Product Review & Comparison: “Build Sleeping Beauty Castle”
![]() Trader Sam | February 19, 2015
Trader Sam | February 19, 2015

There has been some speculation over the origin of Disney’s new “Build Sleeping Beauty Castle” kit, specifically how similar it looks to my own version (designed in 2006, and re-skinned in 2008). And, indeed, there are many spooky similarities upon first glance. It’s easy to jump to conclusions, especially when it is known that Disney does have access to my model. Believe me, my heart started pounding (not from dread or panic) when I found two YouTube videos showing the details of the new kit. Keeping an open mind and an objective view, logic prevailed, and simple explanations were found. But, I’ll start with an overview of the product before I start comparing models.
Product Review
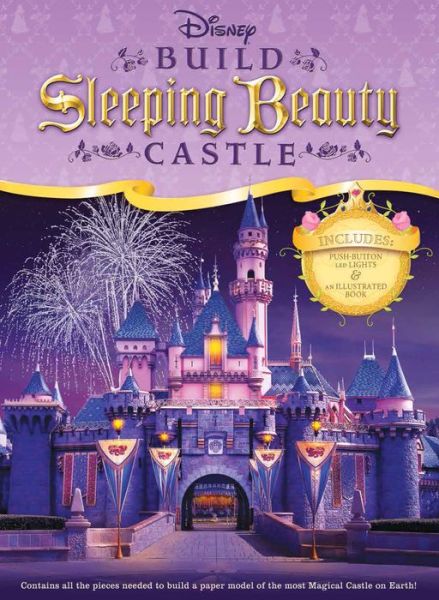
“Build Sleeping Beauty Castle” comes with a book, an illustrated assembly booklet, a backdrop featuring Disneyland fireworks, 12 pages of parts, and a battery-operated set of 4 push-button LED lights. Overall, Disney went above and beyond with the model to include lighting, a backdrop, gold foil embellishments, and quality printing on premium papers.
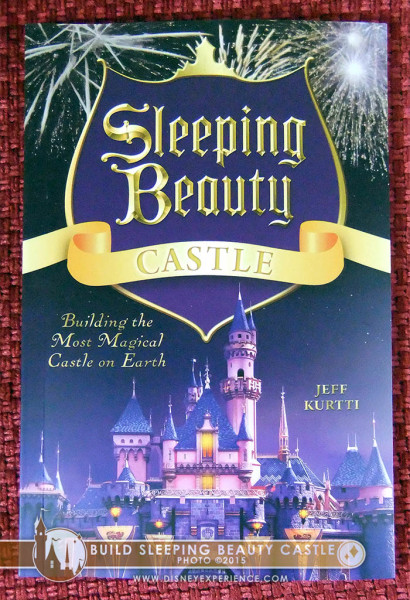
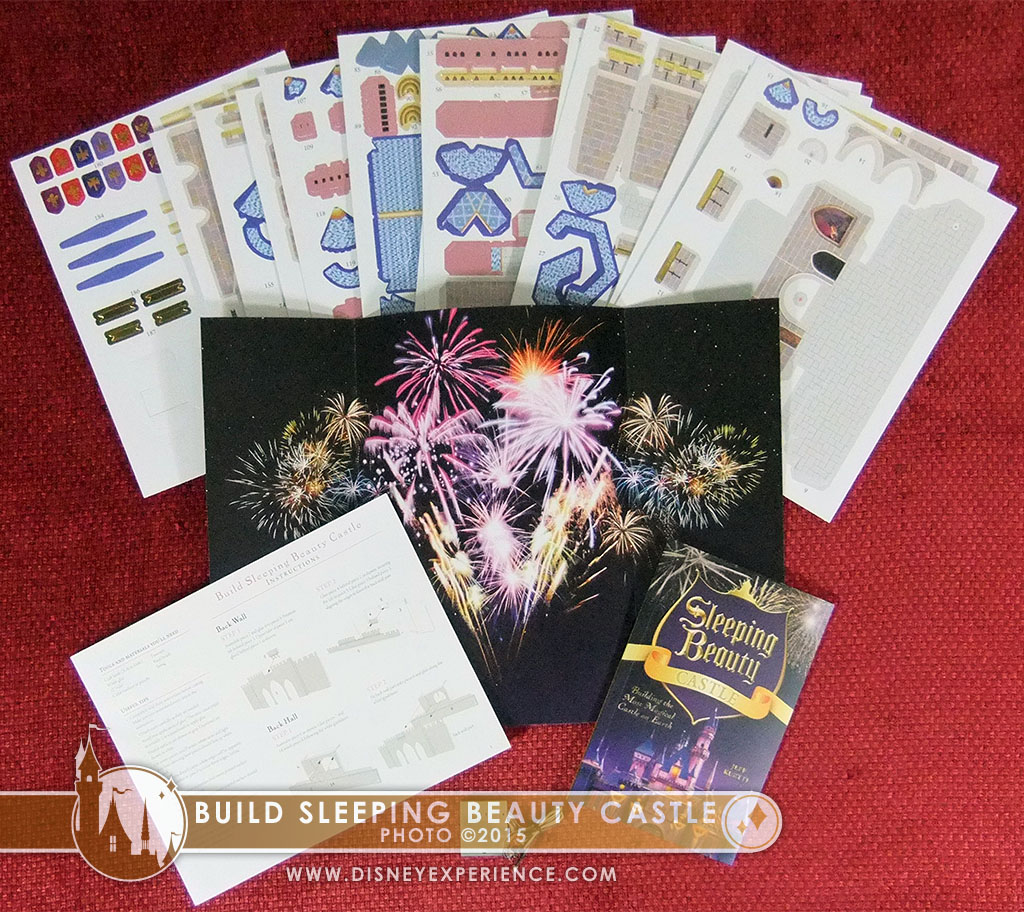

“Sleeping Beauty Castle: Building the Most Magical Castle on Earth,” by Jeff Kurti, is an illustrated book on the inspiration, design, building, and transformation of the castle over the years. There are several pictures that I have never seen before, which was very refreshing, and many photos that were very familiar to me. I didn’t read the book, however, since I was far more interested in the model itself, which shouldn’t be a reflection on the book.
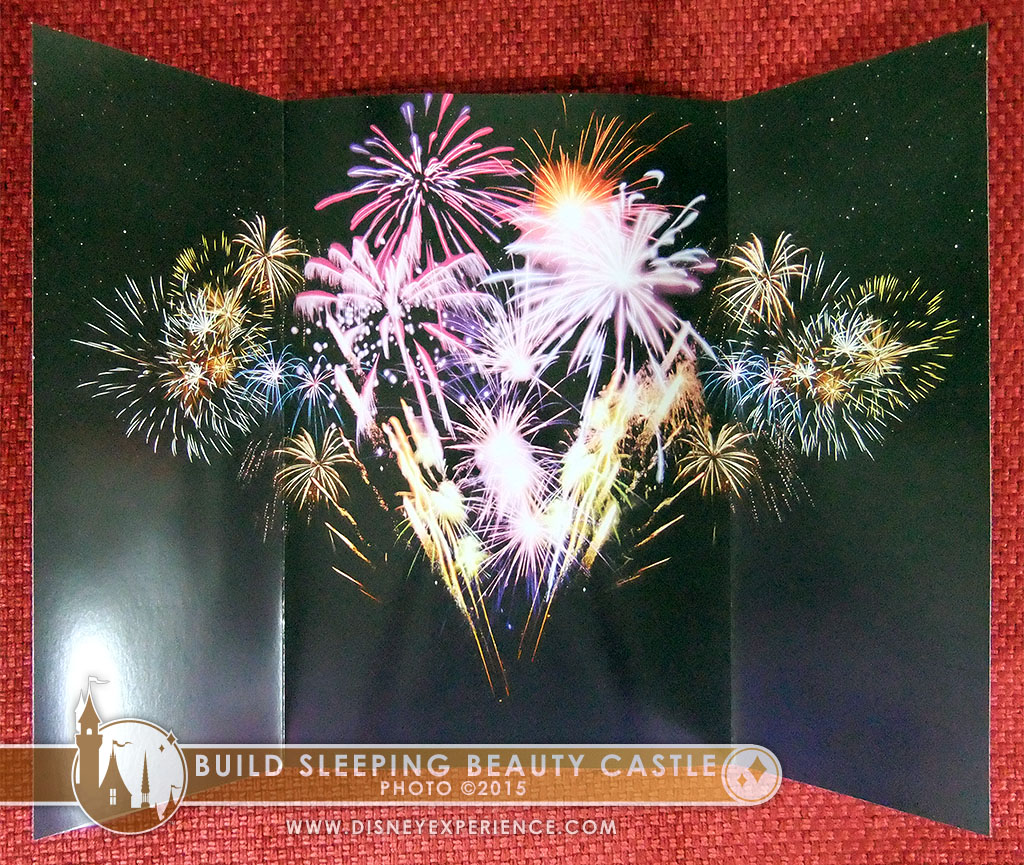
The backdrop is a simple folded print featuring Disneyland fireworks that can be placed behind the finished model. It’s a nice touch for displaying the castle on a shelf. I wish it wasn’t folded, but it wouldn’t fit in the box otherwise.
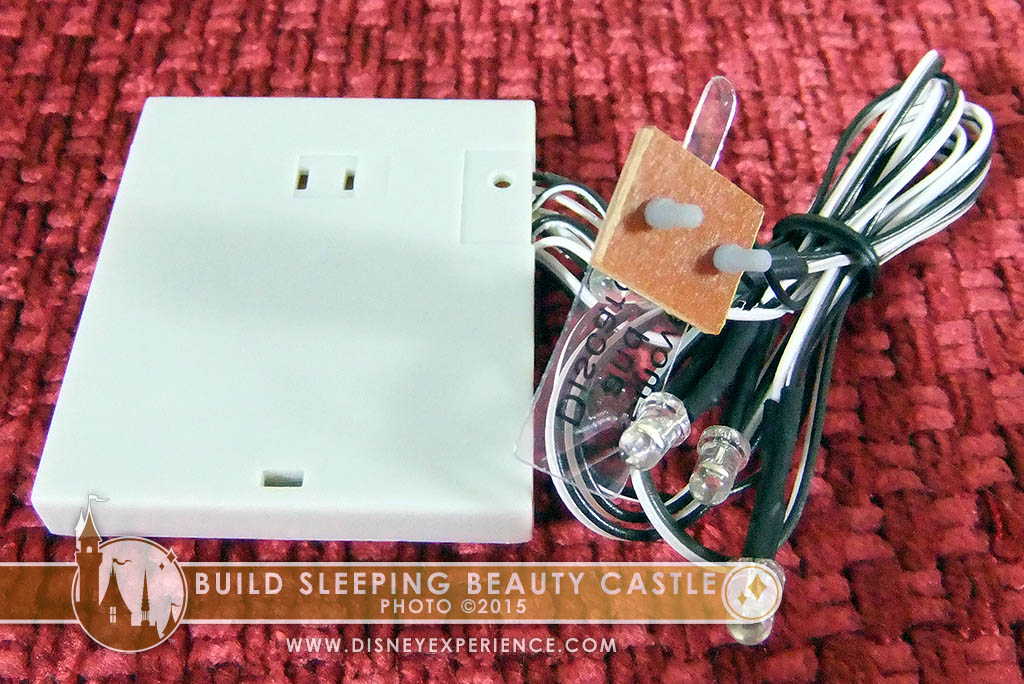
The light-up feature of the model is powered by 4 bright white LEDs. They are battery-operated, using two replaceable button-cell batteries. A soft silicon push-button turns the lights on and off. Turning them on, though, is a bit of a downer for me. They stay on for only 24-seconds (that’s an odd number), shutting off automatically. It’s a handy battery-saving feature if you have kids who will be pushing the button a lot. But, if you’re an adult, you’ll wish they stayed on much longer.
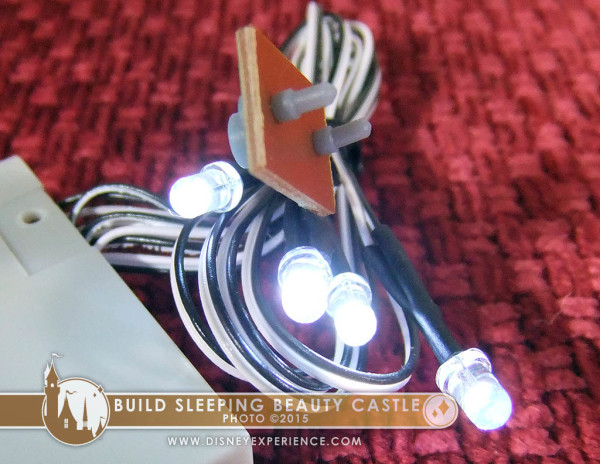
Seeing images of the model, I assumed that the lighting feature would illuminate transparent windows from within the castle. Wrong; the windows are completely opaque! Bummer. Instead, the LEDs light up three towers and the front of the castle. The towers are a little unique in that the LEDs actually sit inside the tower to illuminate the outside. Confusing? I thought so, too, until I realized that the towers have slots at their bases to let the light spill out and reflect off of the paper surfaces. Brilliant . . . in theory! Since I did not assemble the castle (more on that later), I do not know how well this feature works.
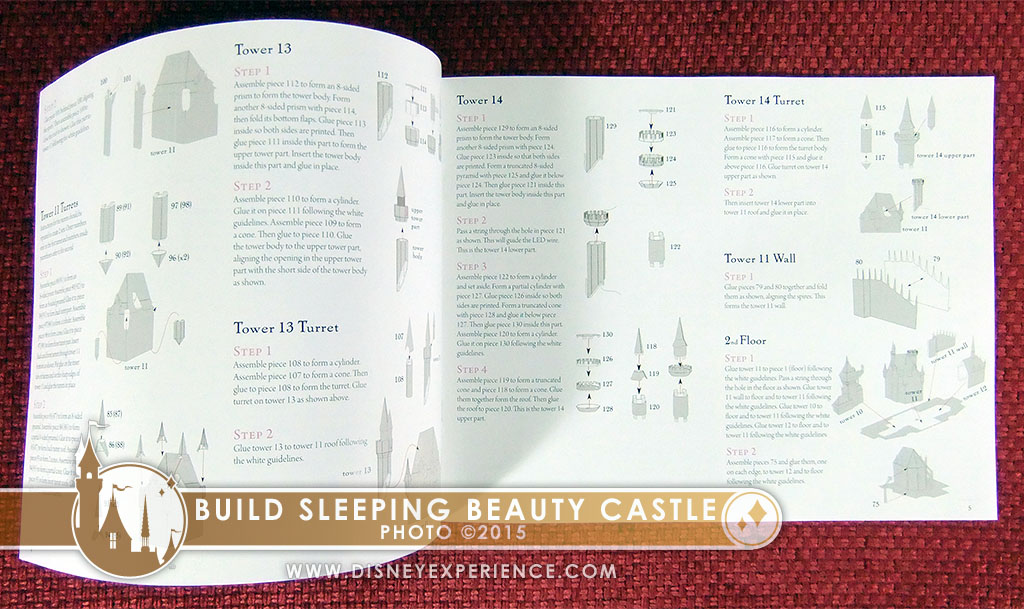
The illustrated 12-page assembly booklet is large. The illustrations are clean and simple, and the step-by-step directions are easy to follow. To build the model, the instructions say you need the following tools:
- Craft Knife: They mention an X-Acto knife, which is a specific (and popular) brand. But, any small crafting blade will do.
- White Glue: This really is best. Don’t use rubber cement; it’s messy, hard to use, and you’re model will eventually fall apart.
- 12-inch Ruler
- Color Markers or Colored Pencils: These are for coloring the edges of the parts where the paper shows. If you don’t mind the white edges, you can skip these. It’s really a personal preference.
- Tweezers
- Paint Brush: The instructions say this is for applying glue. I prefer to use my fingers and McDonald’s coffee stir sticks (they’re like little spatulas). If you do use a brush, use an inexpensive one; the glue will most likely ruin it by the end.
- String: String is used pull the LEDs through the holes in the castle.
The model parts are all perforated and pre-scored, saving precious assembly time. They are all printed on 12 sheets of semi-gloss paper, and feature gold foil accents. Unfortunately, the gold foil is used way too much in my opinion; the model incorporates the castle’s remnant color scheme from Disneyland‘s 50th anniversary. As we speak, the park’s castle is already getting a new color scheme for the park’s 60th diamond anniversary. A safer bet would have been to use the classic color scheme, which is what I used on my model.
Oddly enough, the things that should have gold foil (spires, decorative rooflines, tower caps) do not. Go fig.
The graphics are crisp and clean. They’re clearly vector lines, although a few photo elements have been sneaked in. The model would have greatly benefited from more photo elements. But, that takes time, and it most likely have increased the sale price. The same can be said for castle details, which were obviously left out for the sake of time and simplicity.
Overall, “Build Sleeping Beauty Castle” is wonderful, and worth more than what you pay for it. The small footprint (approximately 12-inches wide) makes it perfect for displaying on a shelf, and the build is easy for noobs and amateurs alike (even easier for pro builders). If you’re itching to build my Sleeping Beauty Castle model, but want something that isn’t so complicated or time consuming, give the “Build Sleeping Beauty Castle” kit a try.
Product Comparison
Comparing the two models does immediately seem like they are very similar in colors, patterns, and shapes. However, if two separate parties are aiming to reproduce an object as a paper model, it would only seem natural that they would each design similar properties. After all, both Disney and I were attempting to recreate an iconic castle, matching colors, patterns, and shapes to stay true to the original.
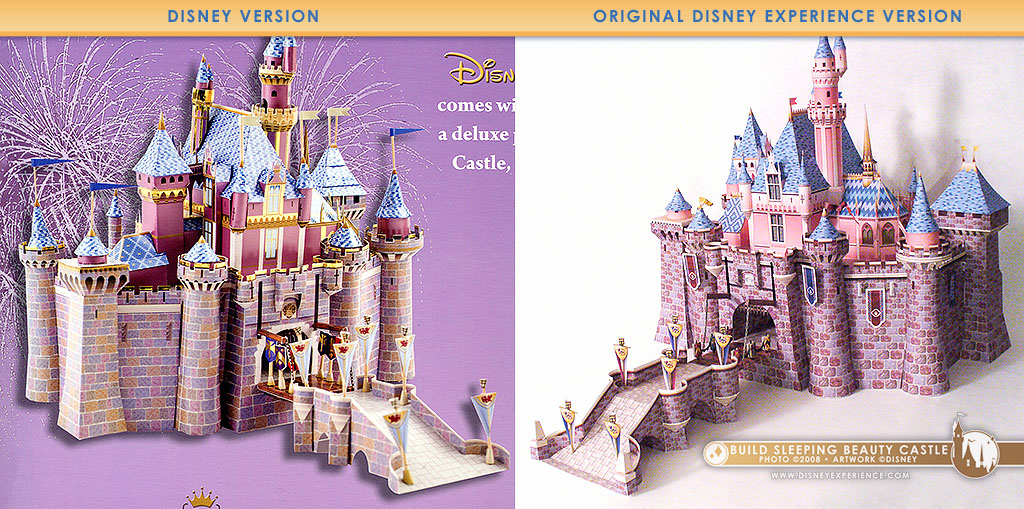
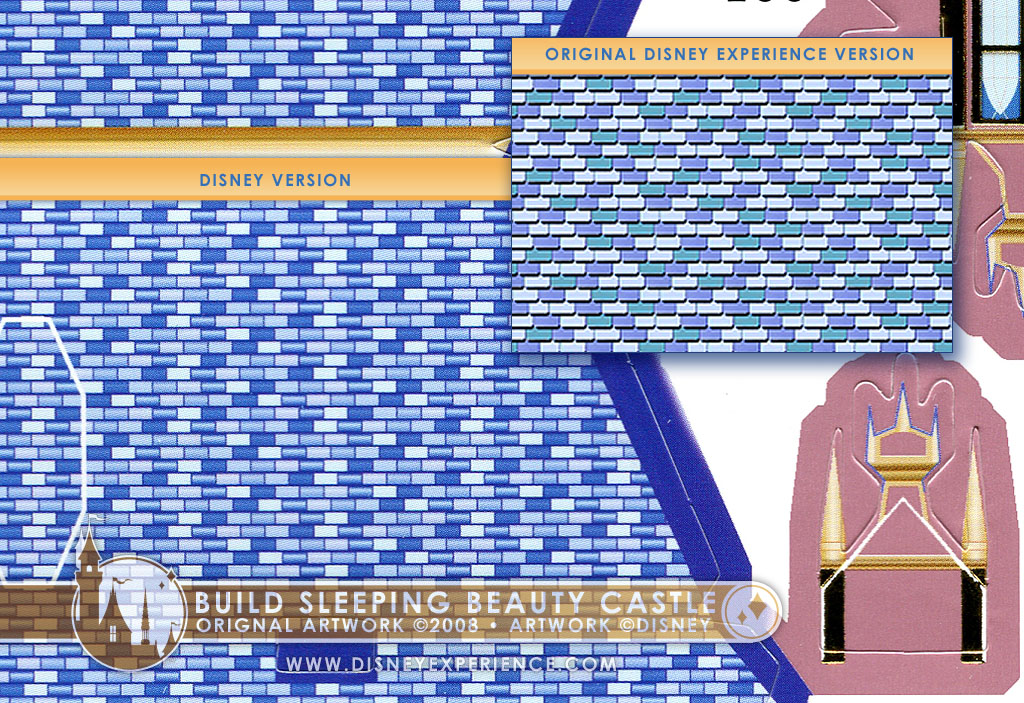
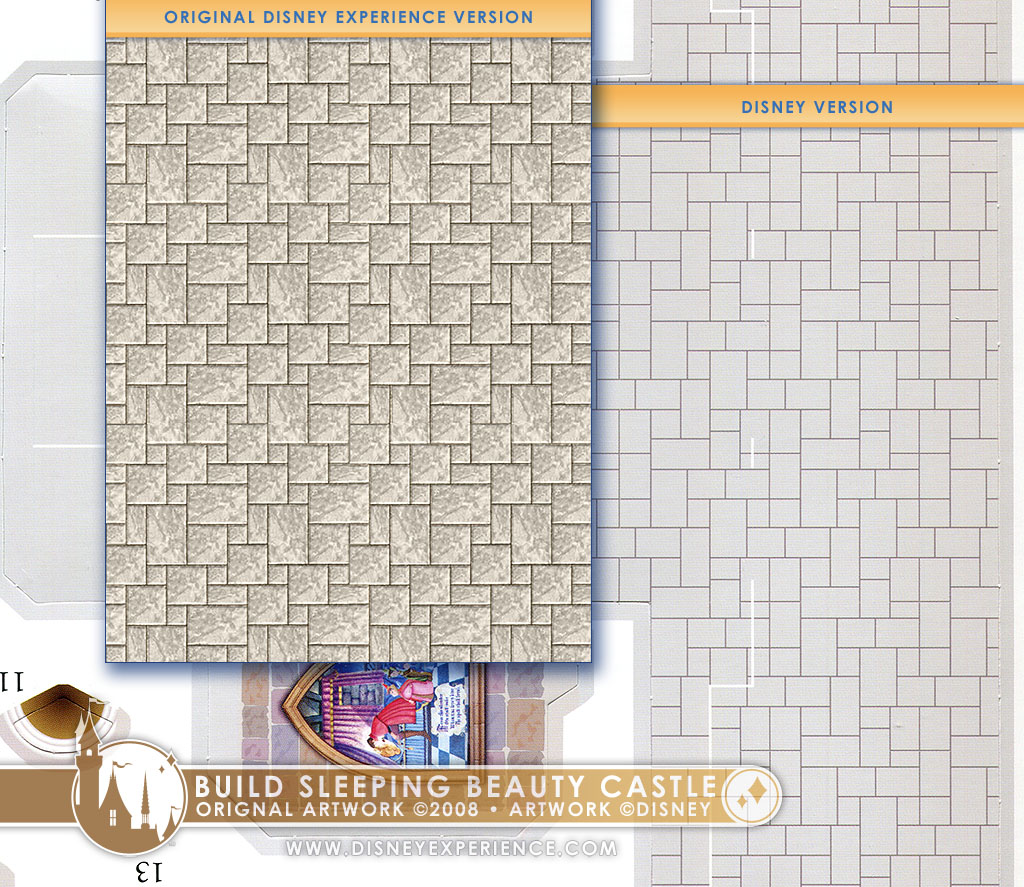
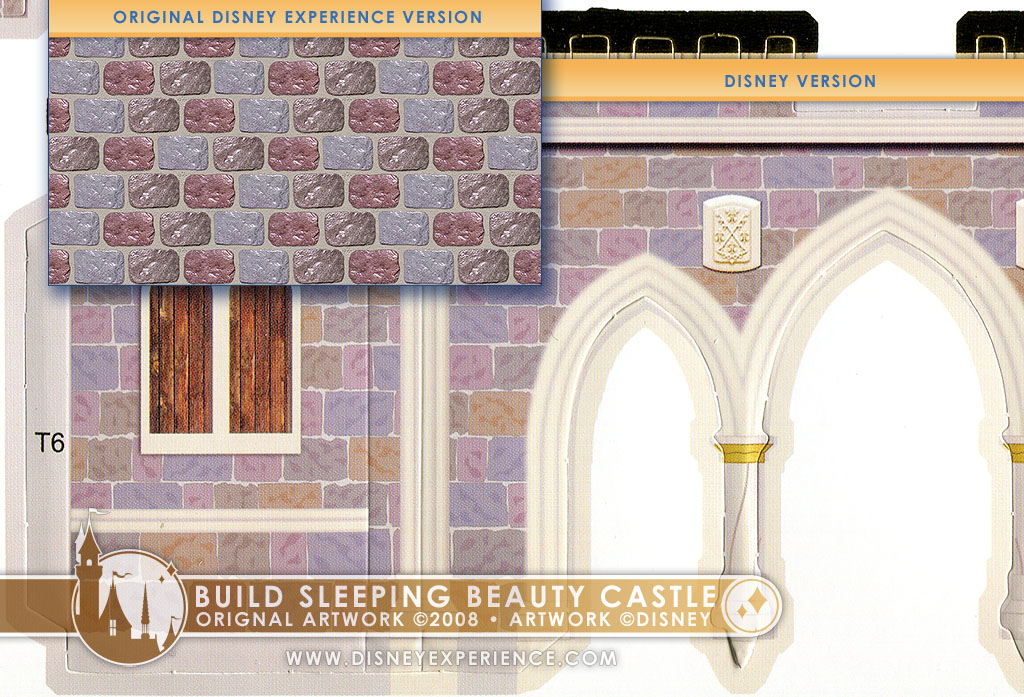
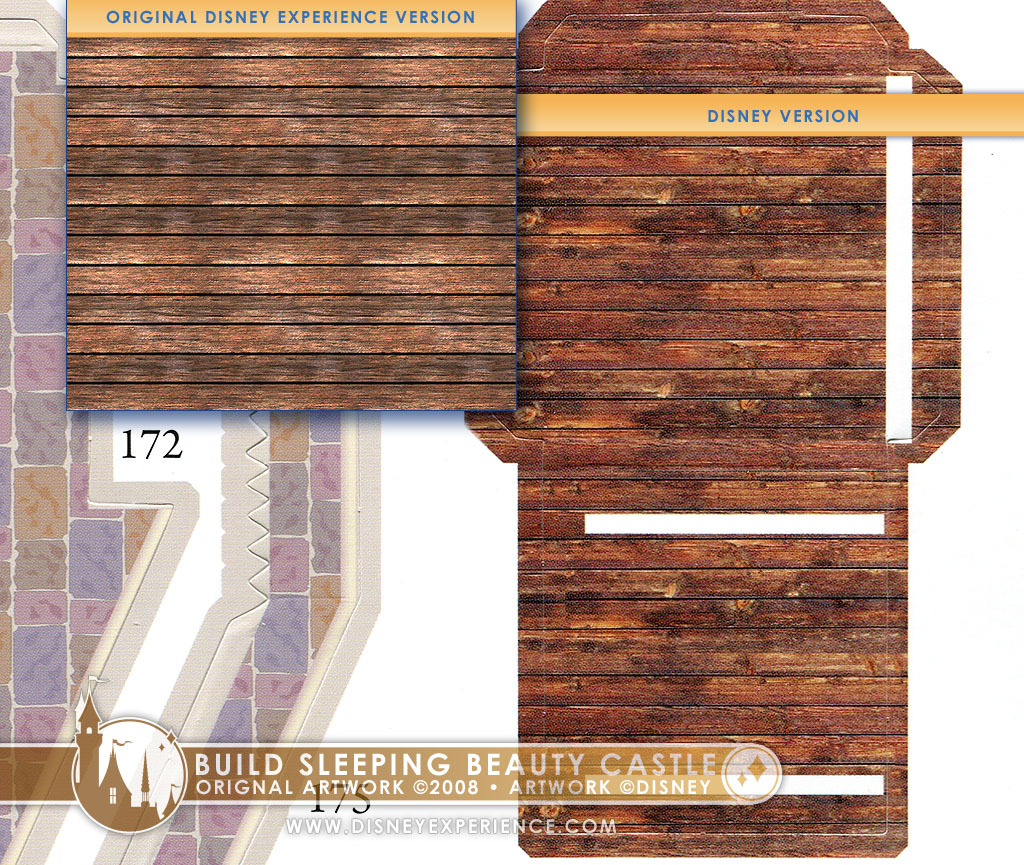
All of Disney’s patterns are similar to mine, but clearly designed independently. The castle stones on my model are modified from actual photographs; Disney’s castle stones are original vector art. Even comparing the size and patterns of all of the stone pavers, wood, and roof tiles show a variation in style and design.
As for color, well, Disney has clearly gone with the Disneyland 50th anniversary scheme (lots of gold). But, underneath that is pretty much the same color scheme. Of course they’re going to be similar; the castle is a certain shade of pink, the roof tiles multiple shades of blue. Changing those or any other color would begin to deviate from the original goal of making a faithful representation. Could you imagine the castle with green roofs?
The same for color can be said for shape. Changing the shape of the castle and its towers would begin to transform it into something else entirely . . . and just look funny. It’s something you’d expect from a cheap knockoff. The castle has a definite shape. Period.
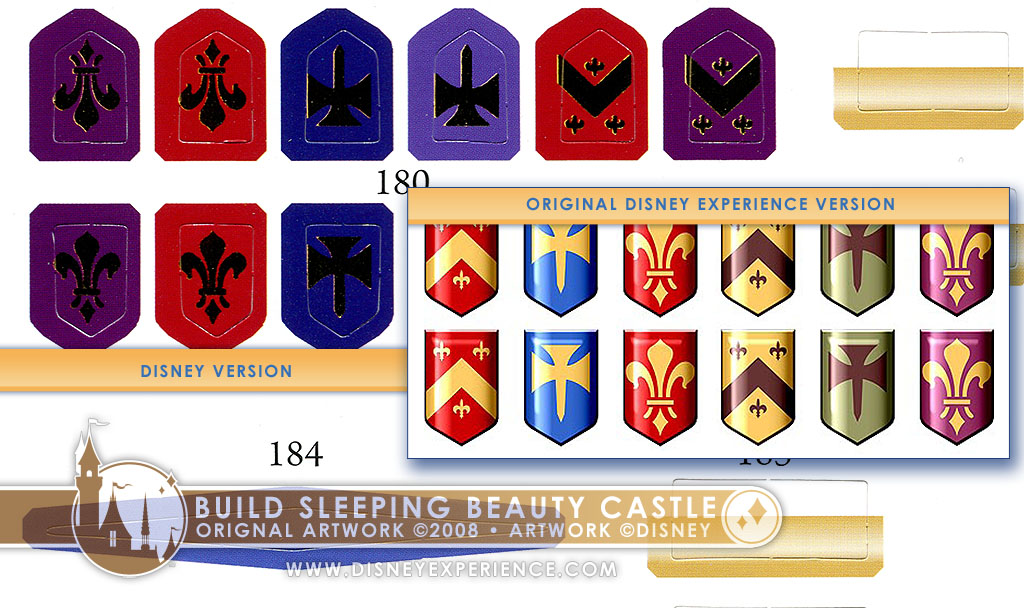
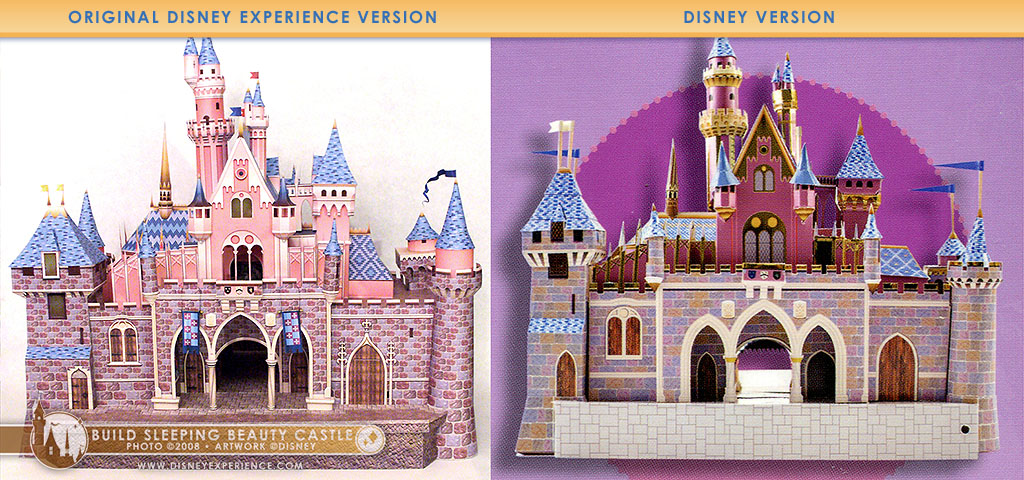
Flipping through the pages, I did notice many differences in the castle details. Disney has omitted many, changed some, and simplified all, but everything still contributes to the representation of Sleeping Beauty Castle in a cohesive manner. I imagine the lack of details was to save the company time and money.
Rational similarities aside, I did begin to see personal touches in how the model is assembled. Since I didn’t assemble the model (more on that later—keep reading), I relied on both the parts themselves and the illustrations in the assembly booklet.
The Disney model is far more simplified than mine, and rightly so. The smaller size of the model, and the aim to reach a wider audience both require fewer parts for easy assembly to appeal to inexperienced model builders. Still, there are some assembly and connectivity issues (mainly turrets and towers) that were resolved in the same manner as my own model. One thing you will notice right away is the strikingly similar bridge.
The actual Disneyland bridge is, for the most part, entirely horizontal and elevated above the moat. But, I had to angle the bridge entrance down for a nicer shelf display. The version from the Disney model is almost identical! It even dips at the same point and has a hard angle.
The backside of the castle was also a problem for me. I could have ended the walkway flush with the castle, but I extended it to both meet up with the two doorways and to provide a less harsh cut-off. It looks like Disney extended the walkway, too, matching width and depth.
The two models are independently designed after the same castle. As such, they naturally share many similar characteristics in an attempt to accurately represent Disneyland‘s Sleeping Beauty Castle. However, the one aspect that should be distinctive to both models is in their assembly. Best case scenario: Disney used my model merely as a reference to resolve some of their own assembly issues.
Why I Didn’t Assemble the Model
Now, you’re probably wondering why I didn’t assemble the model. The answer is very simple. I have very little room for my own models, which eventually meet their demise in the fireplace. So, I had planned on keeping the model in its box. I recently did a closet overhaul to reclaim some much-needed space, and this box would now be occupying some if that said space. I couldn’t have that, either, so . . .
![]()
![]() . . . I am giving it away to one lucky guest as a giveaway! If you’d like a chance to win this model kit, make a donation to the site. Get the details, first.
. . . I am giving it away to one lucky guest as a giveaway! If you’d like a chance to win this model kit, make a donation to the site. Get the details, first.
Keep in mind that you will be getting the same opened copy that I used to do this review.
Both the post author and this website have not received any compensation for writing this post. Both the post author and this website have no material connection to the third-party brands, products, or services that have been mentioned. Some of the links in the post above are “affiliate links.” This means that if you purchase the item, we will receive a commission. As an Amazon associate, we earn from qualifying products. This is being disclosed in accordance with the Federal Trade Commission’s 16 CFR, Part 255: “Guides Concerning the Use of Endorsements and Testimonials in Advertising.”
Do you have a thought about this post? Why not leave a comment . . .