Millennium Falcon Build Journal No. 01: Preparation

![]() Trader Sam | July 9, 2015
Trader Sam | July 9, 2015
Introduction
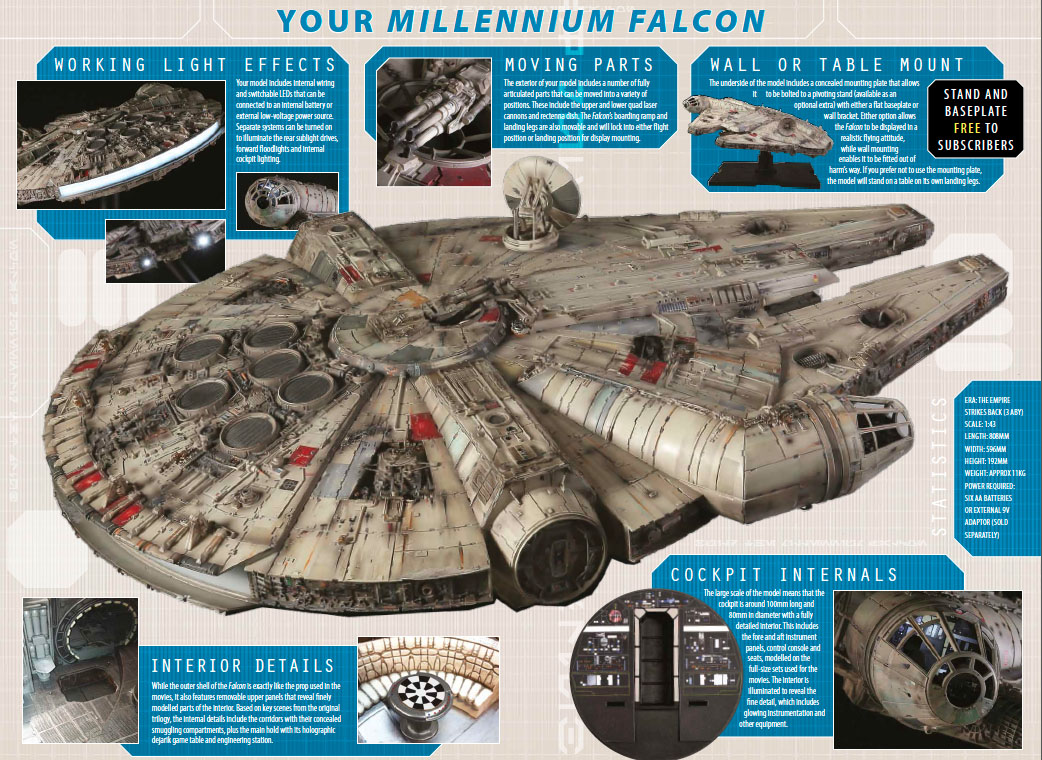
The DeAgostini Millennium Falcon model is a 1:1 scale replica of the 32-inch studio model from the “Empire Strikes Back.” The model is 1:43 scale of the full-size ship. The entire kit is subscription-based, and each issue comes with model parts, tools, and a small magazine that doubles as instructions.
The issues are published weekly in the UK. In the US, they are shipped once a month (for 25 months), and four issues at a time. The cost is $15 per issue, and I bought it during a sale that should cost me only $1 in shipping each month. My total monthly cost is $60.99, which is $5.99 cheaper thanks to the sale. Over 25 months, that’s a savings of $149.75!
With US orders, subscribers get a free binder to store the magazines, and a free wall mount. The model can sit on its feet, but I think it will look better mounted on the wall as if in flight.
The model is molded in plastic and metal, and is assembled with glue and screws. They even supply the screwdriver. The plastic parts are pre-painted, but they can be customized even further. I really want to add the grunge that the Millennium Falcon is known for.
There are also light-up components, which are powered either by a battery pack or AC adapter. So far as I know, the light-up components are the cockpit, the headlights, and the engines. The great thing is that there should be no soldering needed.
The model also has removable panels to reveal detailed interiors. And, of course, no Millennium Falcon would be complete without moving turrets and a boarding ramp.

Supplies
In anticipation of my first package, I began watching several YouTube videos of other people’s builds. There are plenty to choose from, and it’s interesting to see how everyone is approaching their models differently. Better still, several videos were very educational when it came to assembly, tools, and customization techniques. The series of build videos by Modelmaking Guru is right about up my alley, and the how-to videos are very informative.
I knew that I needed to prepare, so I began by selecting a few crucial tools to buy ahead of time. Every model needs to be glued together, so I began there.
Right off of the bat, I can say that I hate regular model glue. ‘Loathe’ would be a better word. It’s thick, messy, and takes a long time to dry. Superglues are usually my glue of choice for plastic. They’re quick and not as messy, but they frost and damage clear parts, and I’m always leaving fingerprints. I wanted something better for the Millennium Falcon. I am investing a large sum of money, so I want it to last for many, many years.
I remembered a solvent that I had heard about roughly a year ago. It was popular among modelers. It’s called Tamiya Extra Thin Cement, a very watery glue that uses capillary action to seep into the space between parts. There, it melts the plastic parts, bonding them together as if they were one solid piece. Sounds perfect for ensuring a model’s long life, and I don’t have to worry about the glue weakening with age!
For metal-to-metal or metal-to-plastic, I’ll either use superglue or an epoxy. I haven’t decided yet. Perhaps I’ll use both on a case-by-case basis.
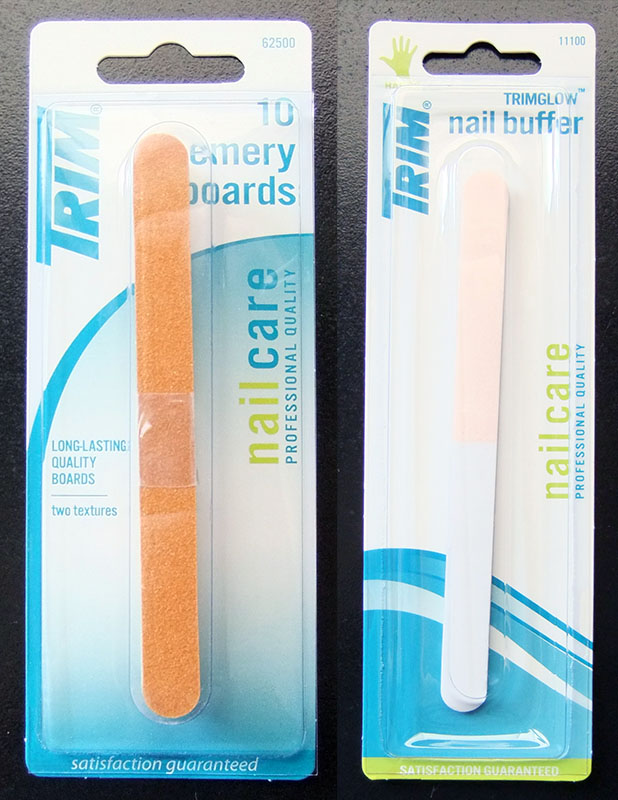
From prior experience, I knew that I would need to clean up seam lines on the model’s parts. Since the model has both plastic and metal parts, I bought some files. For the plastic parts, I will use a combination of X-Acto knives and emery boards (sandpaper on a stick—used for fingernails) of varying grit. A nail buffing emery board has fine grit that can polish to a shine if I need it. I found them at my local WinCo store. They didn’t have a huge selection, so I will check other stores (Rite Aid, Walgreens, et al) in the future for an array of shapes.
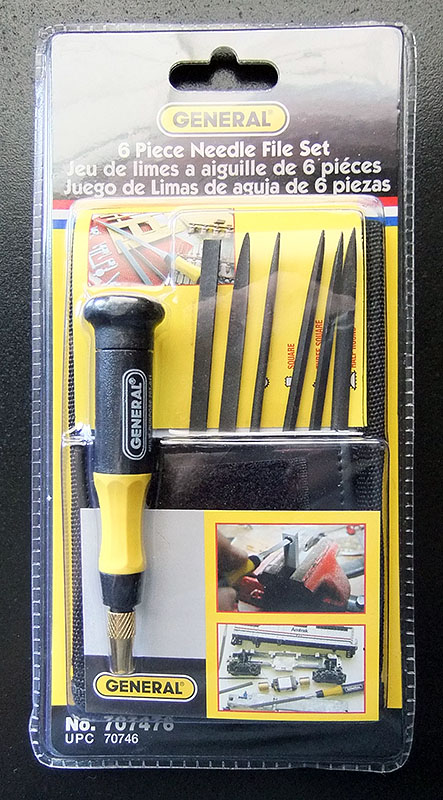
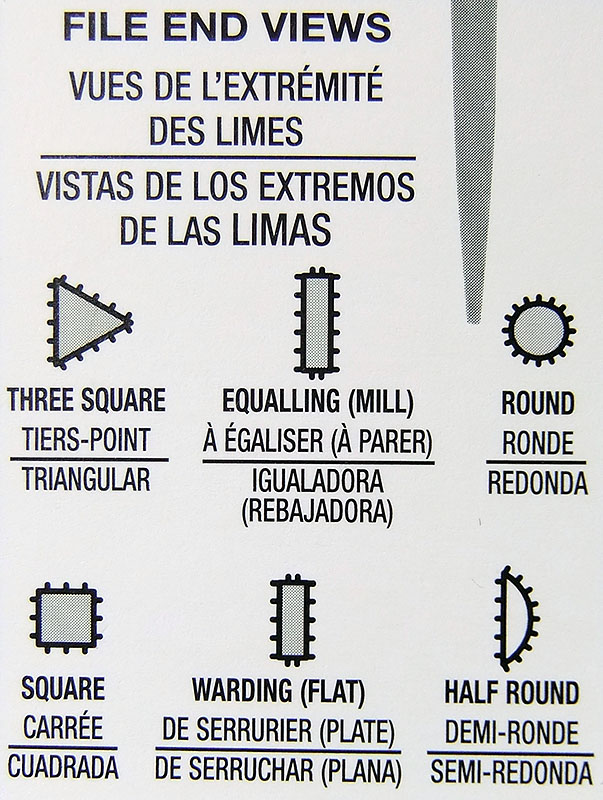
For the model’s metal parts, I bought a set of hobby files from Home Depot. The Nicholson set that I was intending to purchase was nothing special. They came as a set of six of varying shapes, and the plastic sleeve they were sold in doubled as a storage pouch. The General set hanging adjacent to them contained the same files, came with a canvas pouch, came with a handle attachment for the files, and was $6 cheaper! Guess which one I bought.

The canvas pouch is nothing to write home about, but it will protect exposed hands from the long, sharp files. Inside, everything is neatly held in place with elastic bands. But, getting everything back into those bands takes some time and finagling.
The handle is decent, and should make holding the thin files easier. The files sit inside the tip, which locks the chosen file in place with a few twists. Again, it takes some finagling to get the file in there. It’s a good thing I’m a patient person.
My upcoming acquisition is long overdue. As an artist, I’ve never owned an airbrush despite the plethora of occasions when I really could have used one. Since I have some time before I will need it, I will purchase the airbrushing set in pieces. First will be the airbrush itself, followed by the air compressor, and a hose if the compressor doesn’t come with one (some do, some don’t).
The airbrush that I’ve decided to buy (at the moment) is a Paasche Falcon. It’s not horribly expensive, and it costs even less if you buy it without the accessories. I personally recommend buying the full kit; it turns out that they were things that I wanted to use, and it’s more expensive in the long run buying the parts separately.
Both the reviewer and this website have not received any compensation for writing this post. Both the reviewer and this website have no material connection to the brands, products, or services that have been mentioned. Some of the links in the post above are “affiliate links.” This means if you click on the link and purchase the item, we will receive an affiliate commission. This is being disclosed in accordance with the Federal Trade Commission’s 16 CFR, Part 255: “Guides Concerning the Use of Endorsements and Testimonials in Advertising.”
Do you have a thought about this post? Why not leave a comment . . .