Diamond Painting for Fun & Relaxation

![]() Trader Sam | January 13, 2019
Trader Sam | January 13, 2019
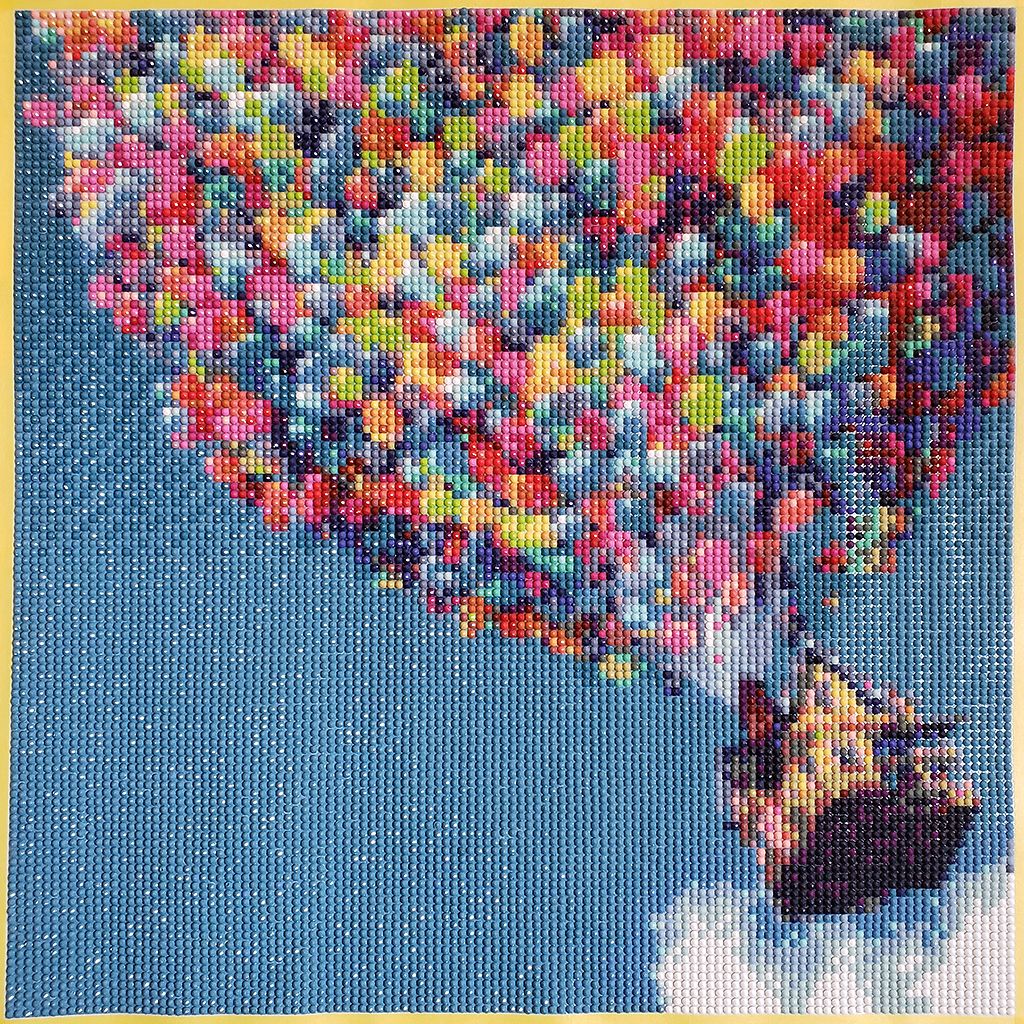
In crafting circles, diamond painting is all the rage right now. It’s kind of like paint-by-numbers, except small plastic gems are used in lieu of paint. The end result is a mosaic that sparkles as if sprinkled with pixie dust. Who doesn’t like pixie dust!? Curious, I did a little bit of homework online, and I ordered a diamond painting featuring Carl’s House from “Up”.
Diamonds (Drills)

There are many places that sell diamond painting kits online and made by many different companies. The kits vary by size, content, accessories, and gem/diamond (drill) types. First, there are two main drill types: round and square. The round drills have gaps between them—that’s the nature of circular objects. This exposes the sticky glue to potential dust/lint/debris. I found that keeping the painting covered with both the included plastic sheet and a piece of tissue paper helped tremendously when I wasn’t working on it.
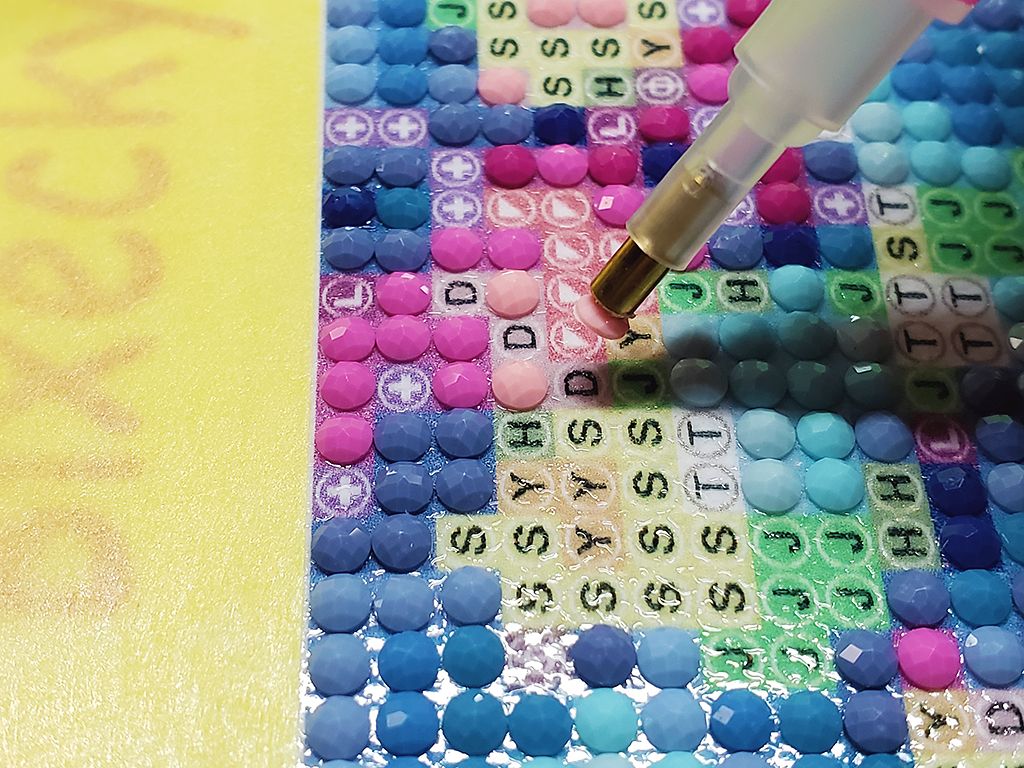
The square drills sit side-by-side, and they don’t have gaps between them. They’re a little slower to apply because they have to be aligned with the squares on the canvas—they can’t be placed hurriedly like round drills can. The square drills also look nicer than the round ones in my opinion.
When choosing a diamond painting, you should decide whether you want to do a full or partial drill. A full drill has the entire picture coated in drills. A partial drill only has part of the image covered in drills. I personally like full drill coverage; if I’m going to do it, go all of the way!

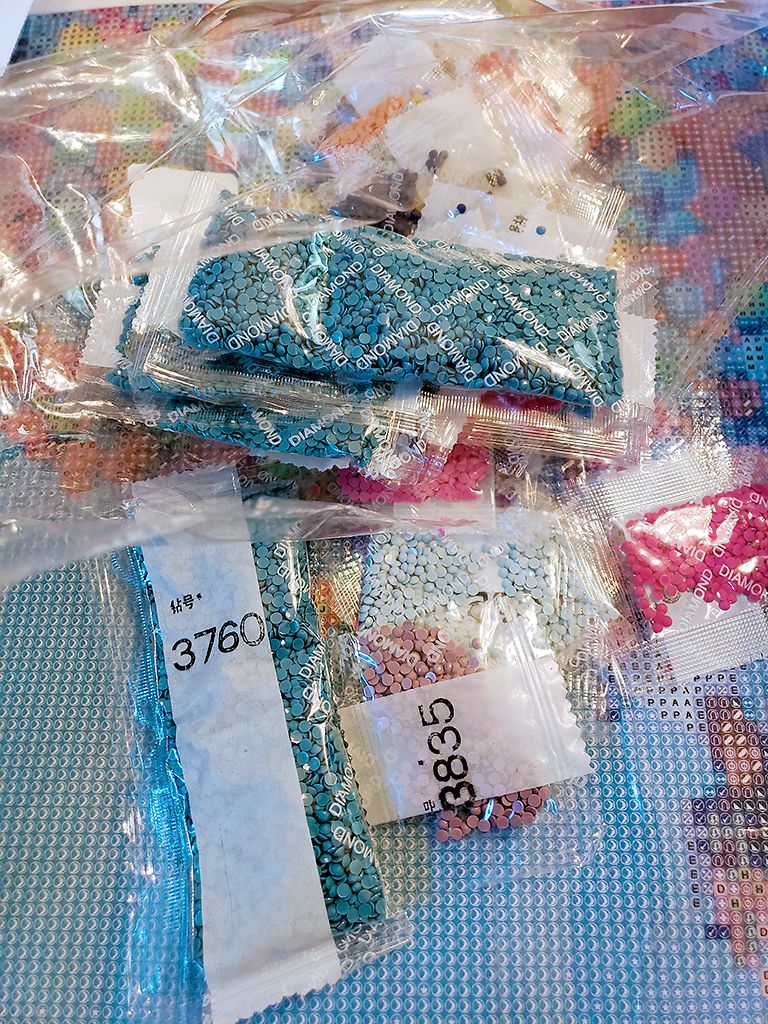
Drills also conform to the embroidery DMC color palette (numbers are printed on the bags) to help keep colors across manufacturers somewhat consistent. Of course, it’s impossible to keep colors 100% identical due to the varying manufacturing processes. If you think you will be doing multiple diamond paintings, keep your spares. You may discover that you can use them in other paintings.
Canvases: Bigger/More is Better
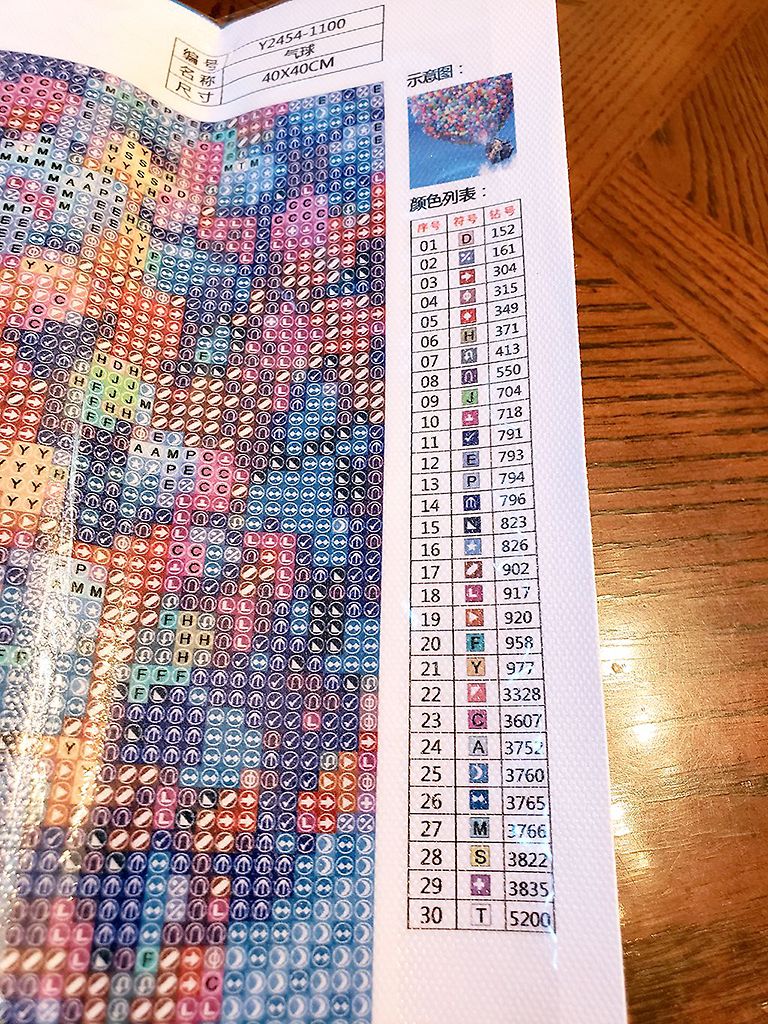
Diamond paintings are printed on fabric canvases, complete with a reference diagram for your drills (why are they called “drills”?). The area(s) to which the drills are applied are coated with a very sticky adhesive. The adhesive is overprinted to compensate for any shifting during the manufacturing process, creating more worrisome dust/lint traps. I recommend masking off the edges (when feasible) with light-tack painter’s tape.
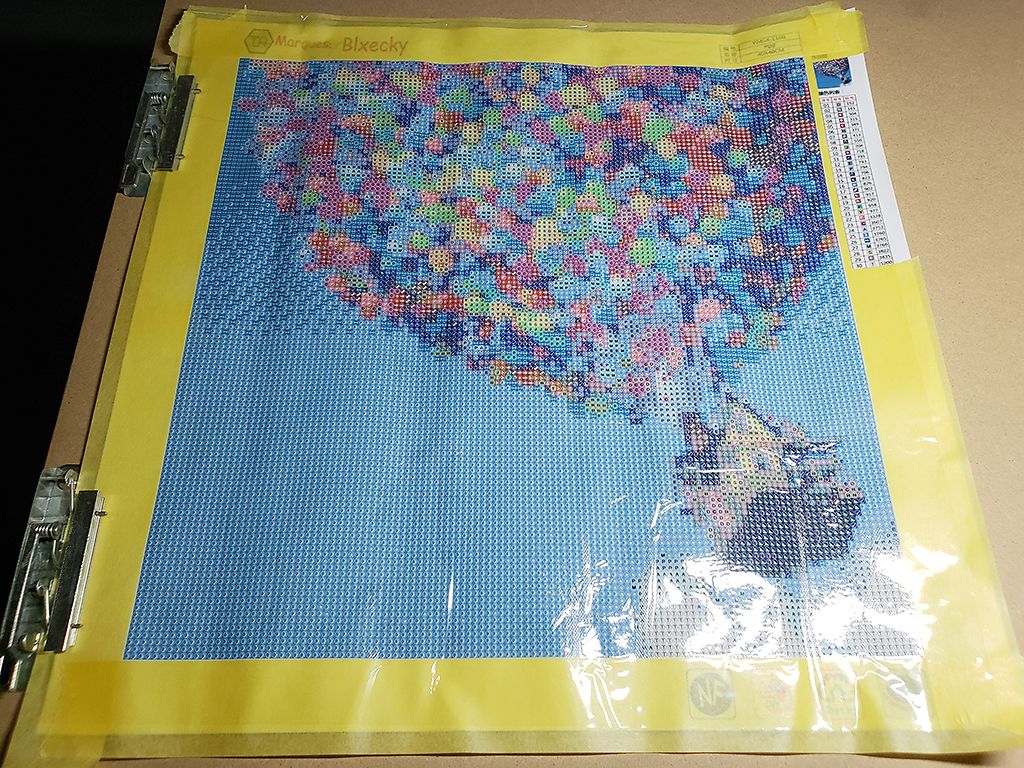
Due to the nature of diamond painting, bigger images/canvases are better—they will show more image detail. I also recommend shying away from complex images with tiny details since a lot of it will be lost, resulting in an image with a blurry appearance. Any digital artist will instantly sympathize as it is very reminiscent of pixel resolution. The number of colors will also provide more detail. Carl’s house has 30 colors to create nice color transitions in the house and balloons.
Also pay attention to canvas measurements. If a product only has one measurement, that is likely the size of the canvas itself, not the size of the image that is printed on the canvas. Carl’s house was listed as a 40cm x 40cm, but the image is really 34cm x 34cm. It’s not a huge size difference, but it’s definitely something to pay attention to if you plan to frame it which is a popular display solution.
Tools & Accessories

Each diamond painting kit varies by manufacturer, most notably in the accessories. The common items in any kit are as follows: a small sheet of wax (typically pink in color) for the drill pen, a double-ended drill pen (one end applies 1 drill at a time, the other end applies 3 drills at a time), many drill packets, and some plastic zip bags. Instructions may or may not be included, but it’s a very straight-forward process.
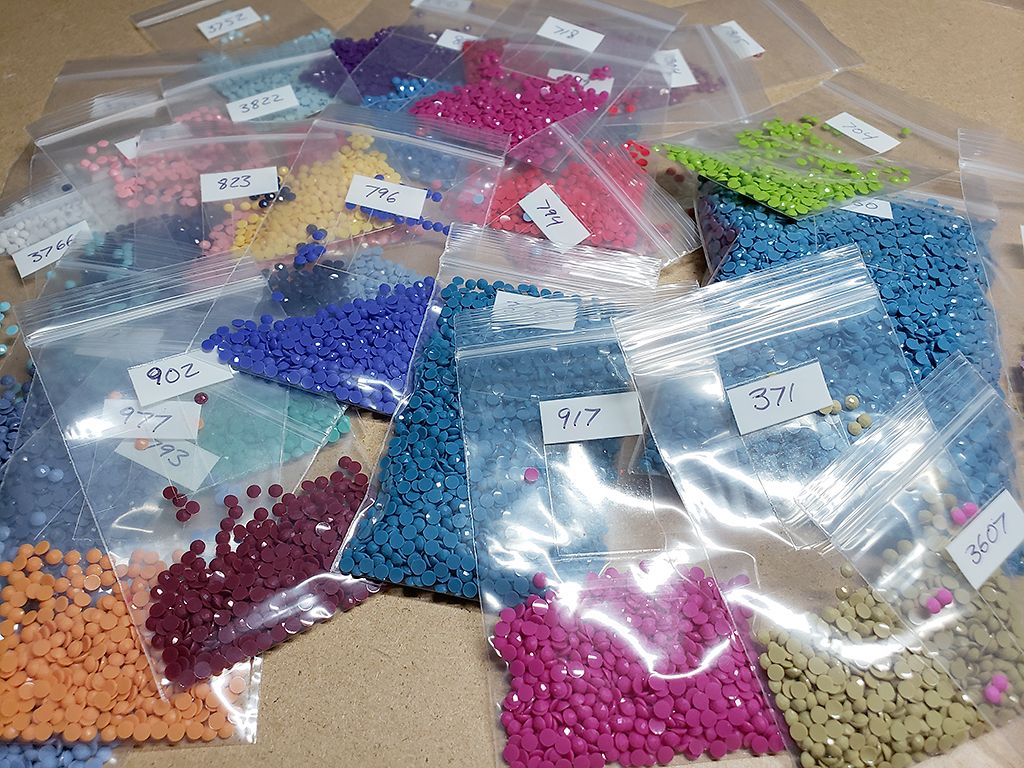
Some of the zip bags are practically worthless—at least, they were with this kit. Only a few are provided, they are too small, and they tear very easily. Instead, I recommend buying some quality zip bags. I used 2in x 3in and 3in x 5in bags, marking the outsides with the colors’ DMC numbers. If you want something more long-term with easy access (bags can be a hassle), consider a more robust and long-term storage solution.
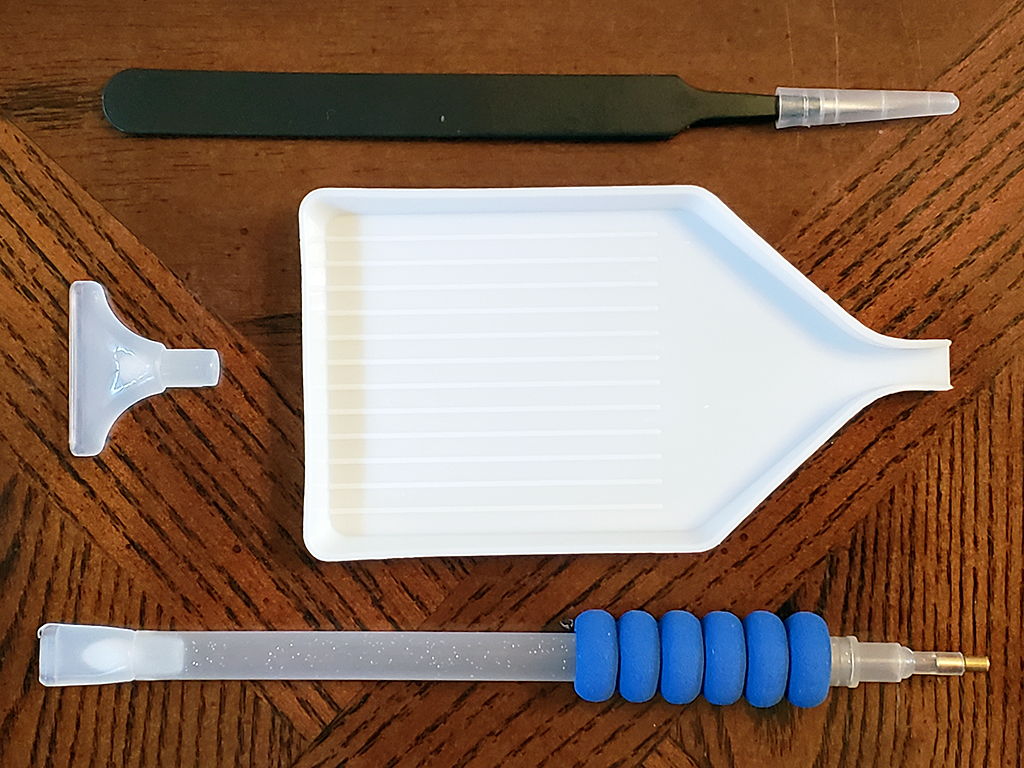
Some kits will come with extras like a 10-drill applicator, a comfort grip for your pen, and even tweezers.
Confirm It
When shopping for a diamond painting, get visual confirmation of the final product. Not all manufacturers provide images of what the final diamond painting will actually look like, and you may end up being disappointed with the end result. On Amazon, I found an image of Carl’s House that was submitted by a customer.
If you can’t find an image or design that you like, there are companies like The Diamond Painting Store that will optimize and convert any personal photo. This is perfect for creating highly personalized gifts for friends and family.
My Experience
After unboxing, the very first thought in my head was, “These are smaller than I thought.” I was staring at the plethora of tiny plastic gems; they look much bigger online. And, yes, I’ve had to pick up spilled drills from the carpet on more than one occasion.
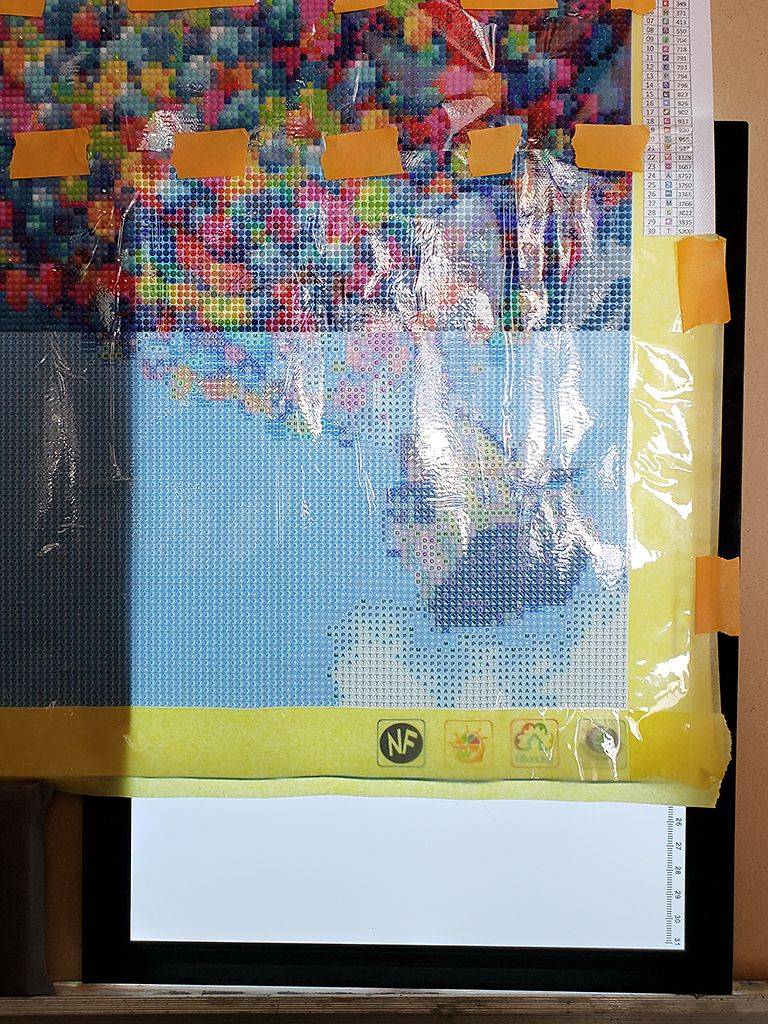
Since the printing and drills are so small, I bough a light board to illuminate the canvas from the rear. That helped tremendously, and as an artist who uses a window or glass sliding door as a light box, the light board will be a great convenience. Check out my review of the one I bought here.
Overall, I found diamond painting to be very relaxing. Carl’s House took longer than expected, each 3-inch by 3-inch section taking roughly 1.5 hours to complete; the whole thing took a week-and-a-half to finish at a rate of a session or two per day. And, I moved from a table to an easel for easier viewing and reach.
There was a fair bit of wiggle room, so each drill didn’t require precision placement. I was wary about using the end off the pen that places multiple drills at a time, but I found it to be a time saver when I came to the large blue sky area.
The early stages of the diamond painting process seemed like a random placing of color, but as the image started coming together, there was a clear sense of accomplishment.
I have no idea what I’m going to do with the diamond paintings—did I mention that I already bought a Tinker Bell one? I might just slap Carl’s house onto a piece of foam board and give it to one of my nephews. Tinker Bell will most likely be framed, although I don’t know where I’ll put it.
Both the post author and this website have not received any compensation for writing this post. Both the post author and this website have no material connection to the third-party brands, products, or services that have been mentioned. Some of the links in the post above are “affiliate links.” This means that if you purchase the item, we will receive a commission. As an Amazon associate, we earn from qualifying products. This is being disclosed in accordance with the Federal Trade Commission’s 16 CFR, Part 255: “Guides Concerning the Use of Endorsements and Testimonials in Advertising.”
Do you have a thought about this post? Why not leave a comment . . .