Nautilus Build Journal No. 03
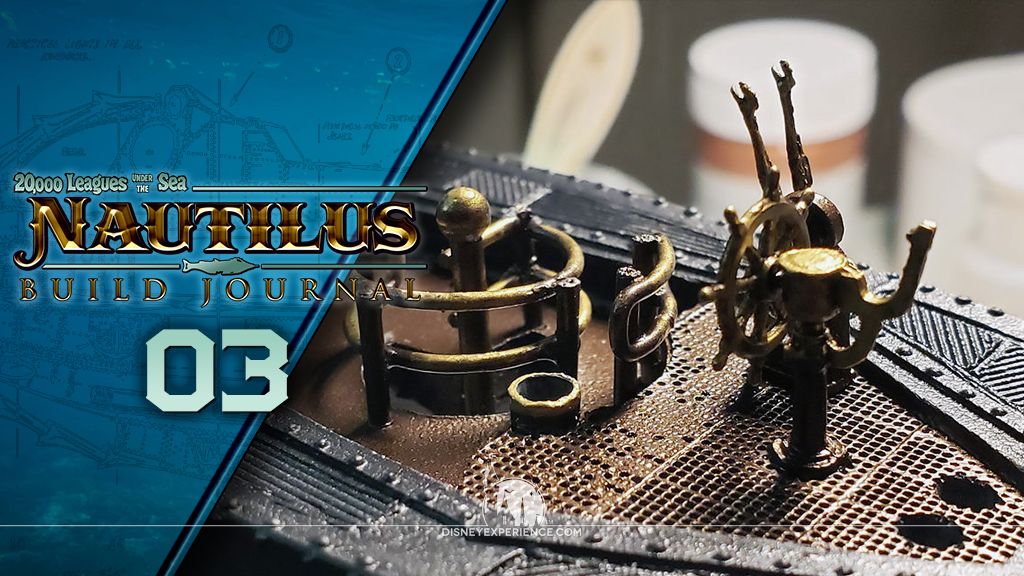
Trader Sam | August 16, 2021
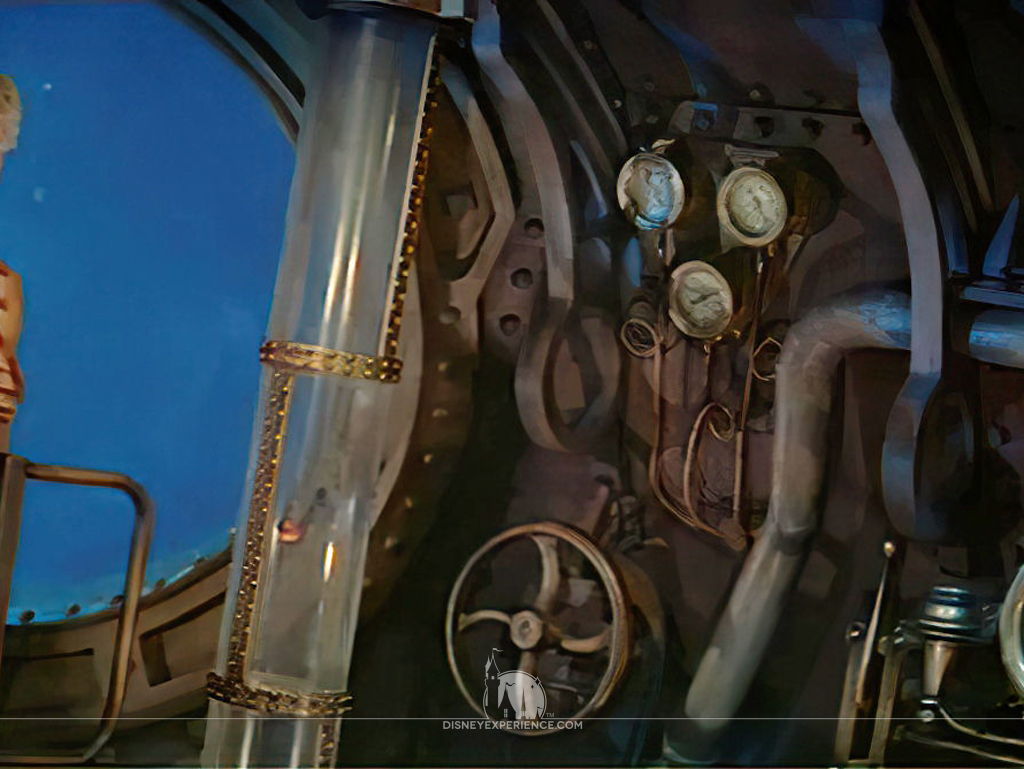
The Wheelhouse, Part 1
Before doing anything, I wash all of the parts with warm water and soap. The upper hull has to be washed in the bathtub due to both its size and the messy nature of the washing process.
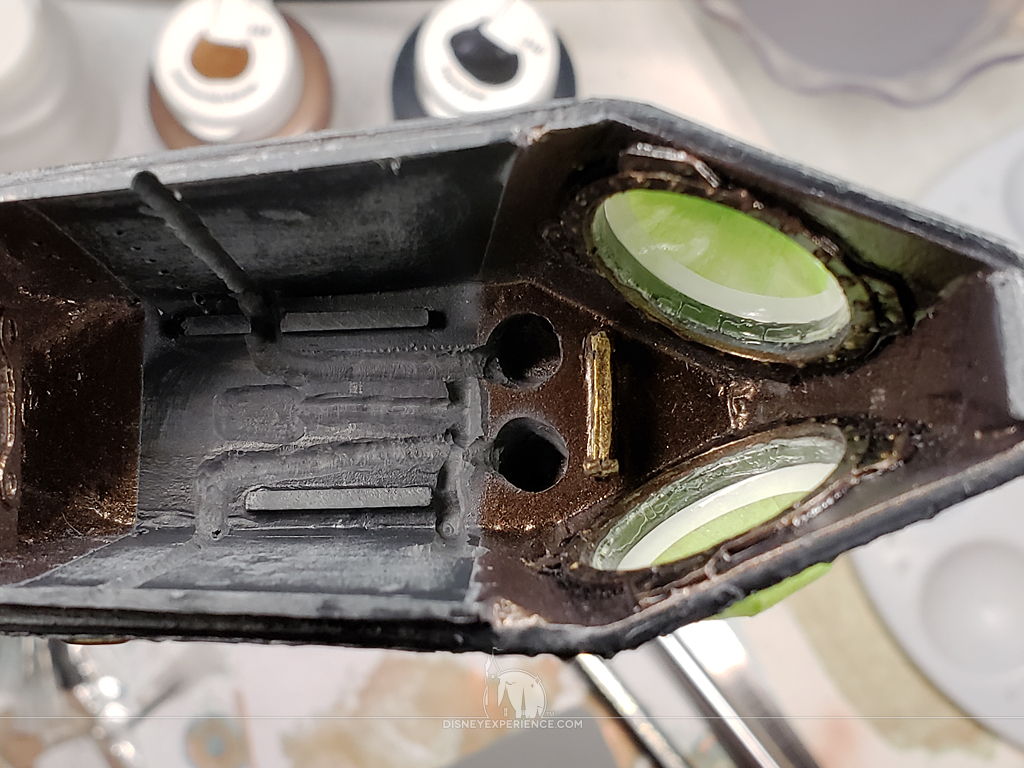
Inspecting the Wheelhouse, I find a few voids where there were bubbles in the mold. I use CA glue and baking soda to quickly fill them in and sand them down.


The gill plate is glued to the wheelhouse with E6000, and I take the time to sand away some flashing inside of the wheelhouse window frames.
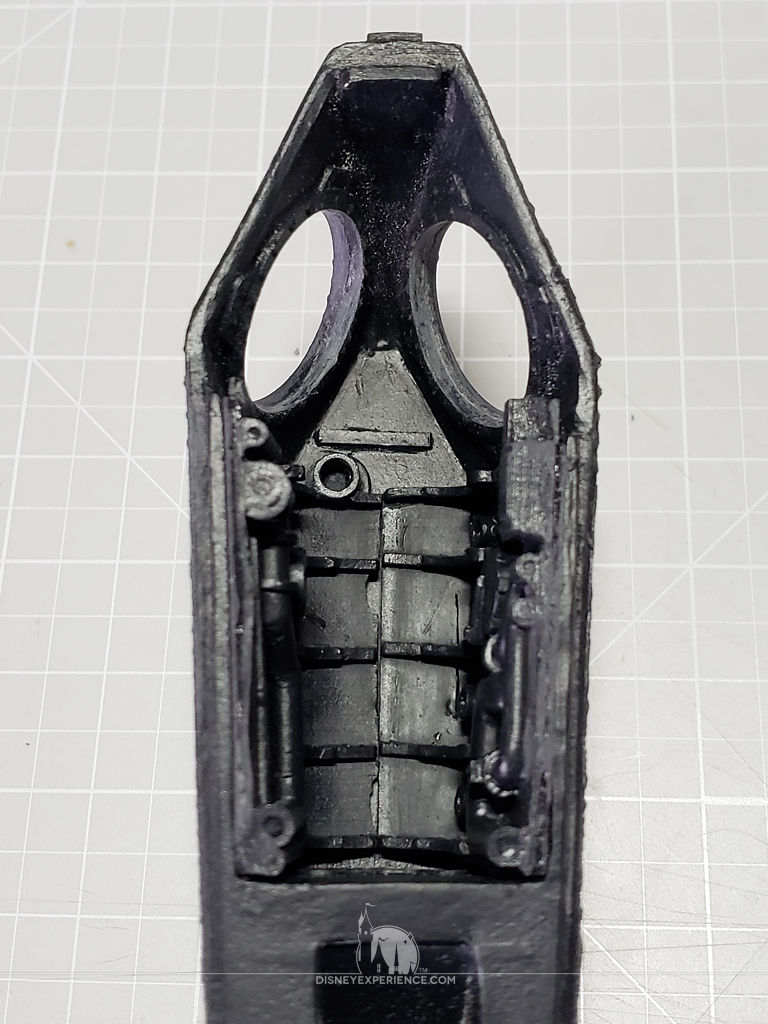
Test fitting the wheelhouse walls, I find that they do not sit correctly. The slots on the wall pieces do not sit over the tabs well; they need to be carved out a little with a chisel blade.
For the ladder rungs, holes are manually drilled with a pin vise hand drill. I love this thing!
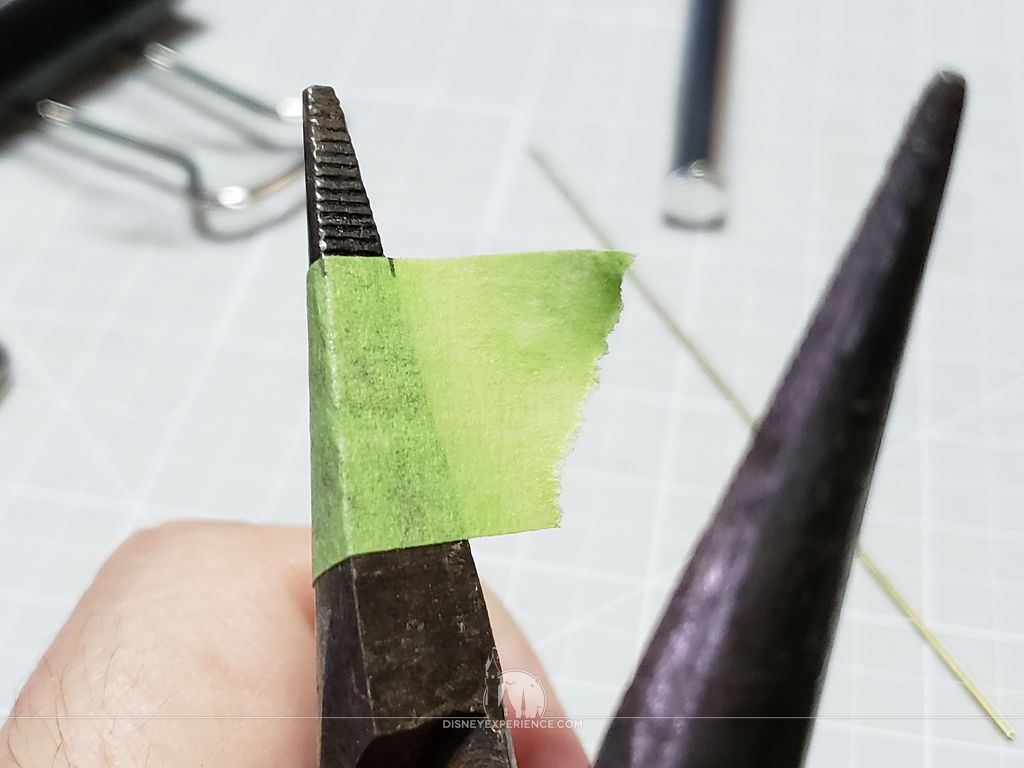
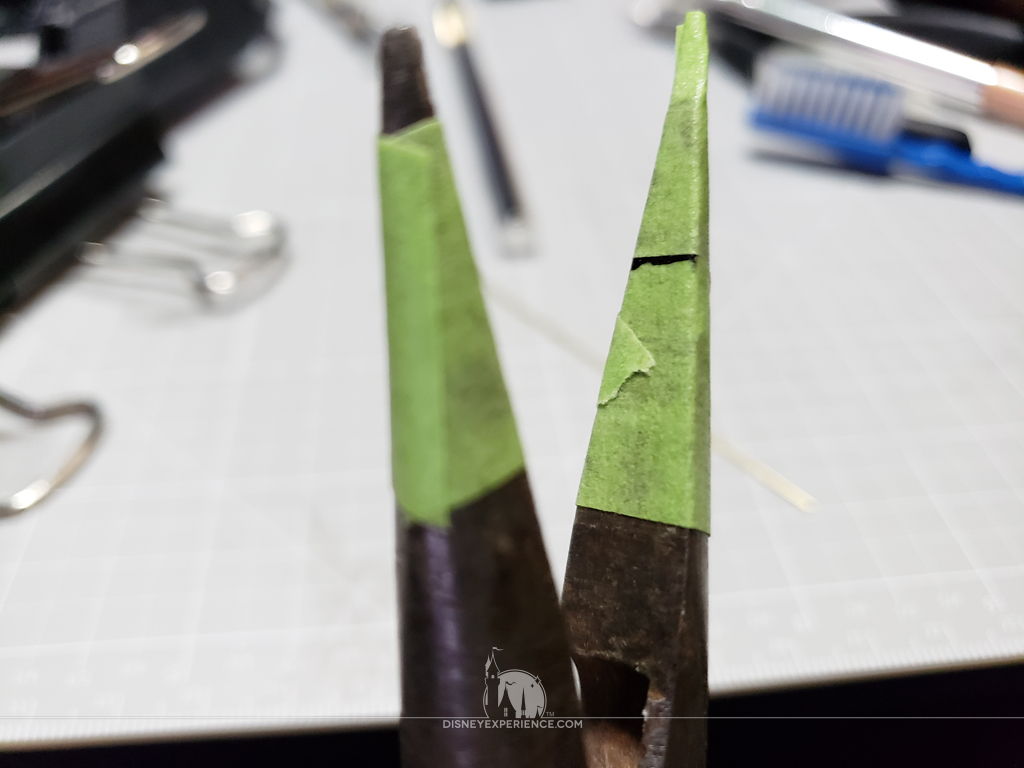
To create the rungs, I measure the distance between the rung holes using a piece of masking tape. Then, I transfer the tape to a pair of needle nose pliers, aligning the marks with the edges of the pliers. I add another piece of tape above that, and I draw a line between the two points on the tape so that it is more visible. This is where I place the wire to bend it to the correct width.
The extra tape on the pliers prevents the teeth from scratching the soft brass rod.
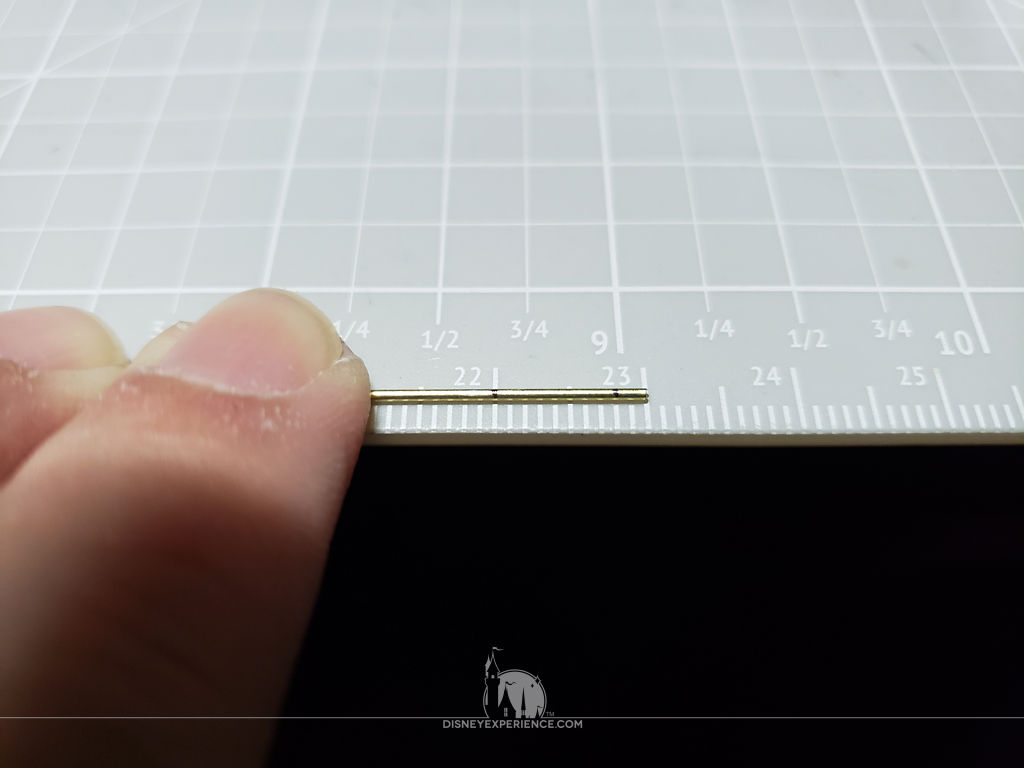
Using a ruler, I mark a length of brass rod. The first mark is approximately 2 mm from the end. This will be the first bend.
The second mark is 10 mm from the end. This will be where the rung will be cut.
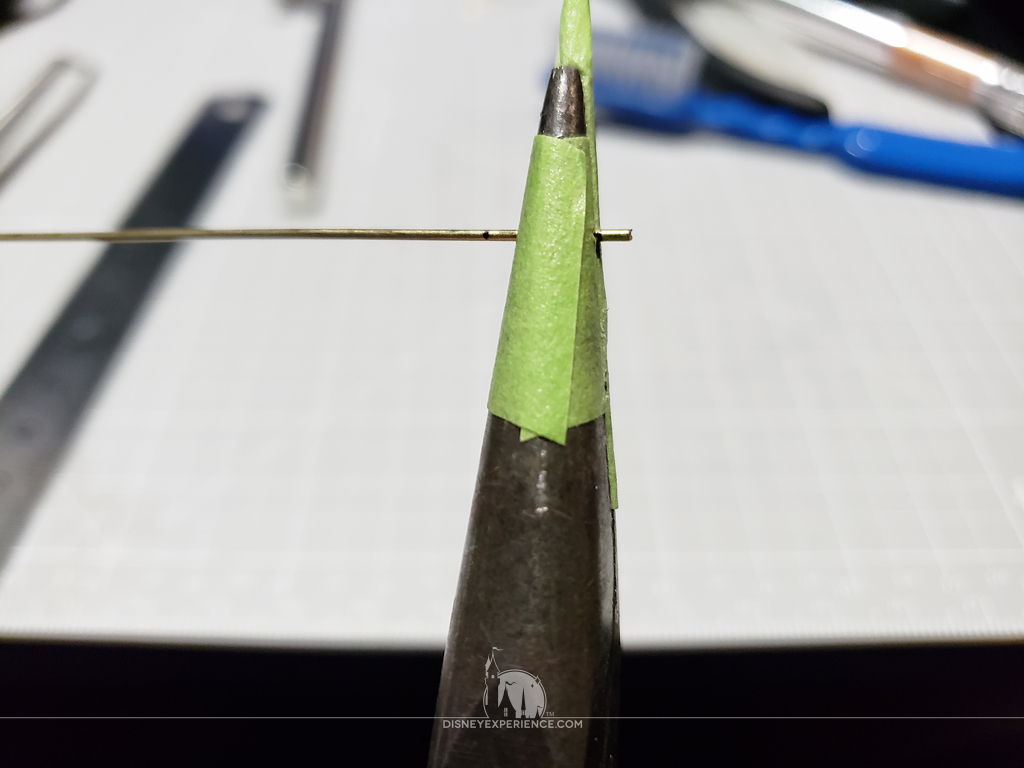
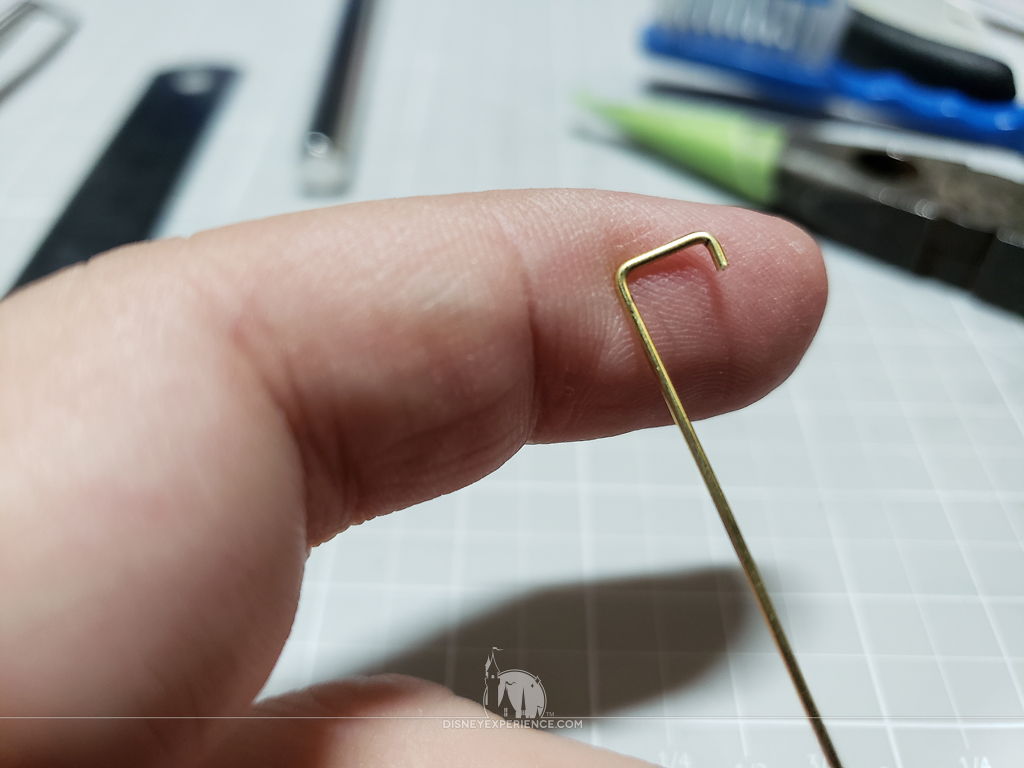
Aligning the first mark with the needle nose pliers, I bend the rod on both sides of the pliers at a 90-degree angles. Using flush cutters, I cut the rung free at the second mark.
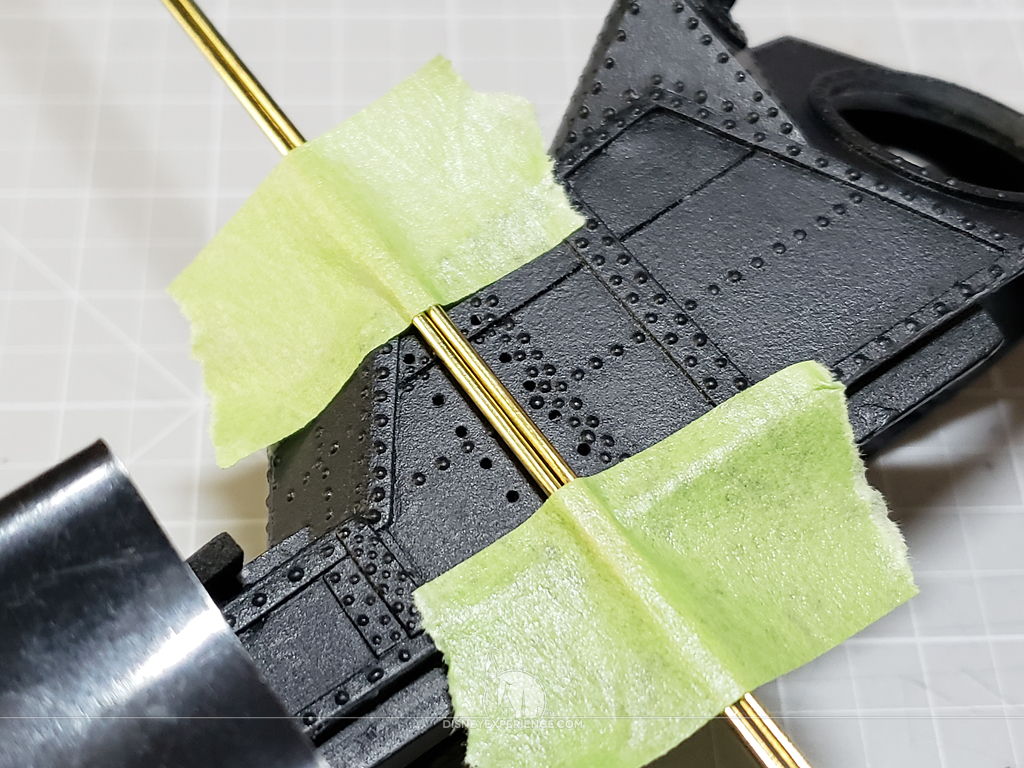
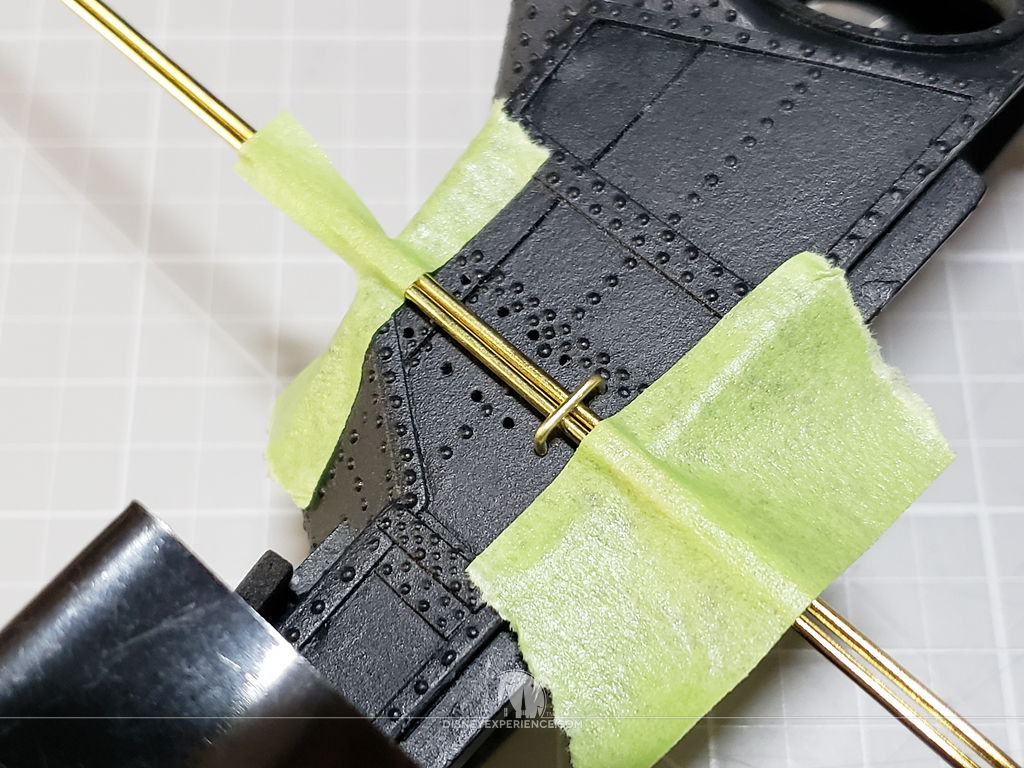
Using a couple of spare rods that I bought, I tape them down to the wheelhouse, between the rung holes. I use these to make sure that the rungs are all glued into the holes at the same depth.
Making the rungs, I ran into a couple of problems. First, the kit’s supplied piece of brass rod is only long enough to make 9 of the 12 rungs. Second, the instructions say to use .045 inch brass rod, but that is NOT he size that was included in the kit; the kit includes a piece of .032 inch brass rod.
I could only find .032 inch music wire, a carbon steel rod that was the perfect size, but is far harder to bend and cut than brass. If I had to do it all over again, I would replace the rungs with 1 mm brass rod.
The Upper Hull
Moving to the upper hull, I start to clean the huge piece by clearing out the excess material within the dive planes. A set of needle files works wonders here!

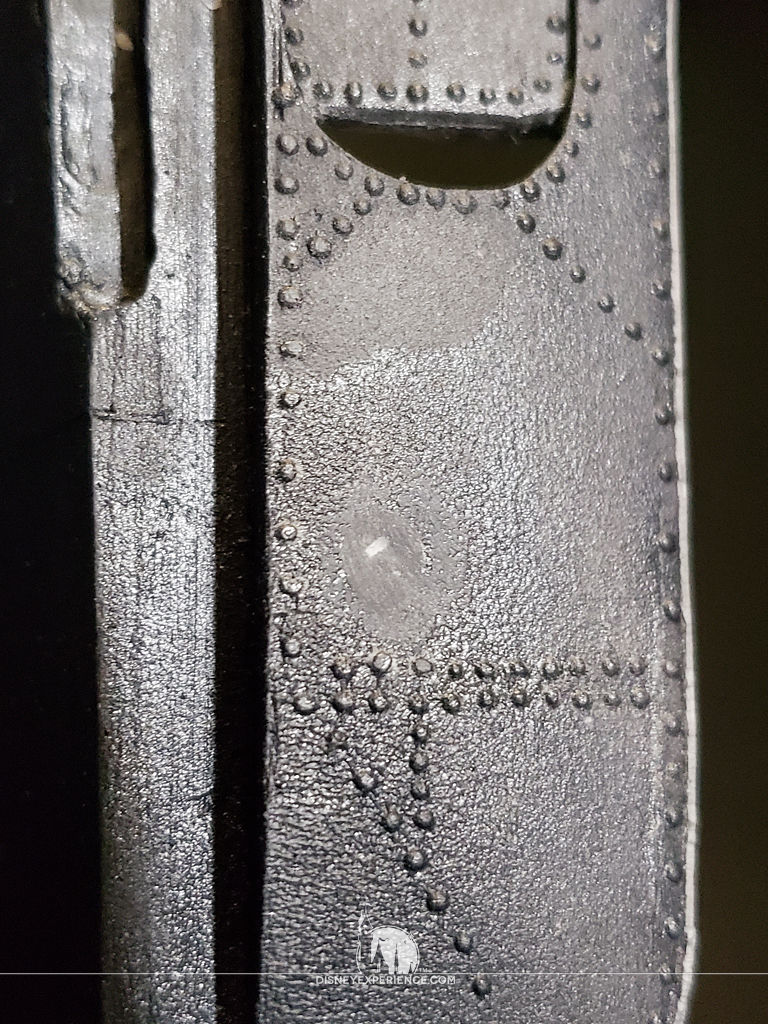
There are also some mold injection points that need to be trimmed and sanded down.

The salon window frames have several bubble voids to be filled and sanded.
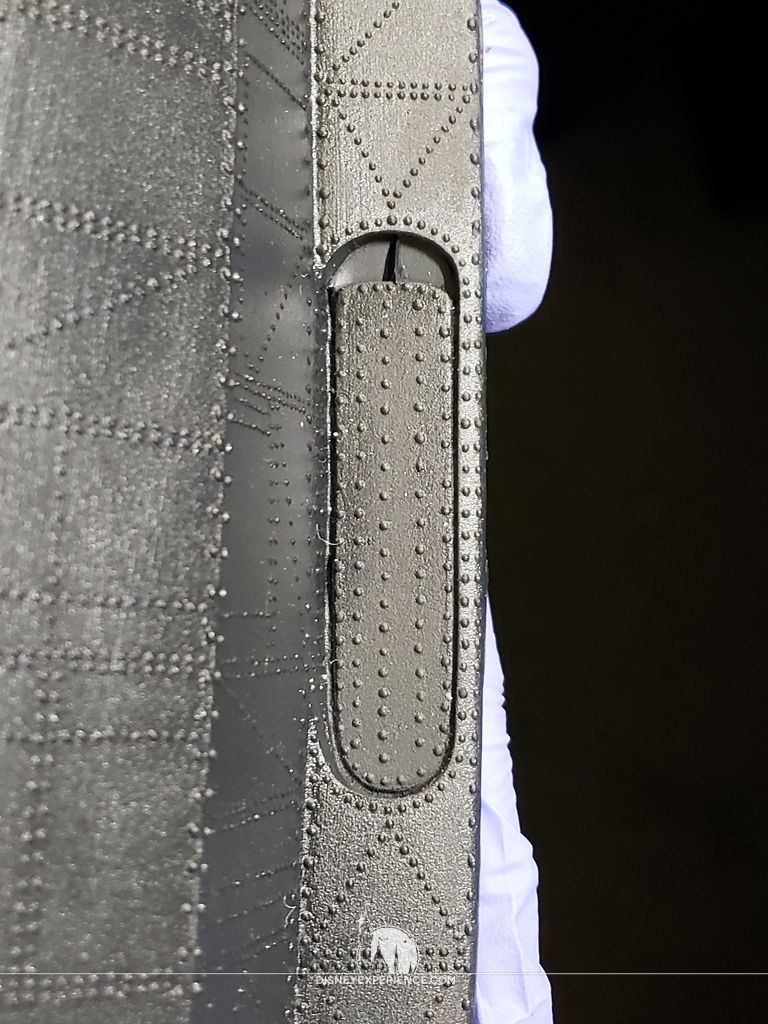
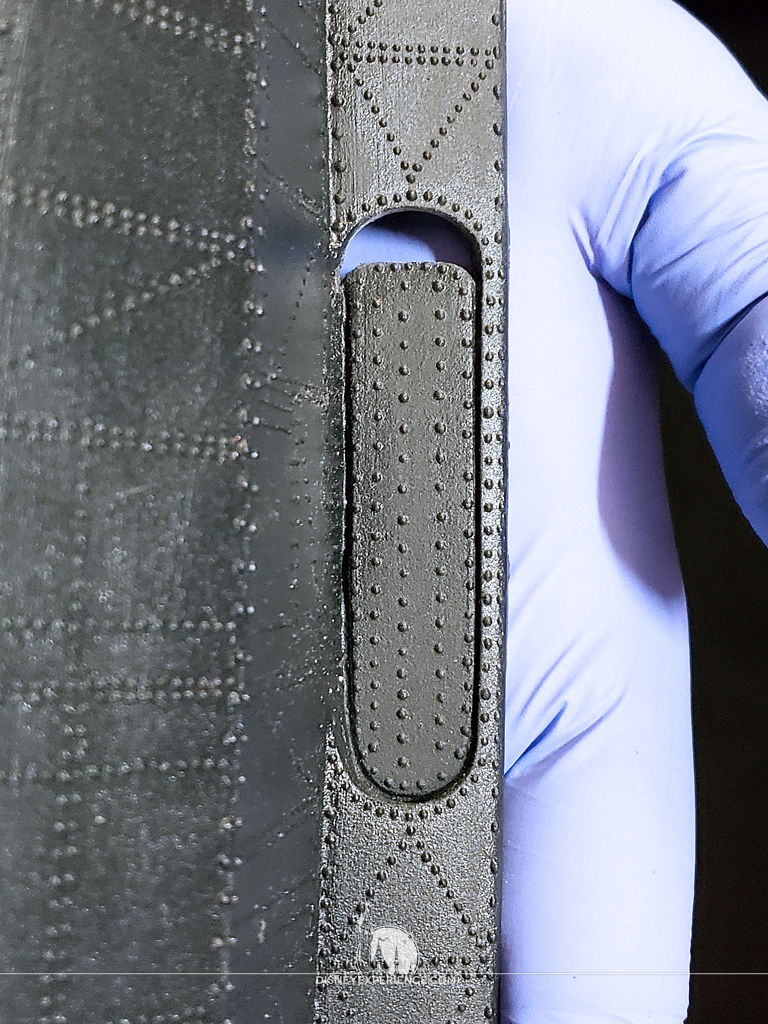
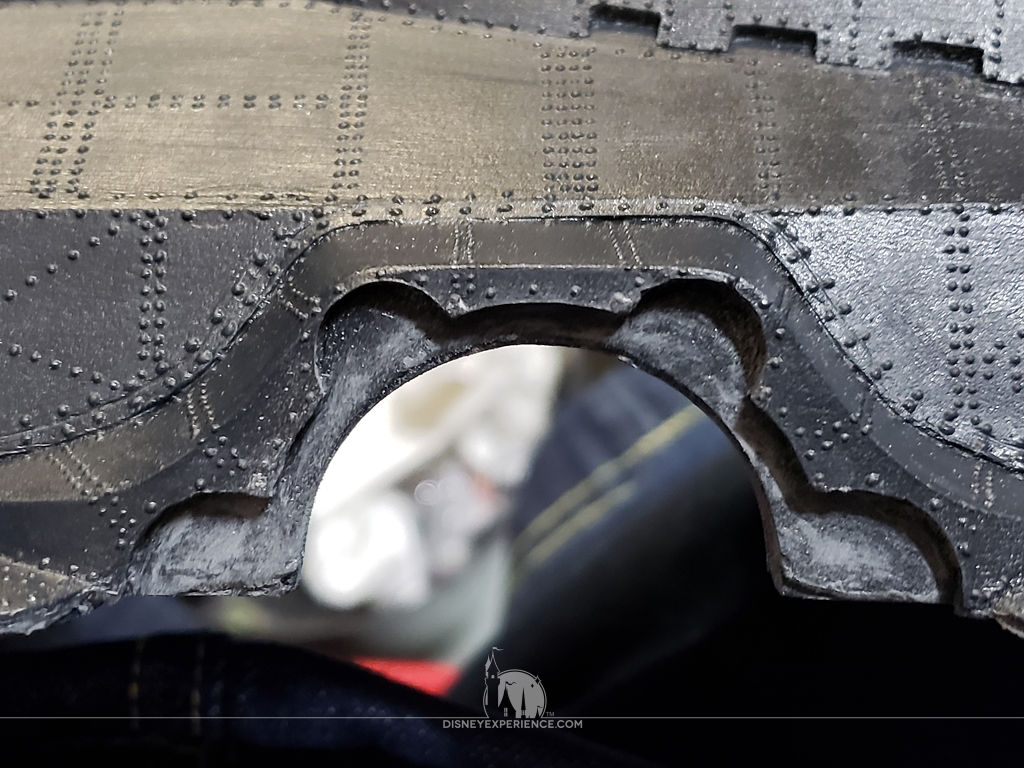
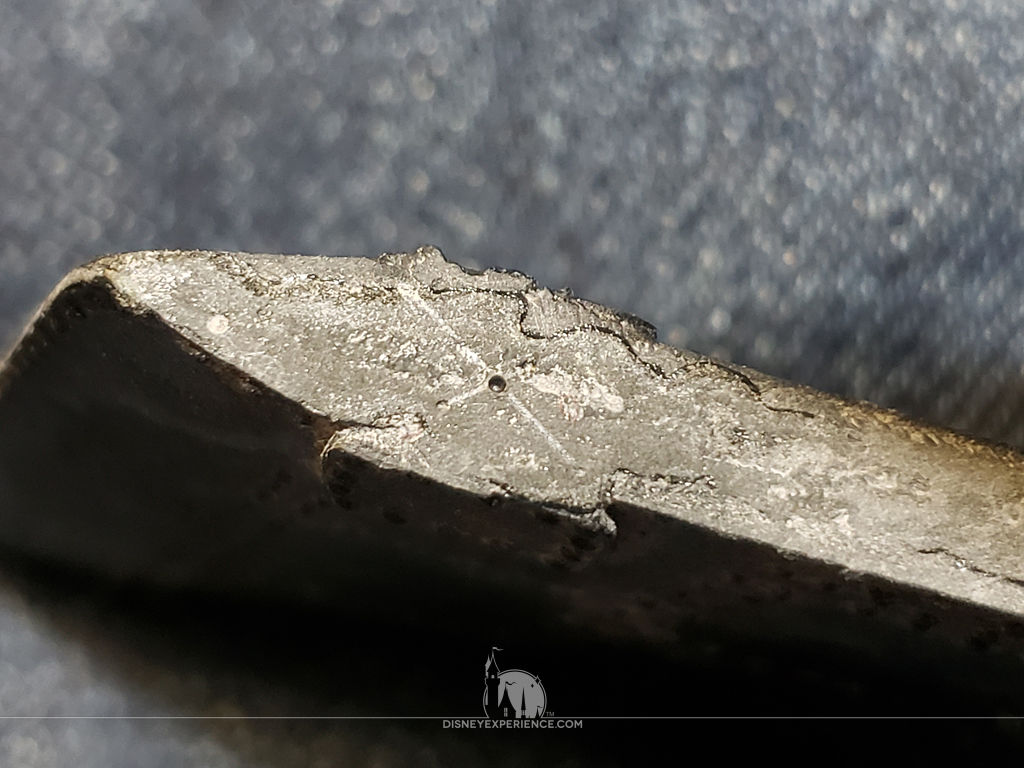
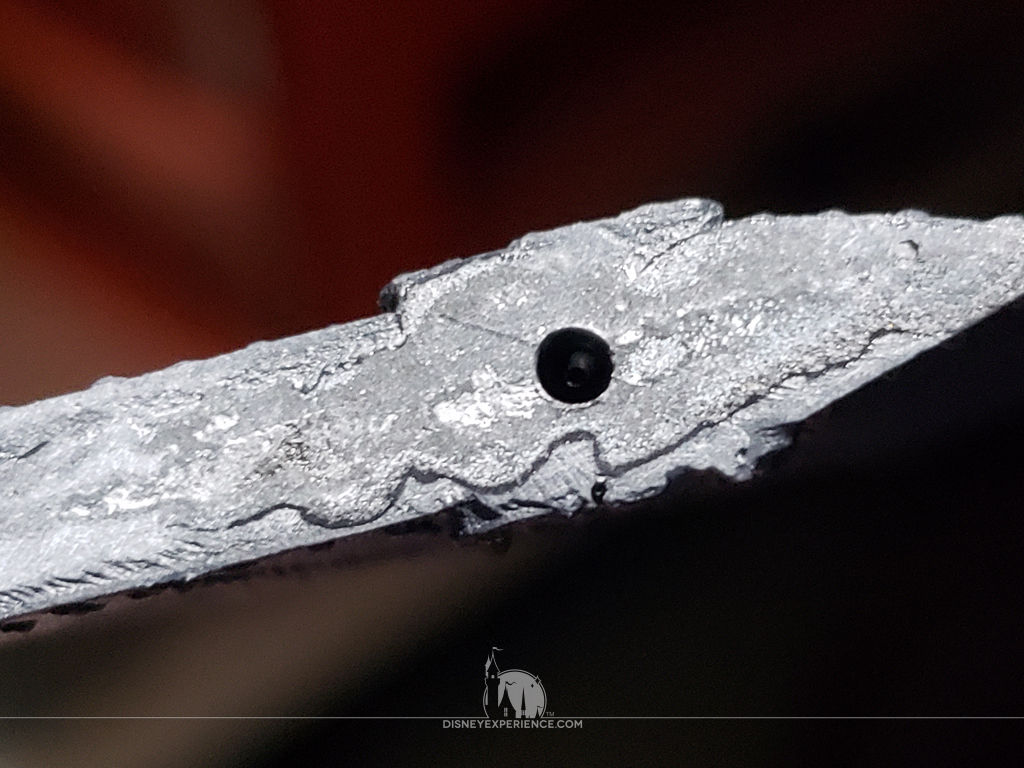
The tail area is particularly horrendous! I removed a large chunk of flashing (this will come in handy later), and the area had excess flashing as well as pits that needed to be filled. It looks like it was chewed from the inside out.
A hole needed to be located and drilled for the rudder pins. I simply made an ‘X’ using the corners of the rudder housing to find the center (‘X’ marks the spot!). I test fit the rudder to make sure that the hole is large enough for it to swing free.

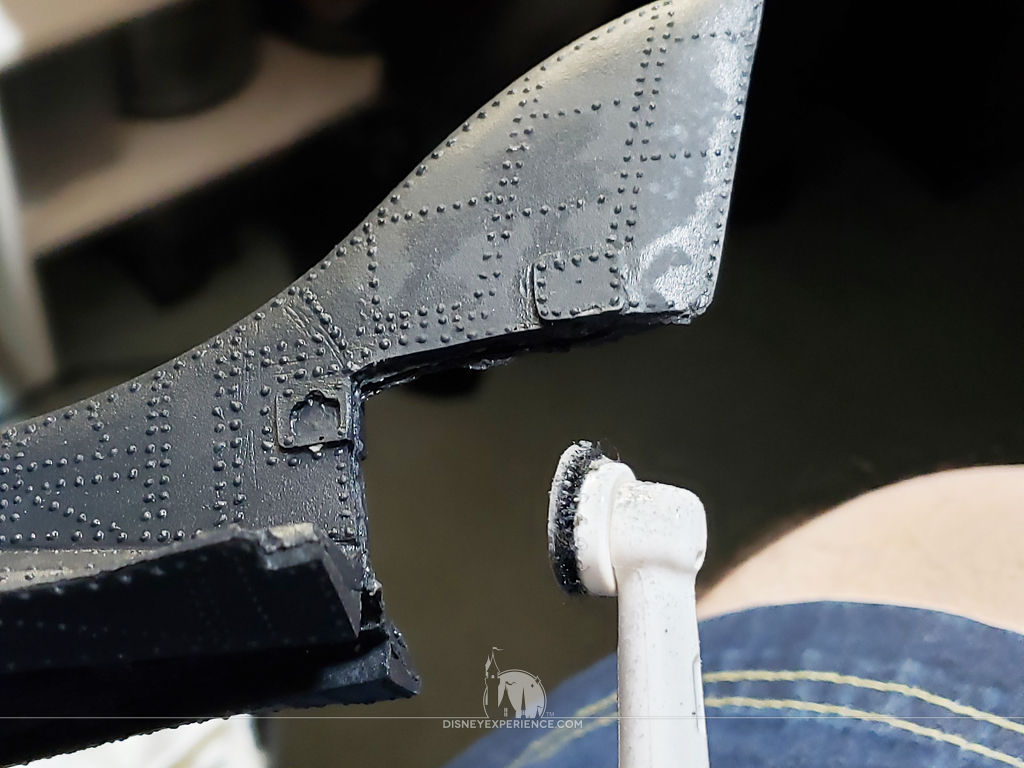
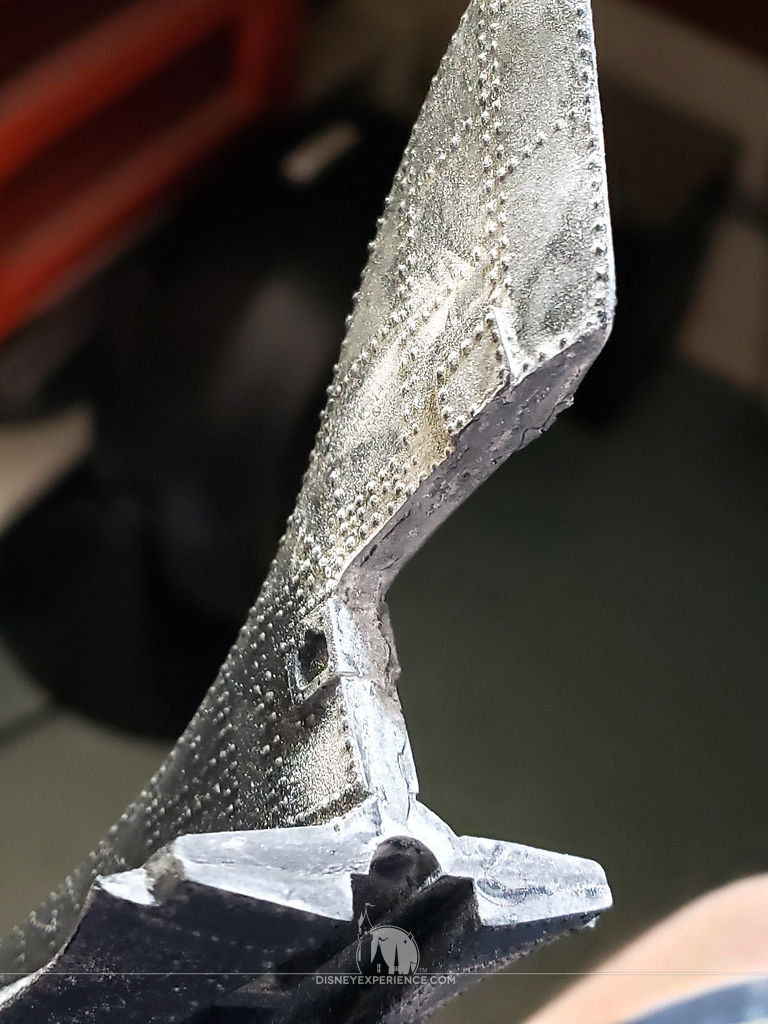
The rest of the upper hull has a lot of excess flashing, and the serrated blades have to be sanded smooth. Those suckers are sharp if you run your hand across them! I can see how the Nautilus can cut through the hulls of war ships so easily.
The Wheelhouse, Part 2
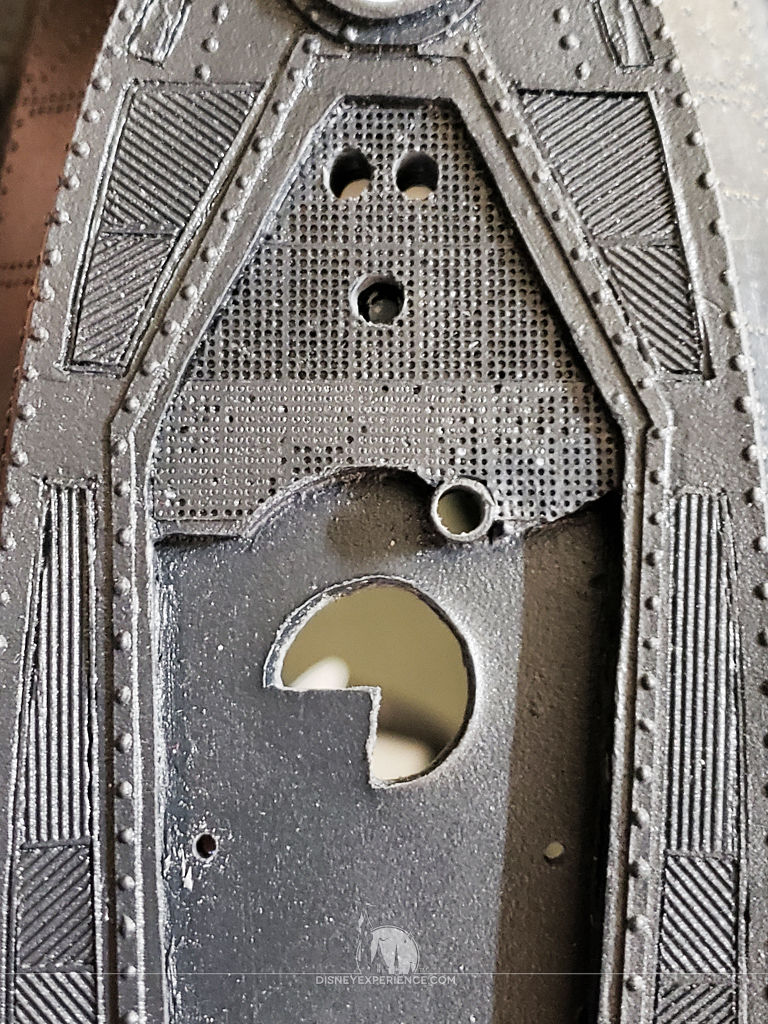
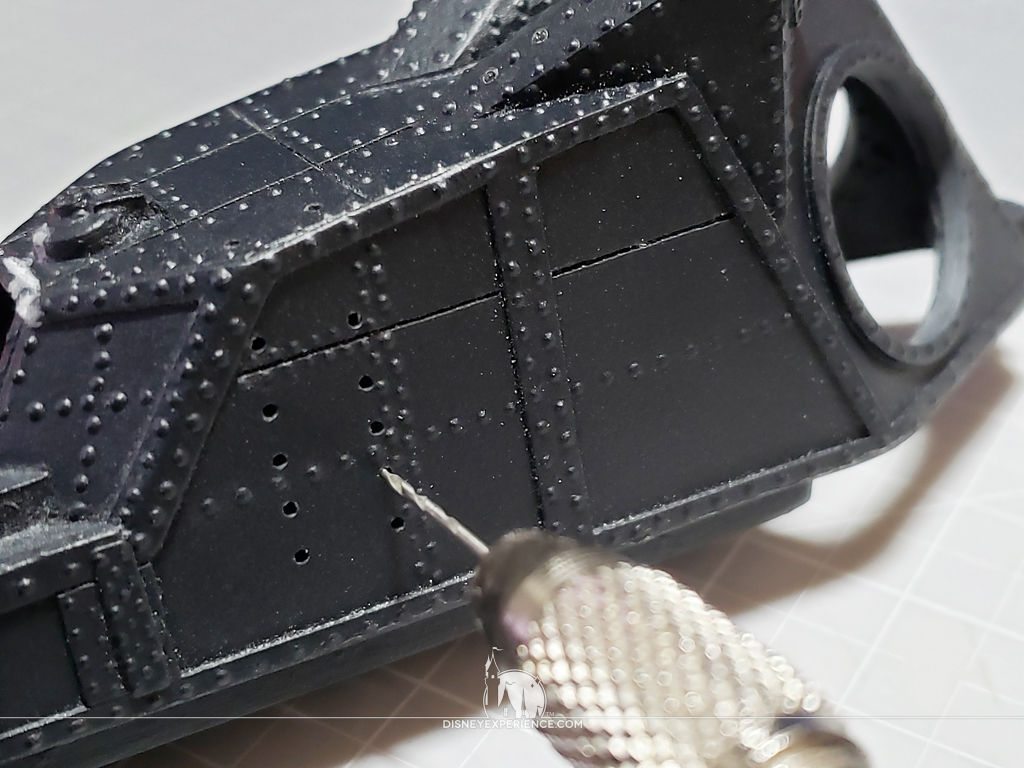
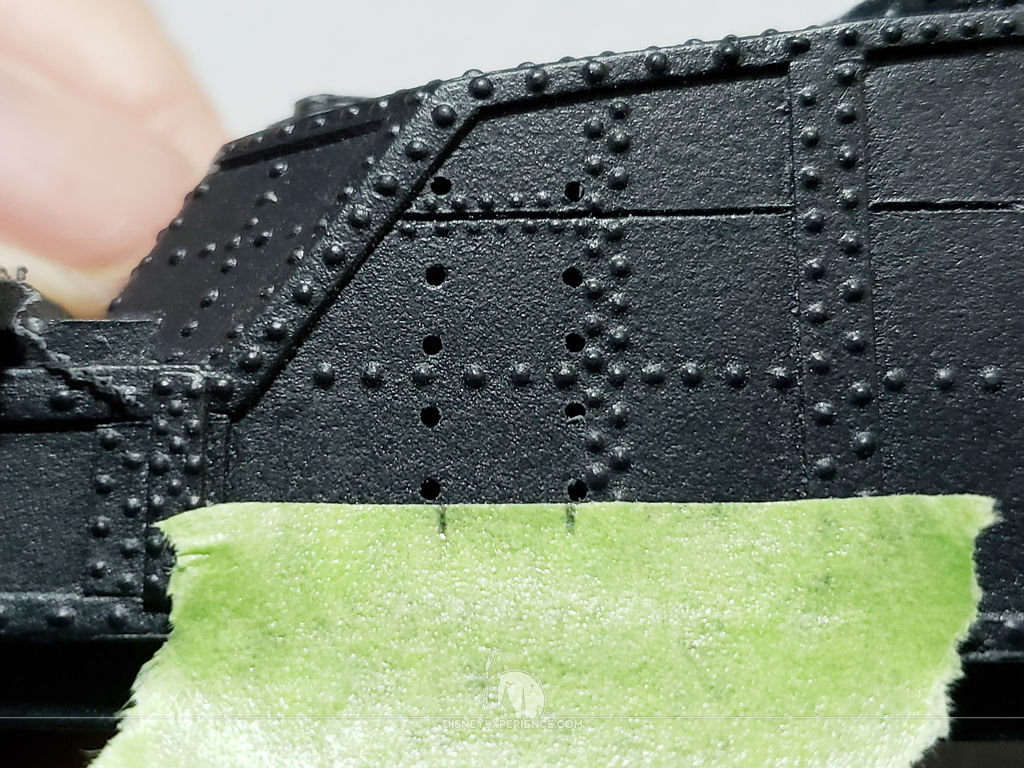
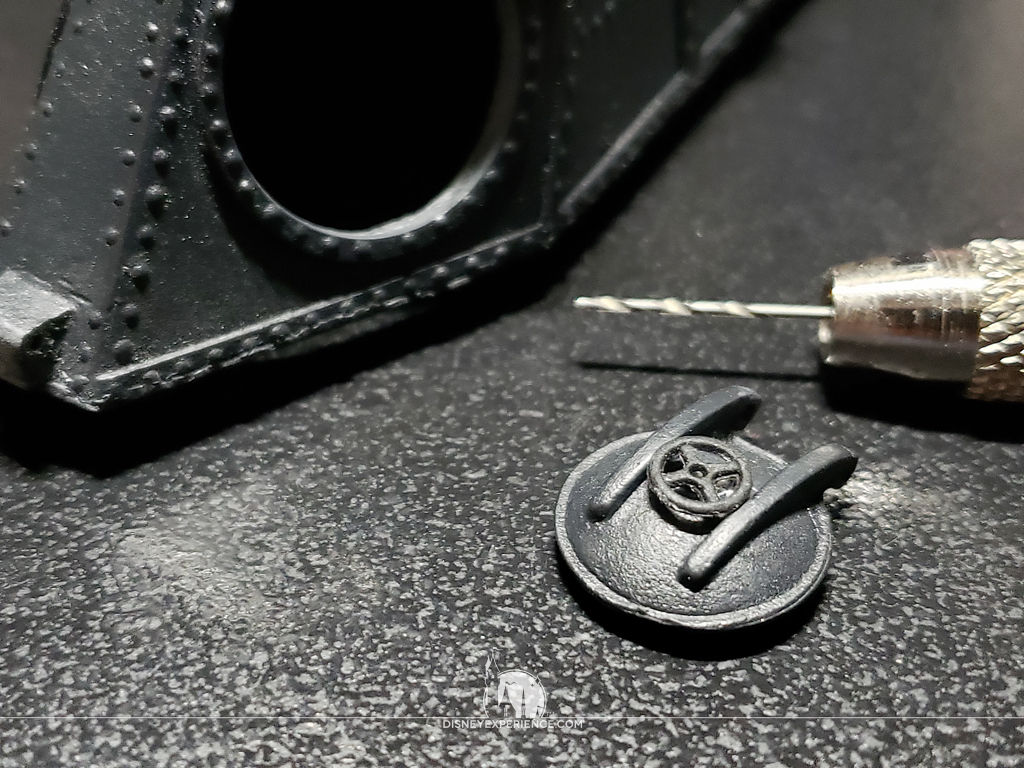
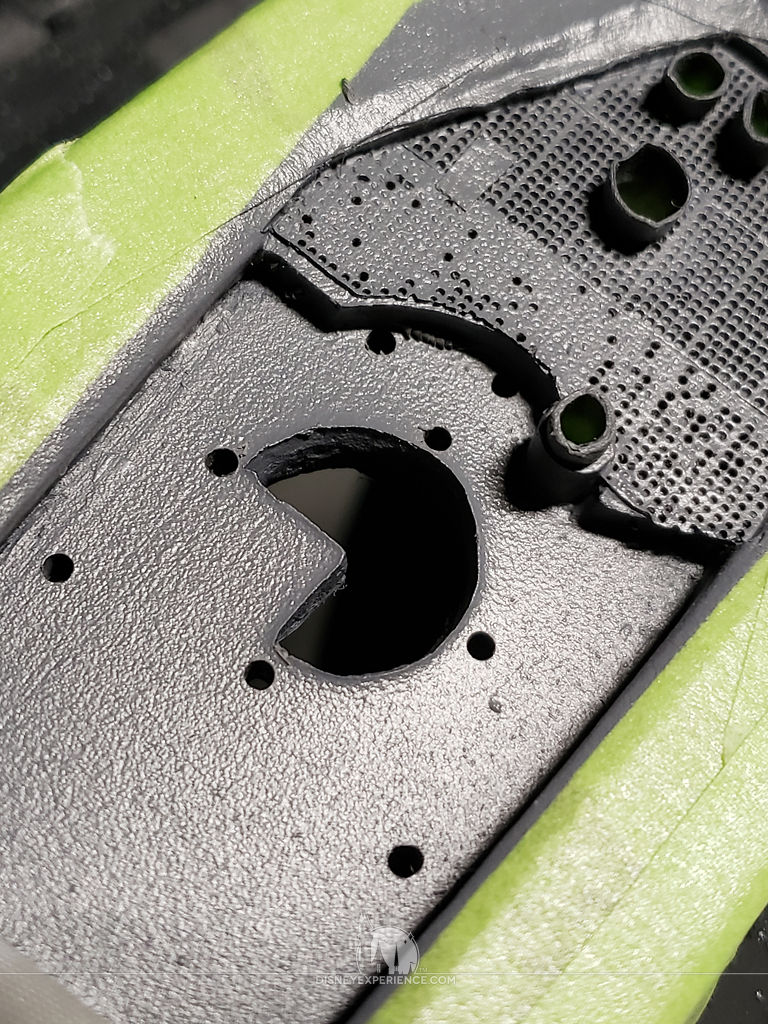
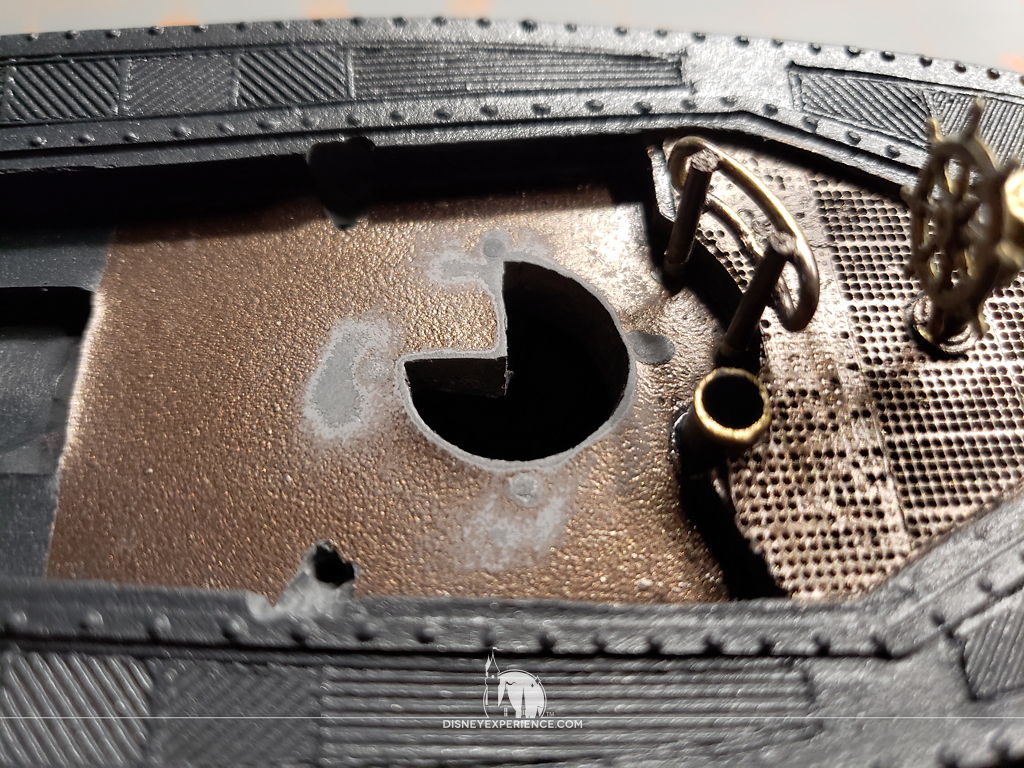
Returning to the wheelhouse, I drill some holes into the floor. The hole for the wheel stand was blocked, so I drill that out for a better fit.
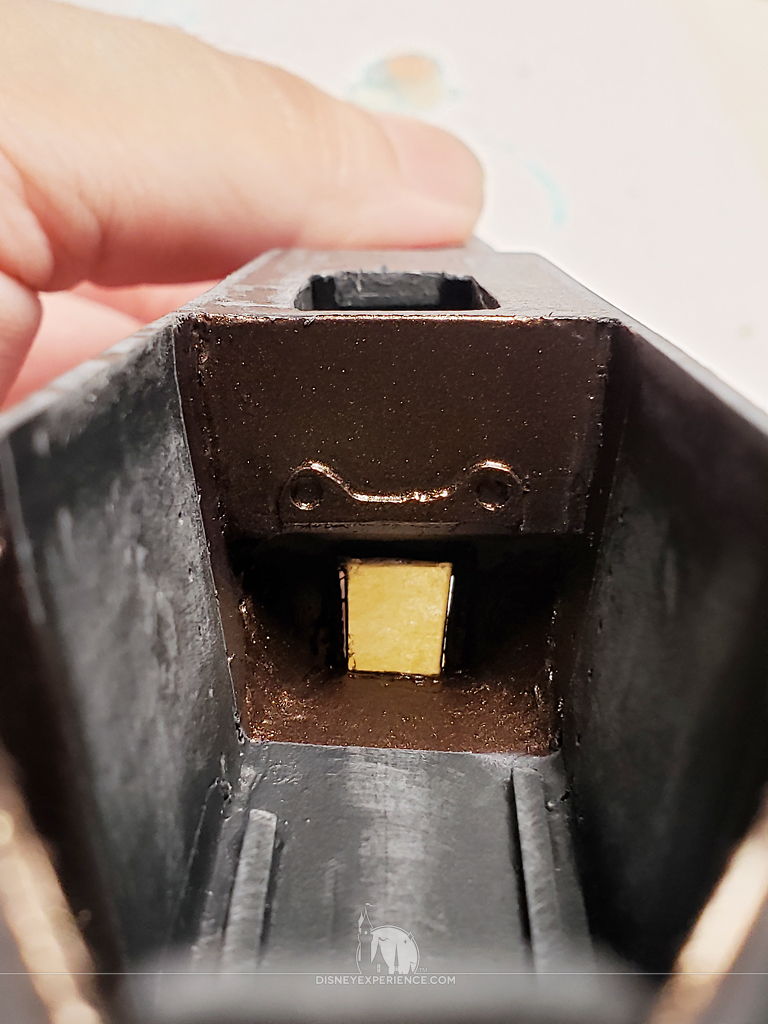
I also drill out the hole for the float tube. This makes it wider for easier assembly later (I don’t have to force the tube in), and I will be inserting a cool white LED into the bottom of the tube.
Next, I drill a couple of holes at the front of the wheelhouse for 2 green LED lights (attack lights). And, I drill a couple of small holes off to the sides of the wheelhouse for running electrical wiring behind the walls.

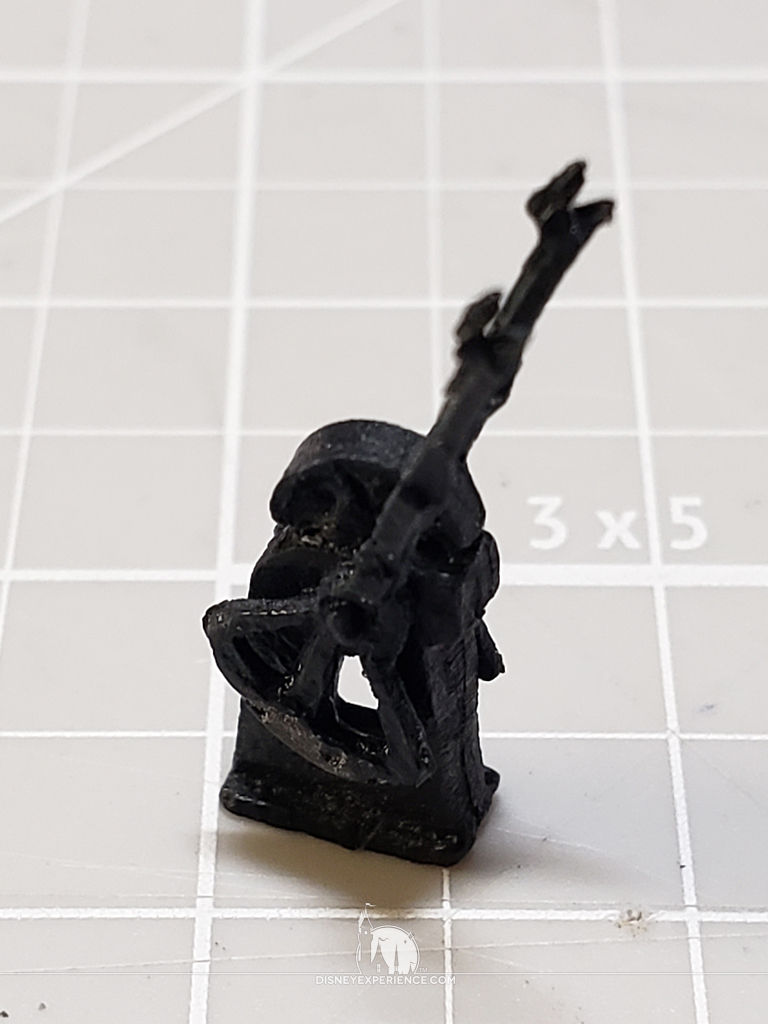
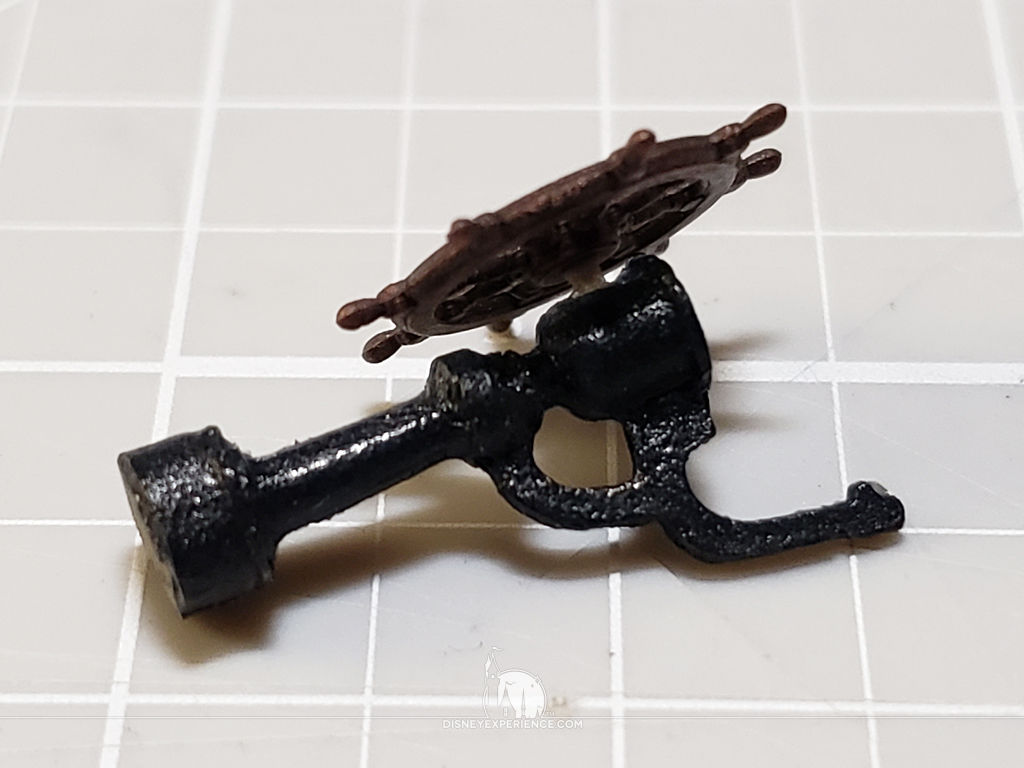
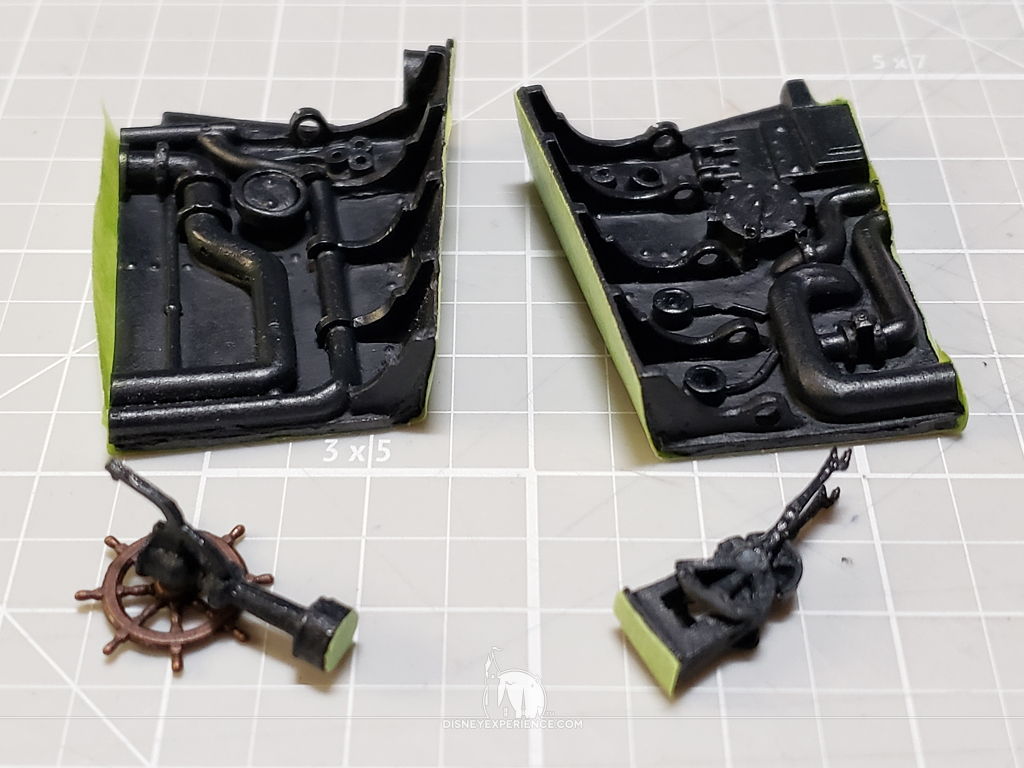
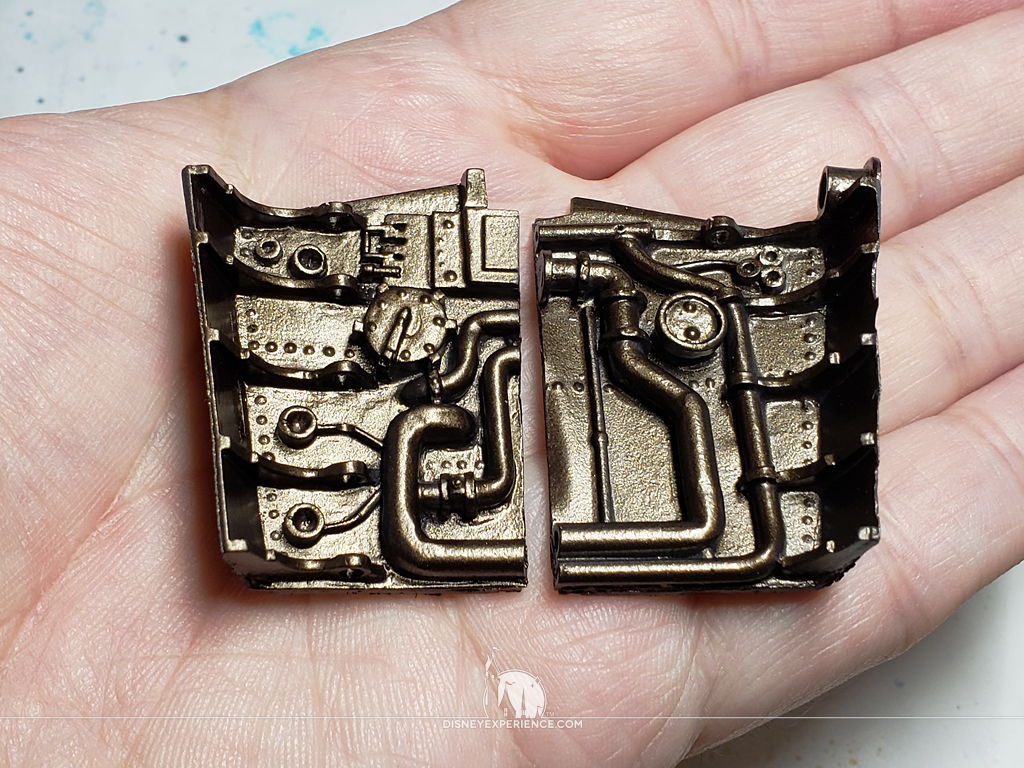
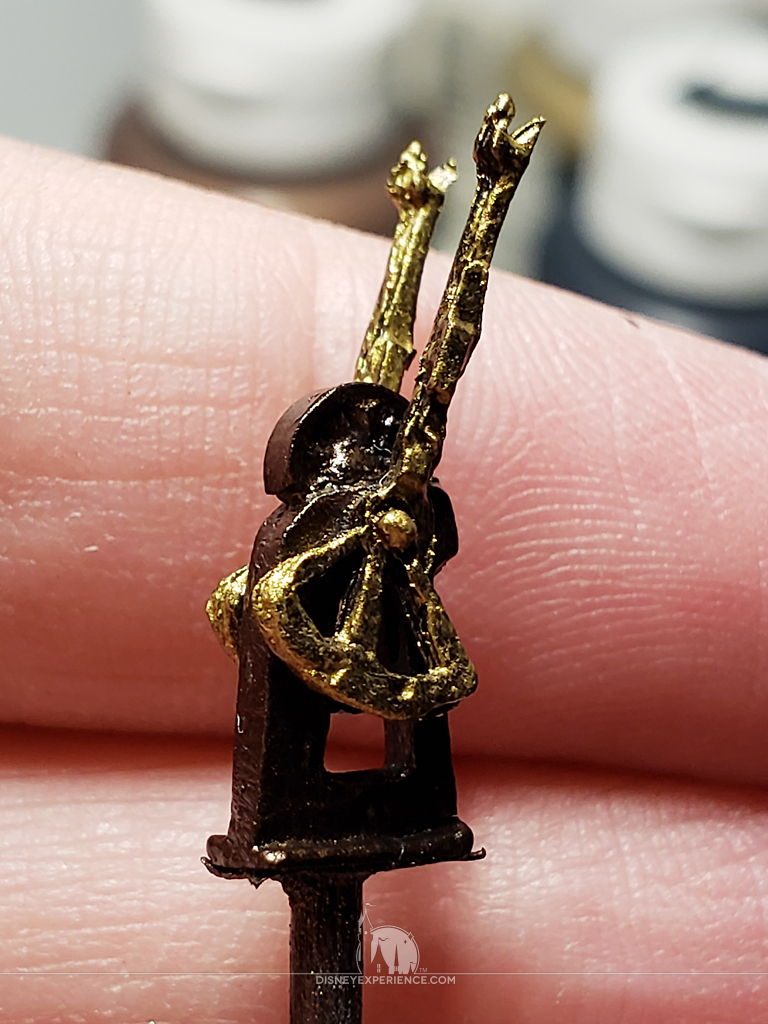
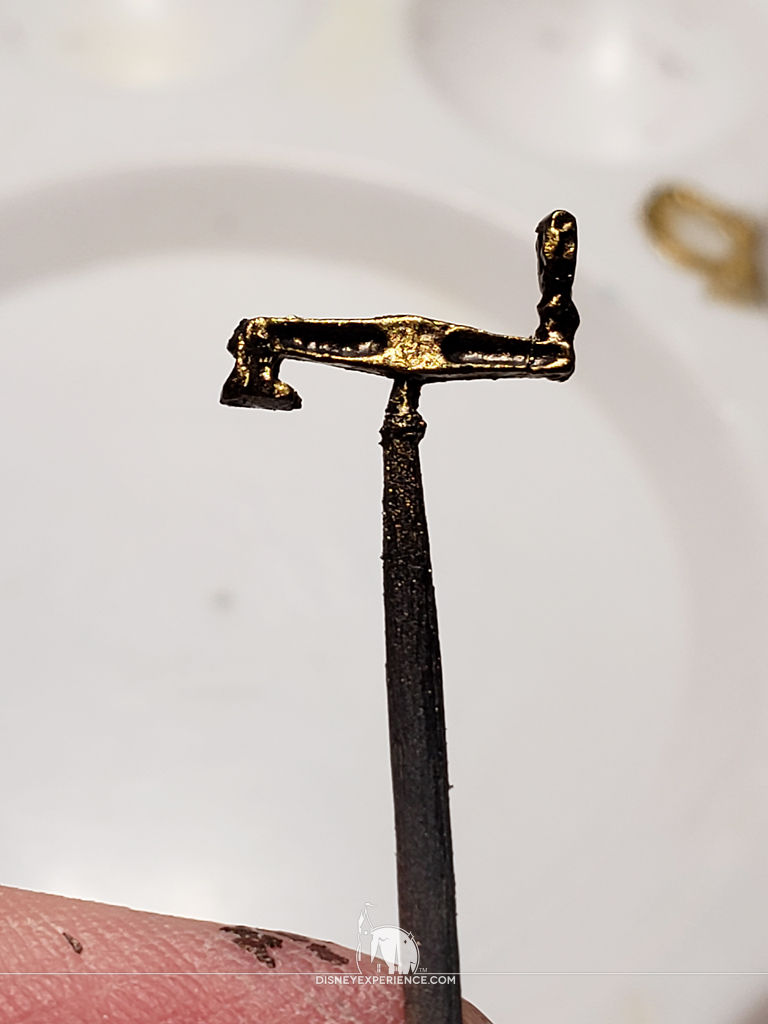
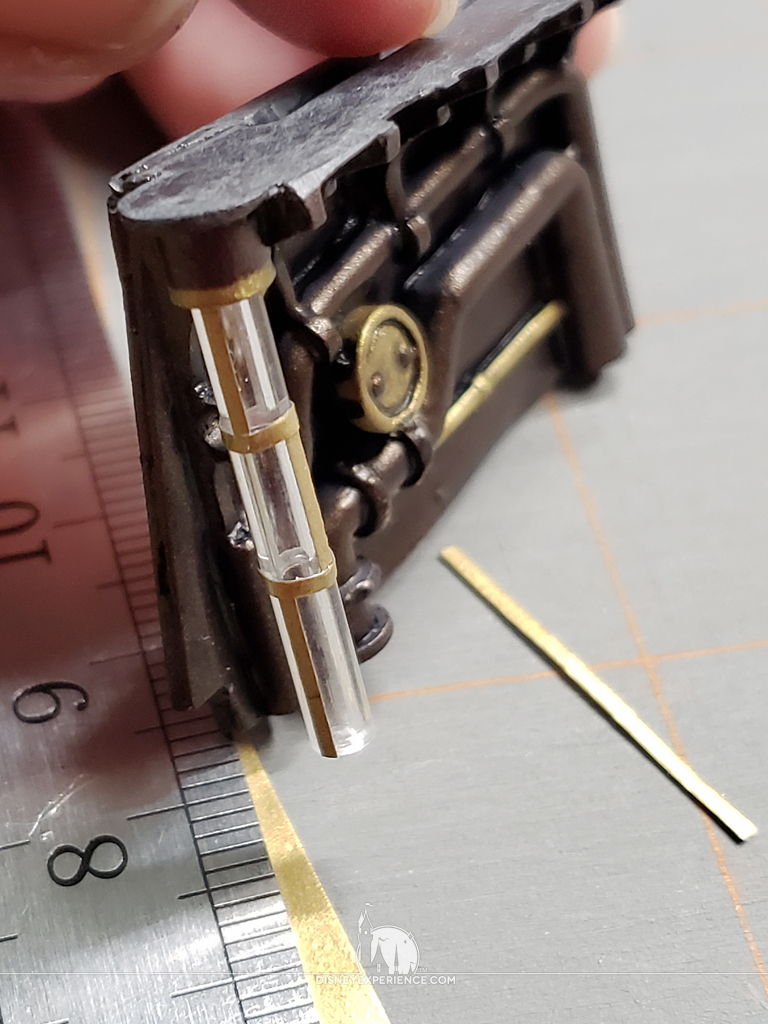
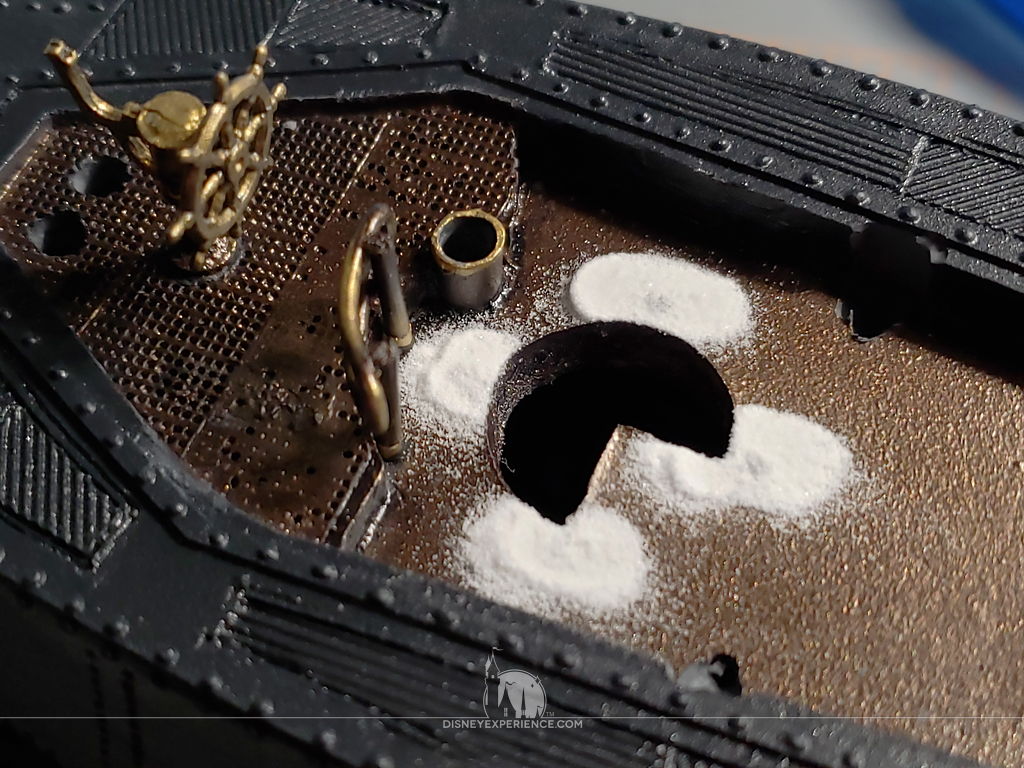
For the wheelhouse details, I assemble both the elevator levers and wheel stand. The parts are very small and covered in flashing that needs to be removed.
The wheel was initially attached to the stand with the end of a toothpick, but I kept accidentally knocking it off. So, I later gave up, drilled a hole through both the wheel and the stand, and I used a cut section of a fabric pin to re-attach the wheel.
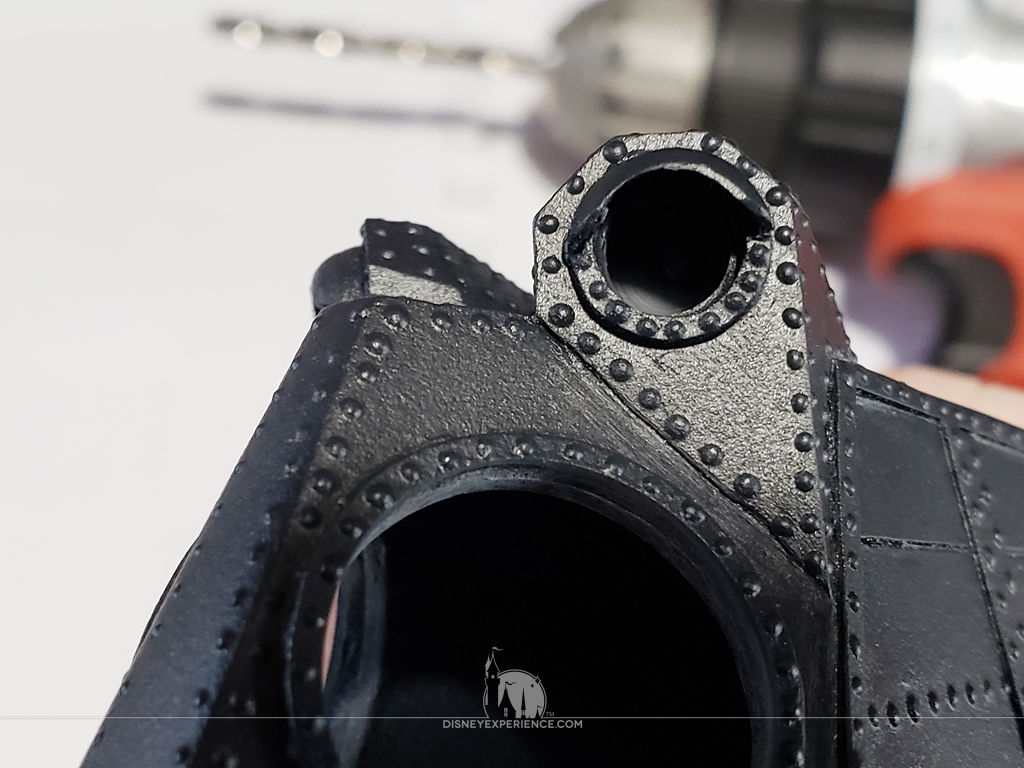
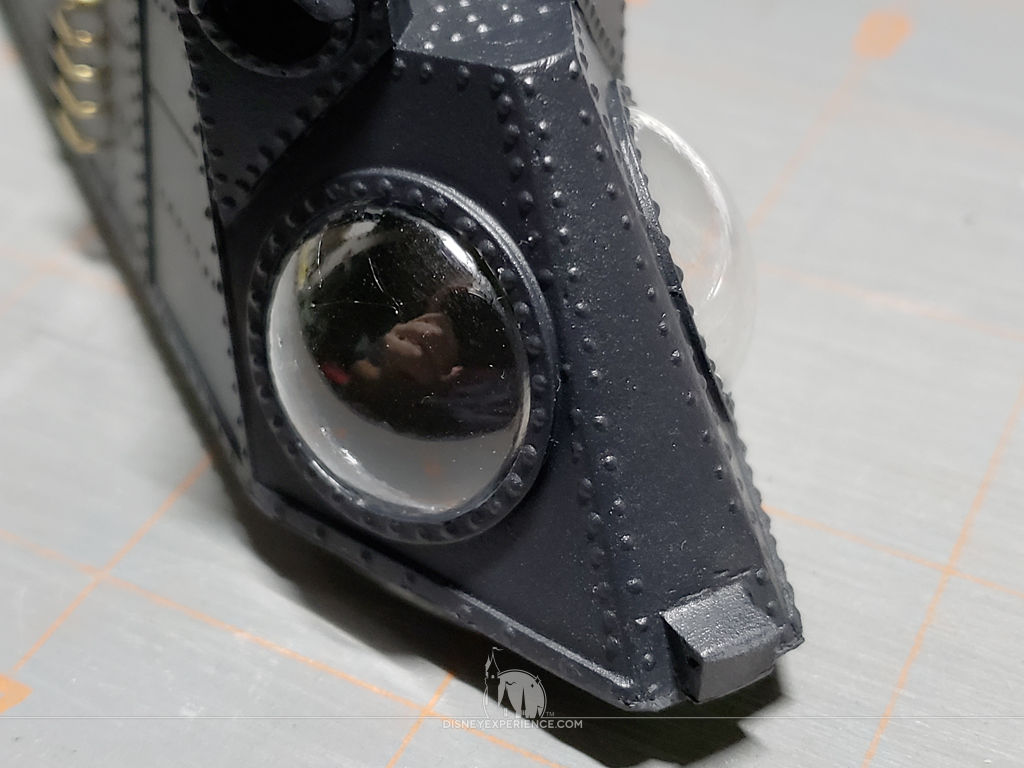
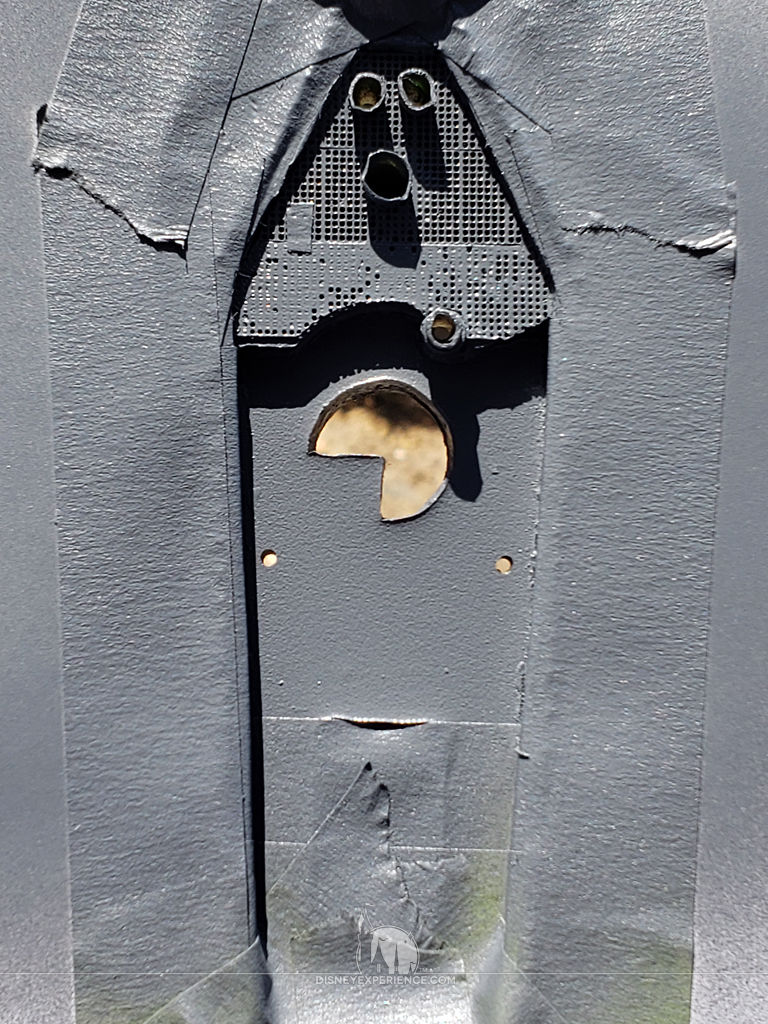
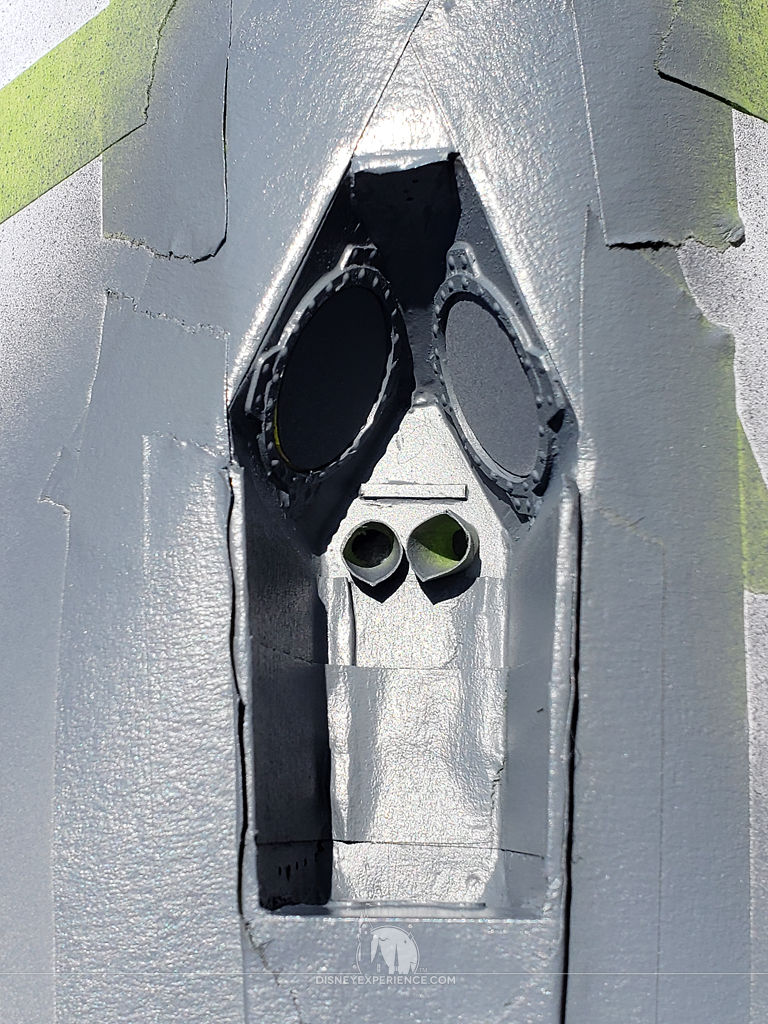
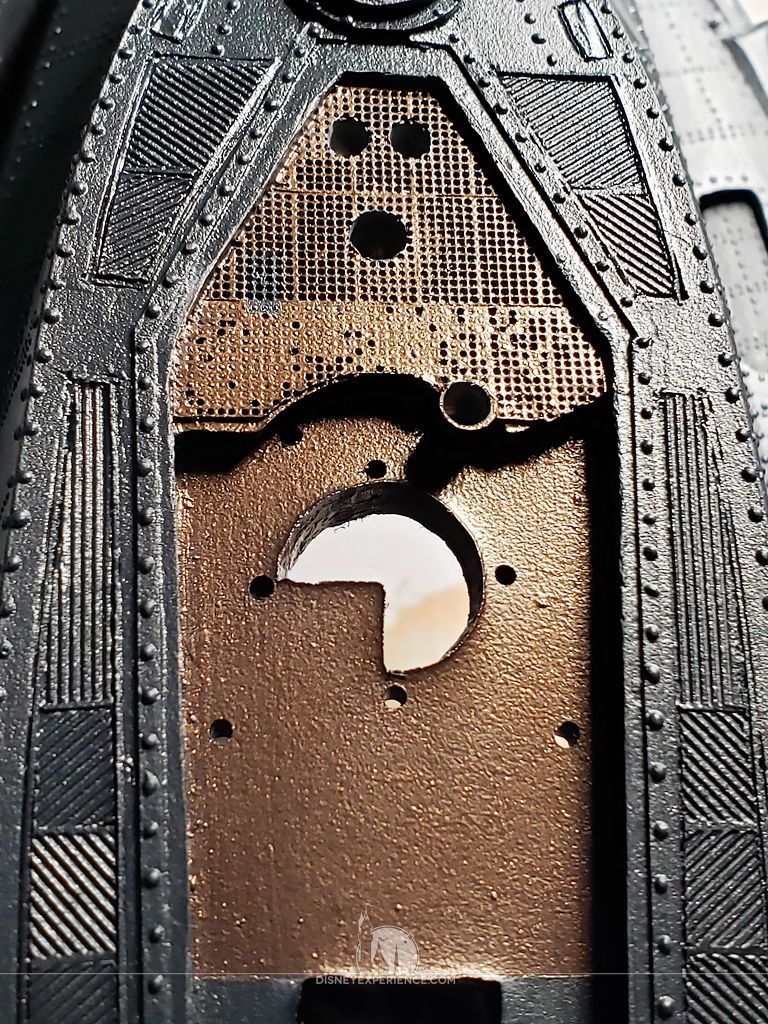
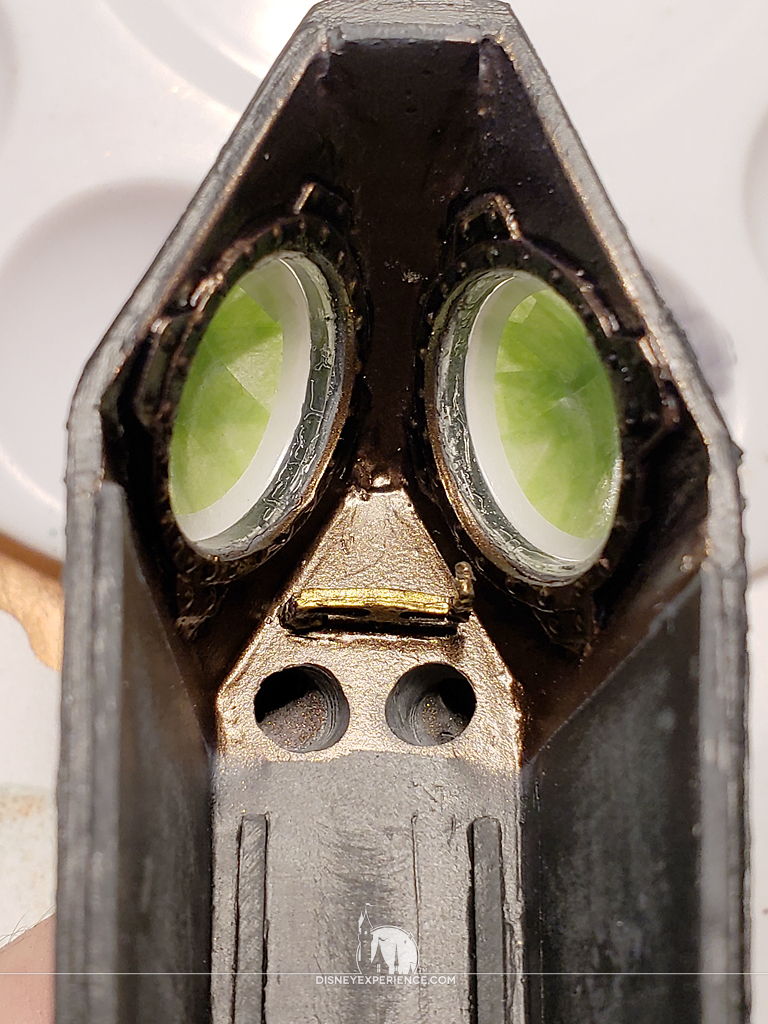
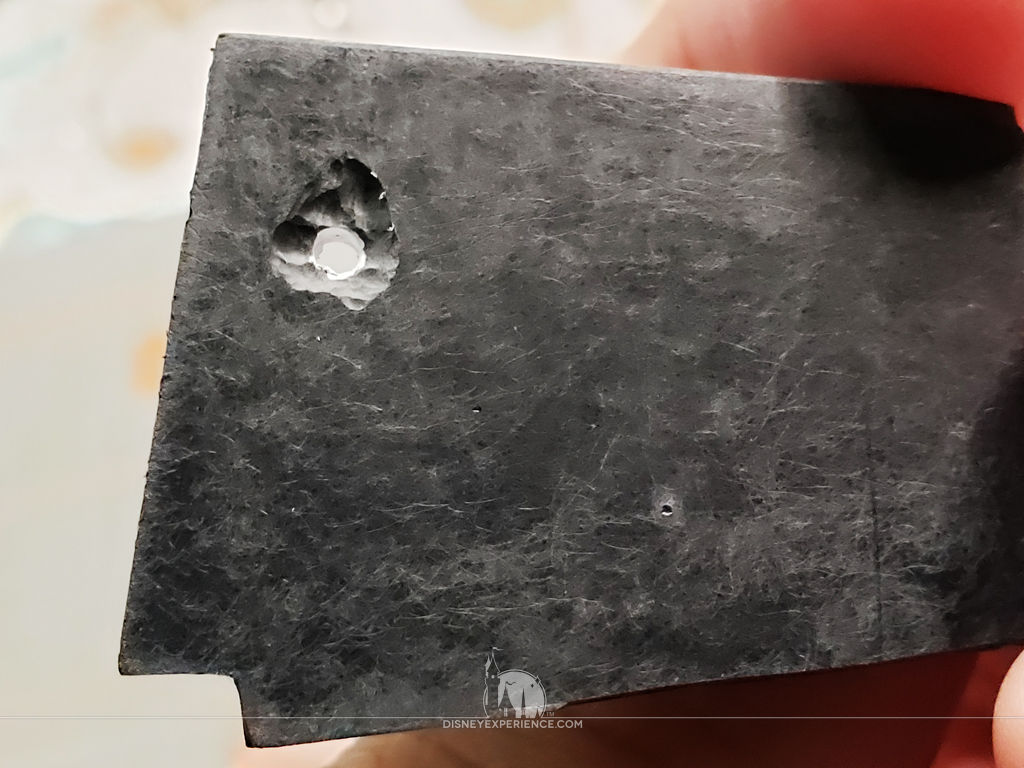
The alligator eyes on the wheelhouse are drilled out so that LEDs can be fit inside later. The drilling is sort of tricky, but also fun. If I go too far, I could end up drilling right through the other side of the wheelhouse (I kinda did, but it only a teensy bit—easy fix).
First, I drill out the eyes from the exterior, using a 7/32 inch drill bit. This leaves a small lip on the inside of the eyes for the cast floodlights to glue to.

On the inside of the wheelhouse, I drill more holes at an angle to connect to the first holes that I made. Getting the right angle is important.
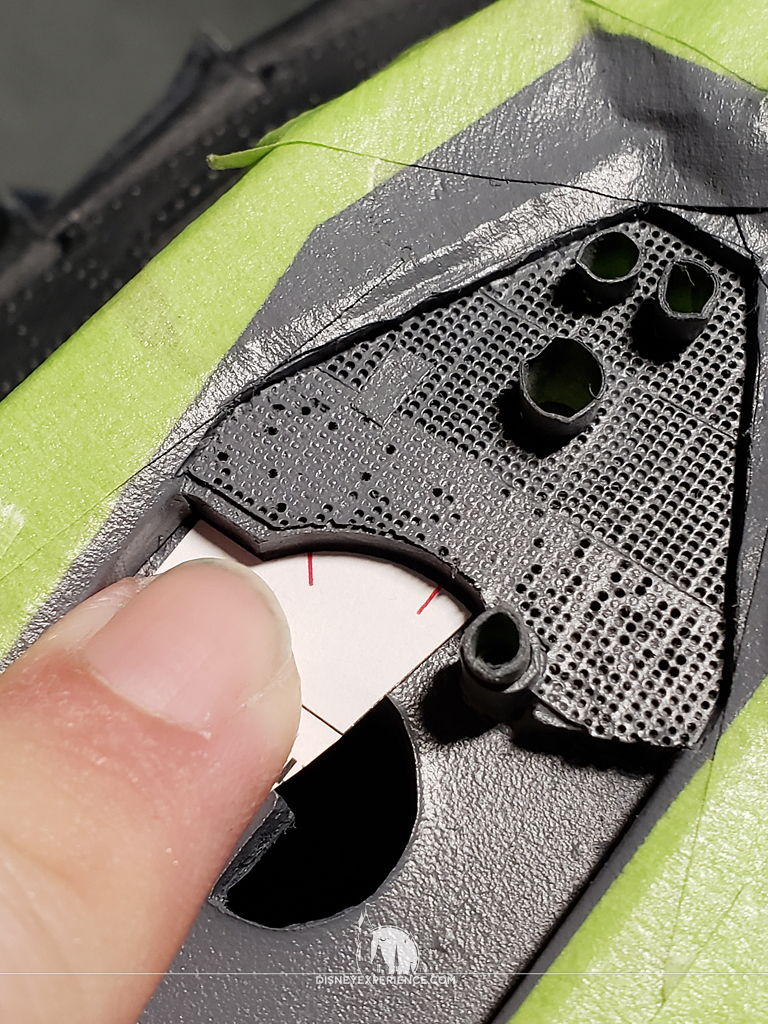
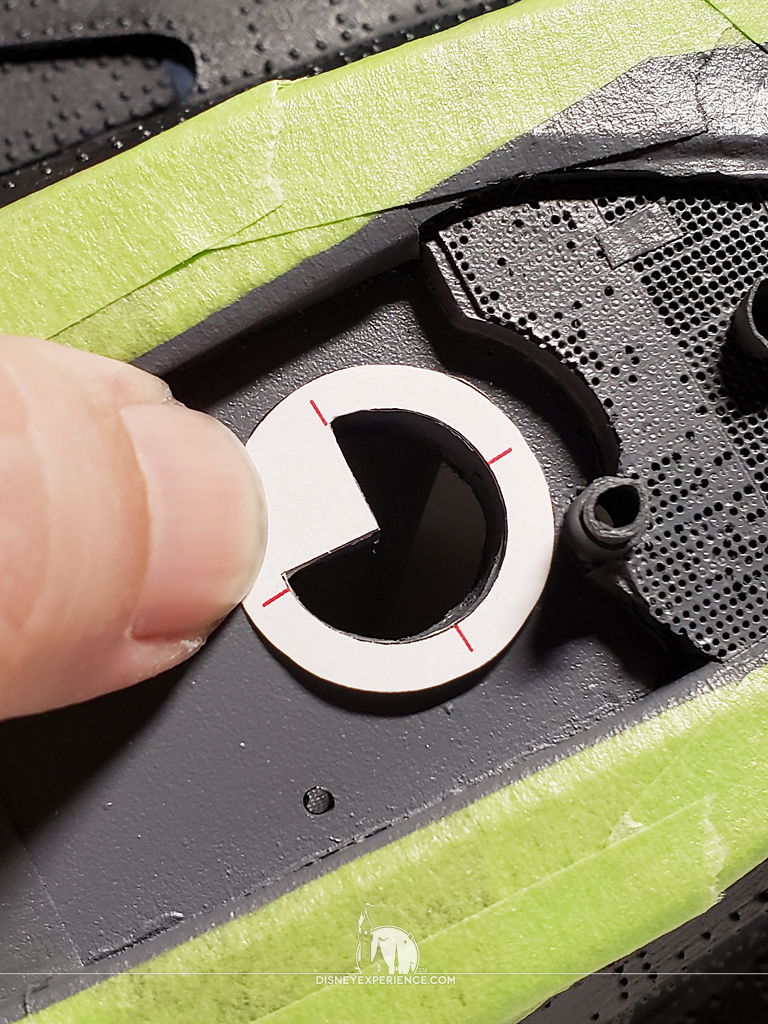
For the rear wheelhouse window, I create a small template out of a piece of scrap cardstock. This is used to cut out a piece of “glass” that then gets glued into place with some E6000.
I use the same template to cut out pieces of masking tape that get applied to the window both on the inside and the outside.

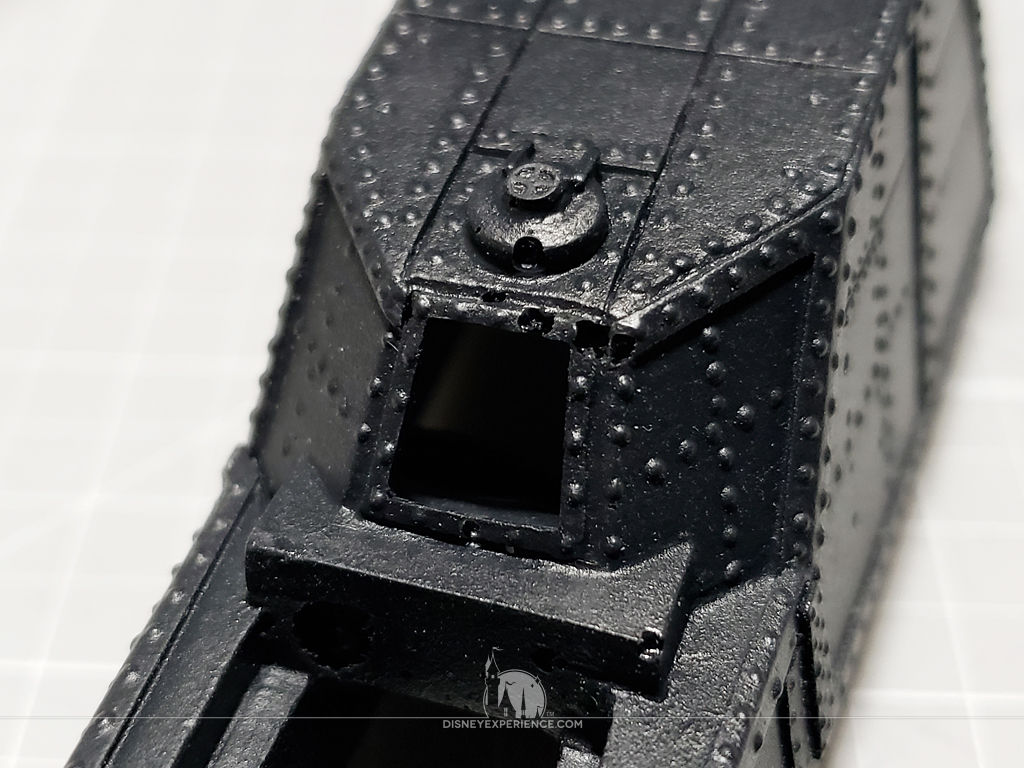
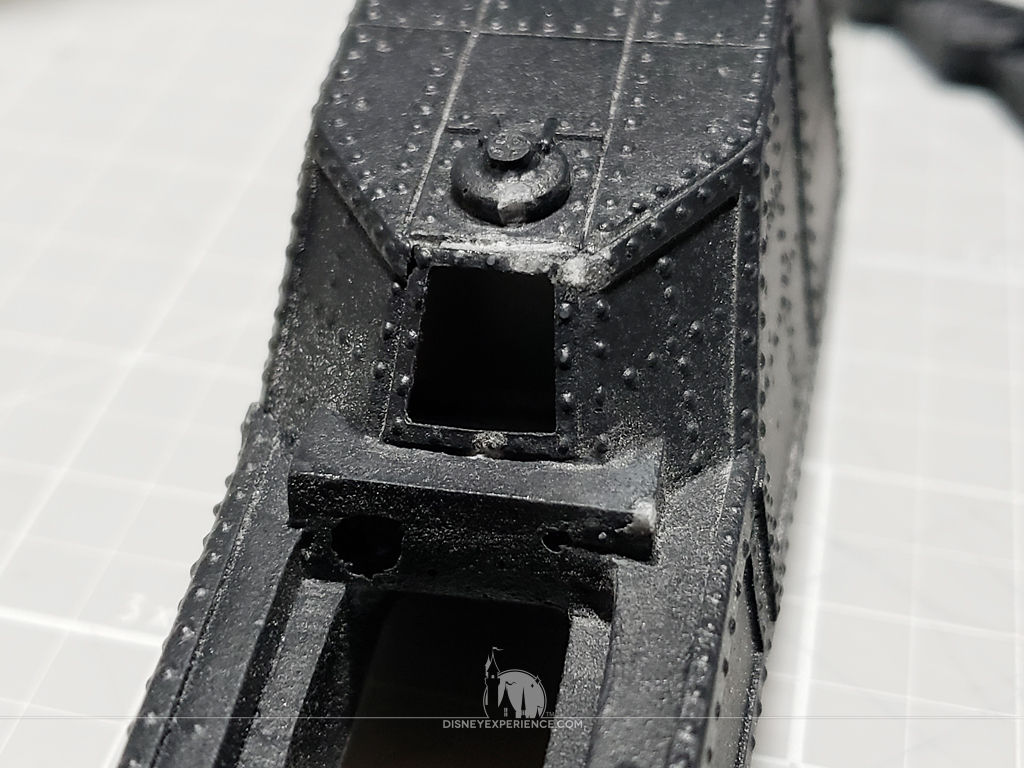
The forward hatch connections get drilled out for later attachment.
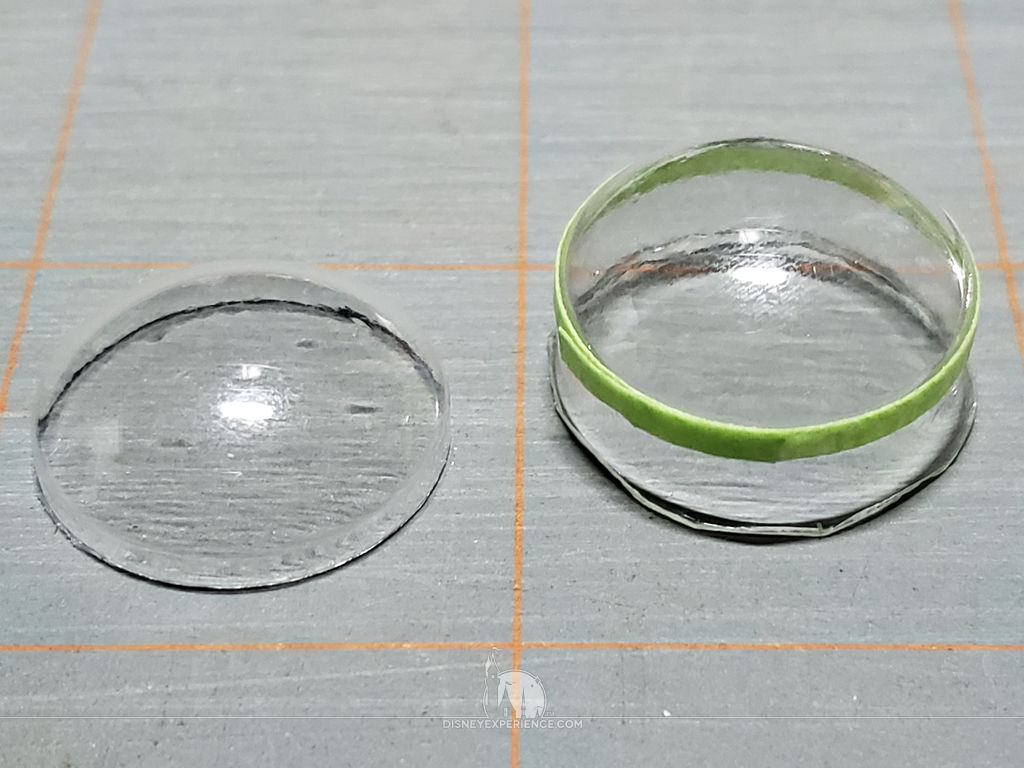
The wheelhouse windows get trimmed from their vacuum-formed plastic. I cut them 2 mm from the domes’ edges using a piece of masking tape as a guide. This 2 mm allowance is what is glued to the inside of the window frames.
I also take this time to mask off the outside of the windows.
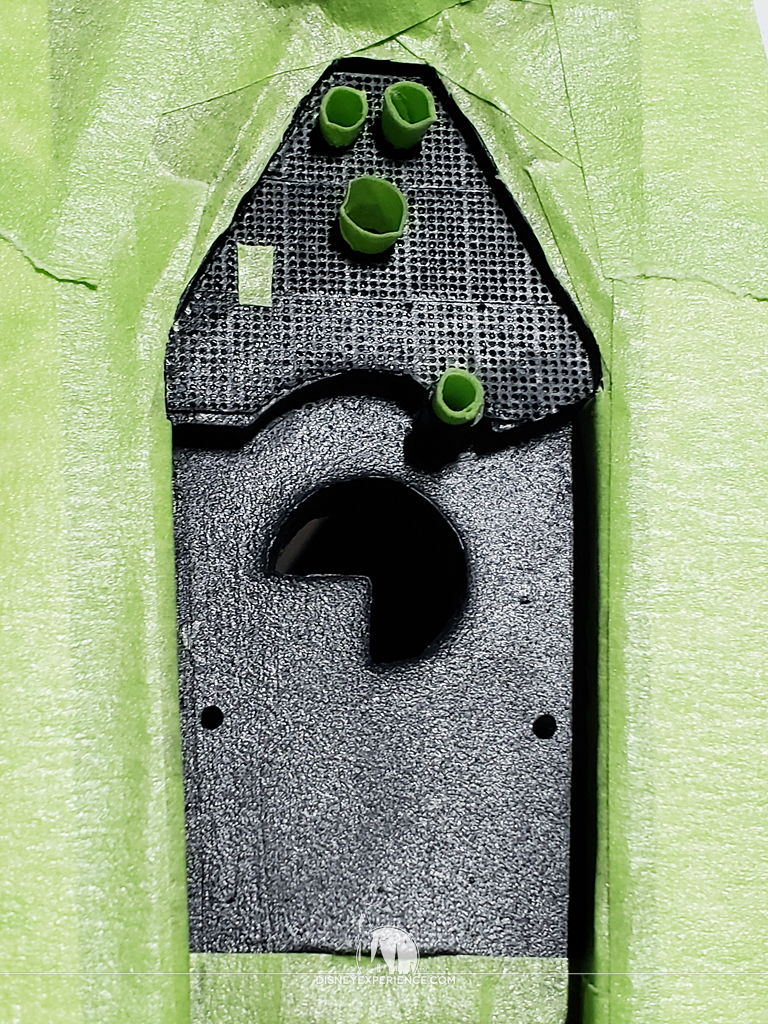
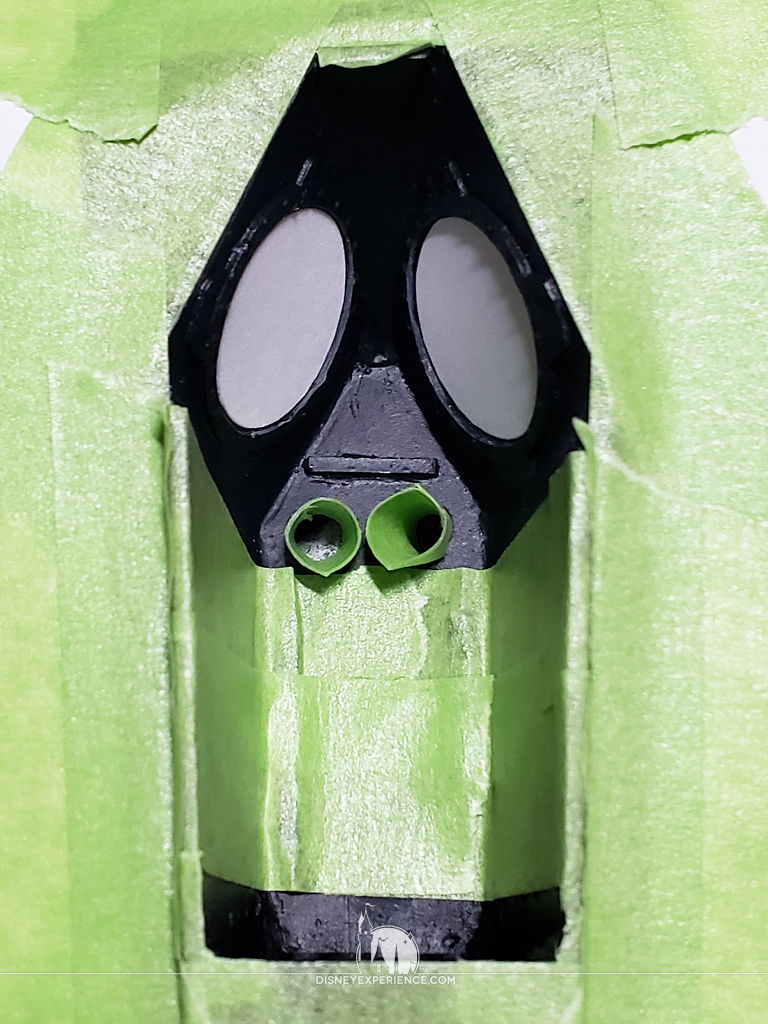

With the wheelhouse parts masked, they are sprayed with gray primer before moving on to painting. Note that I also mask off the inside of the wheelhouse windows with discs made from cardstock.
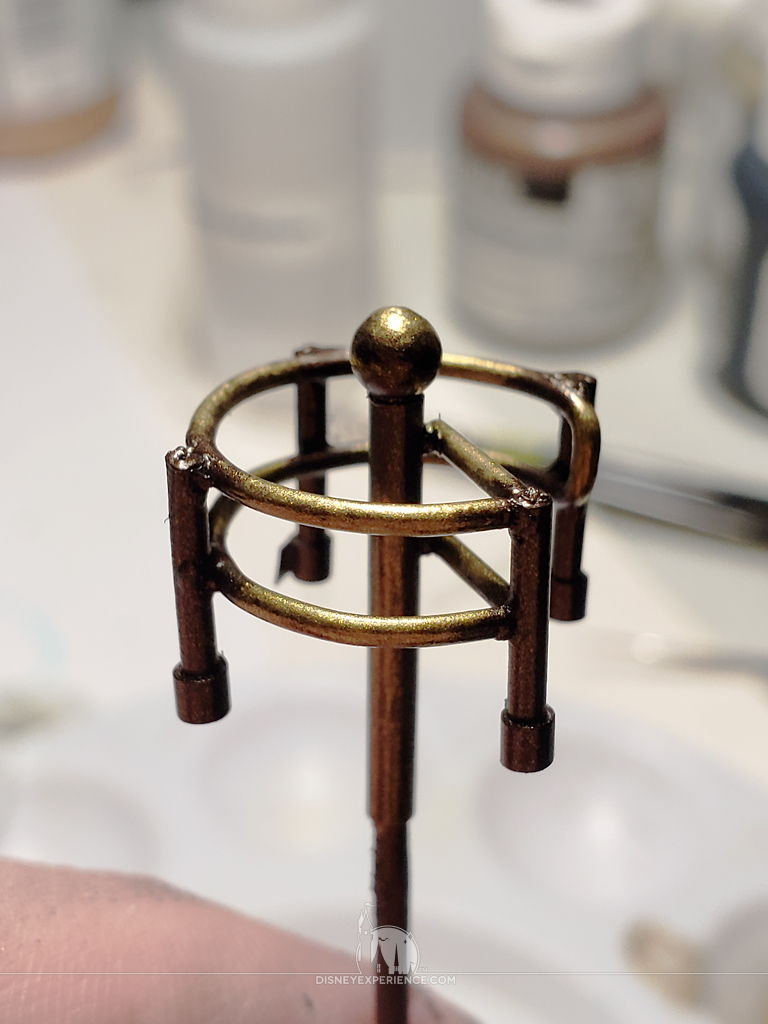
A couple of things that the model lacks are railings for the wheelhouse. There is a simple railing behind the helm, and a circular railing for the staircase.
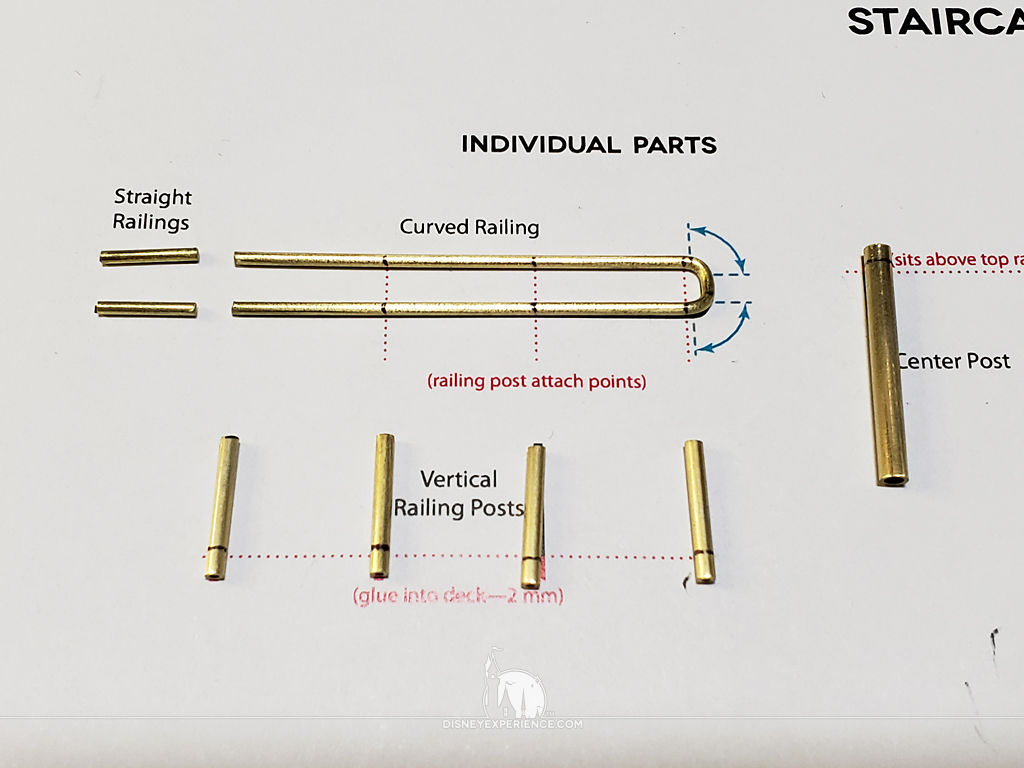
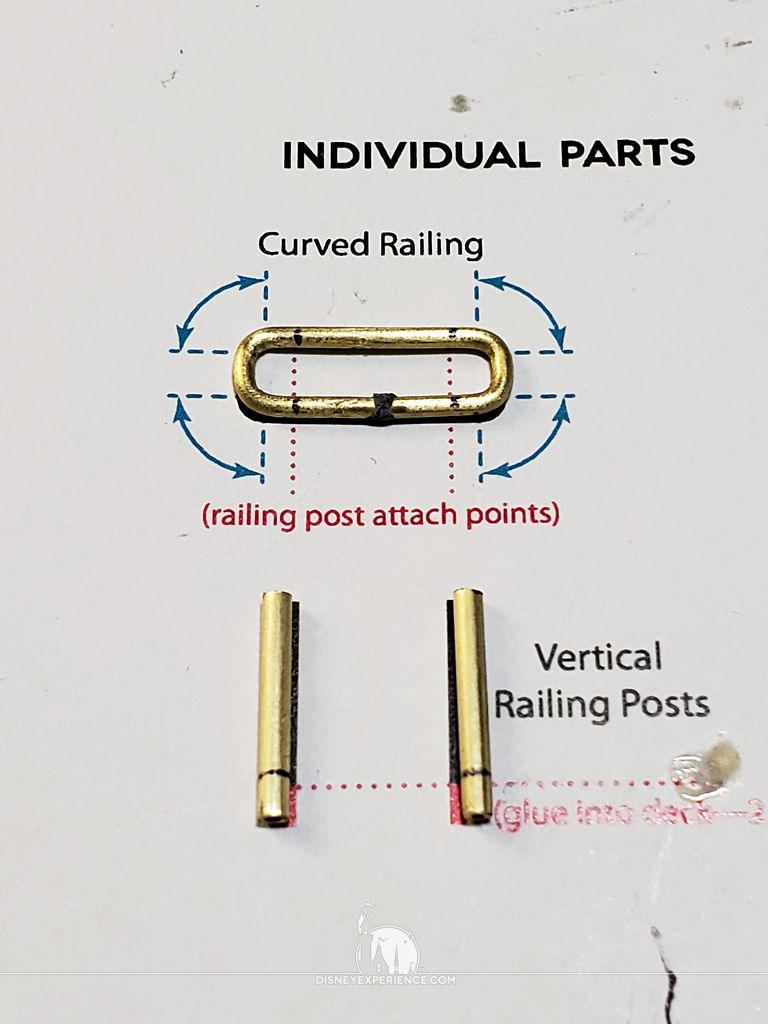
With templates that I made in Adobe Illustrator, I recreate the railing parts using brass rods of varying thicknesses.
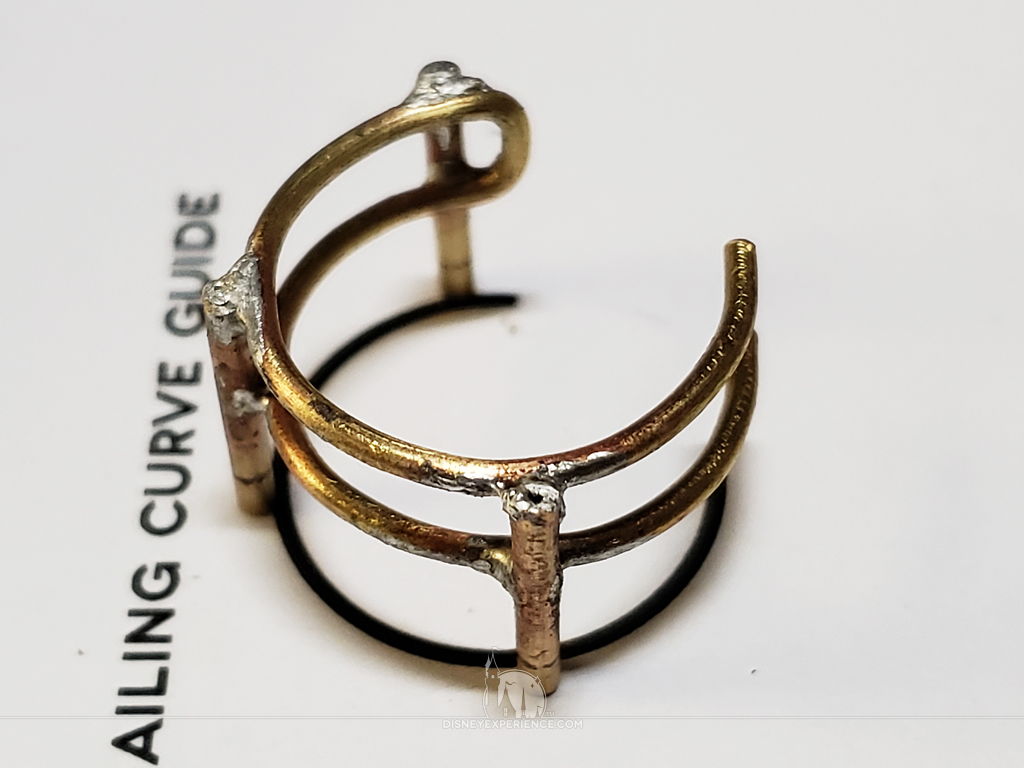
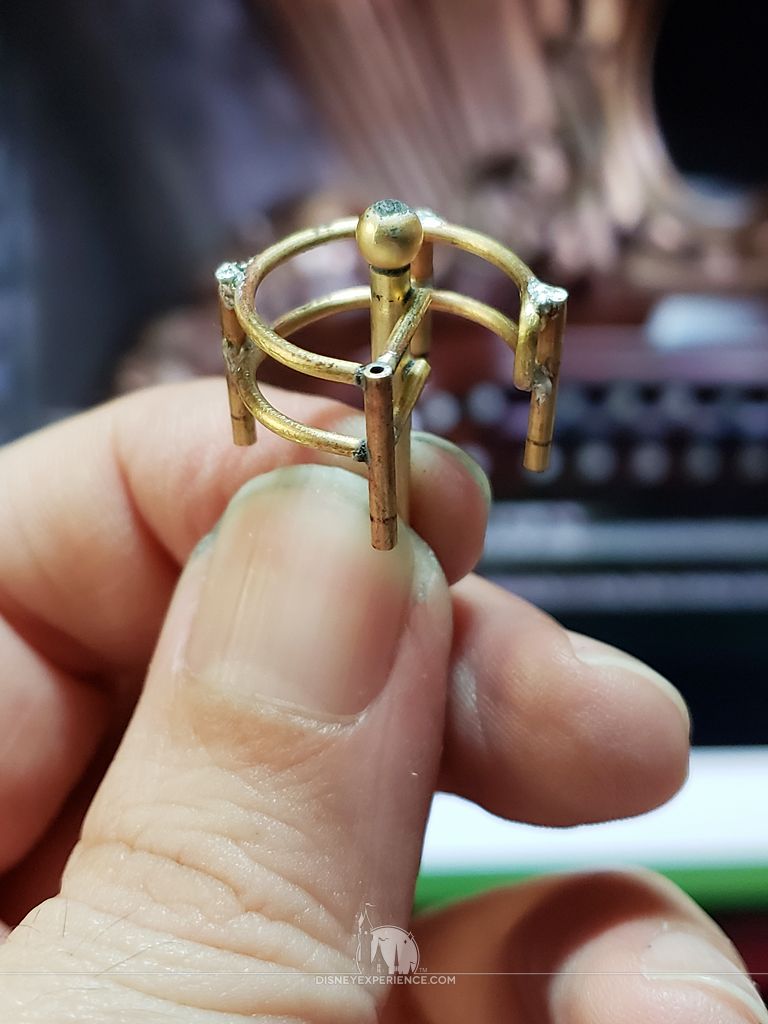
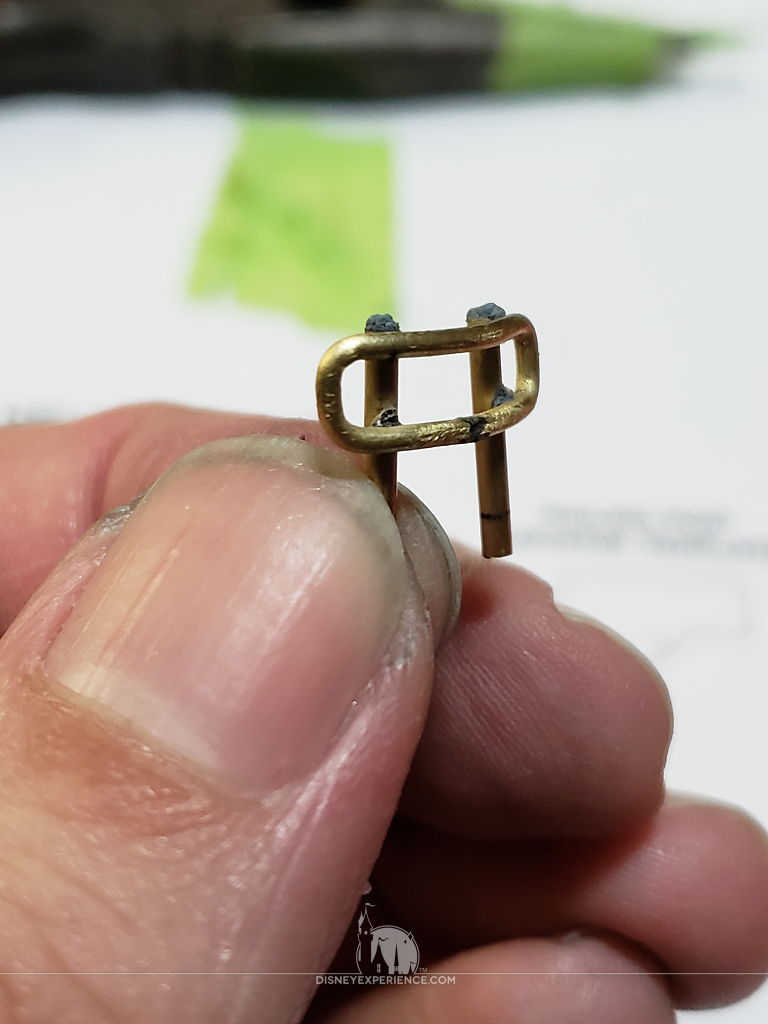
I was originally going to solder the pieces together (I was partially successful), but I had trouble with my soldering iron. So, I switched to using CA glue.
I spray these parts with primer as well.
I also make some templates to locate the drilling locations for the railings. They are handy tools!
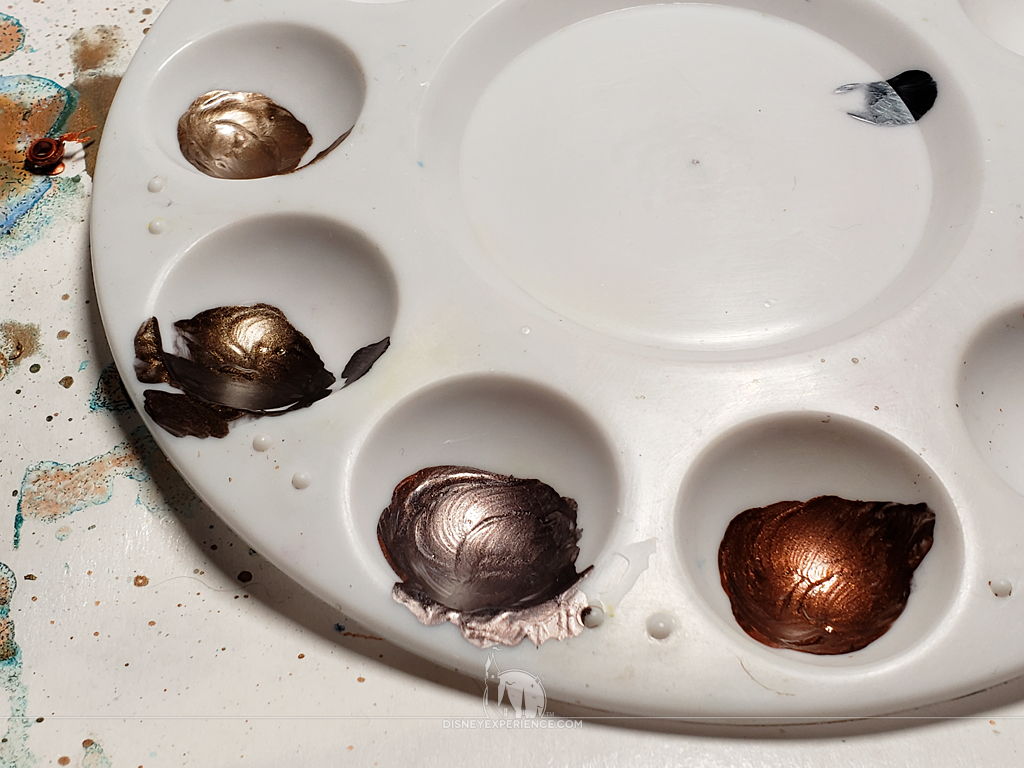
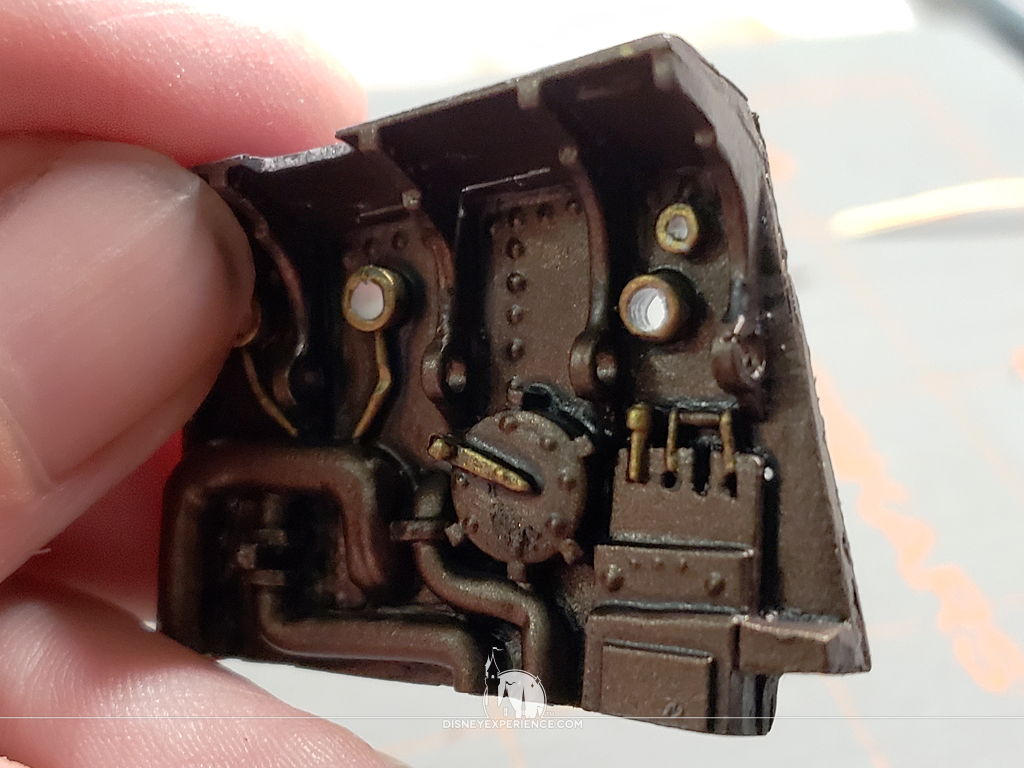
Mixing some paint on a palette, I decide on a color for the interior of the wheelhouse.

The wheelhouse interior is airbrushed with the base color, and all of the interior masks are removed, making sure not to forget the inner mask on the rear window.
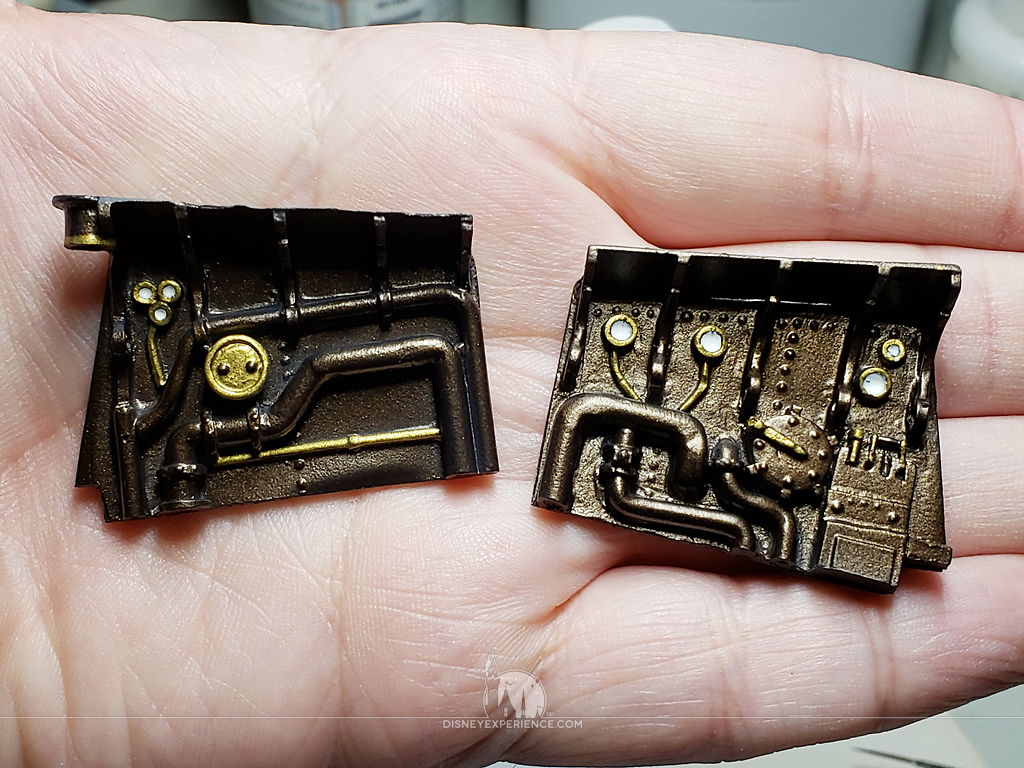
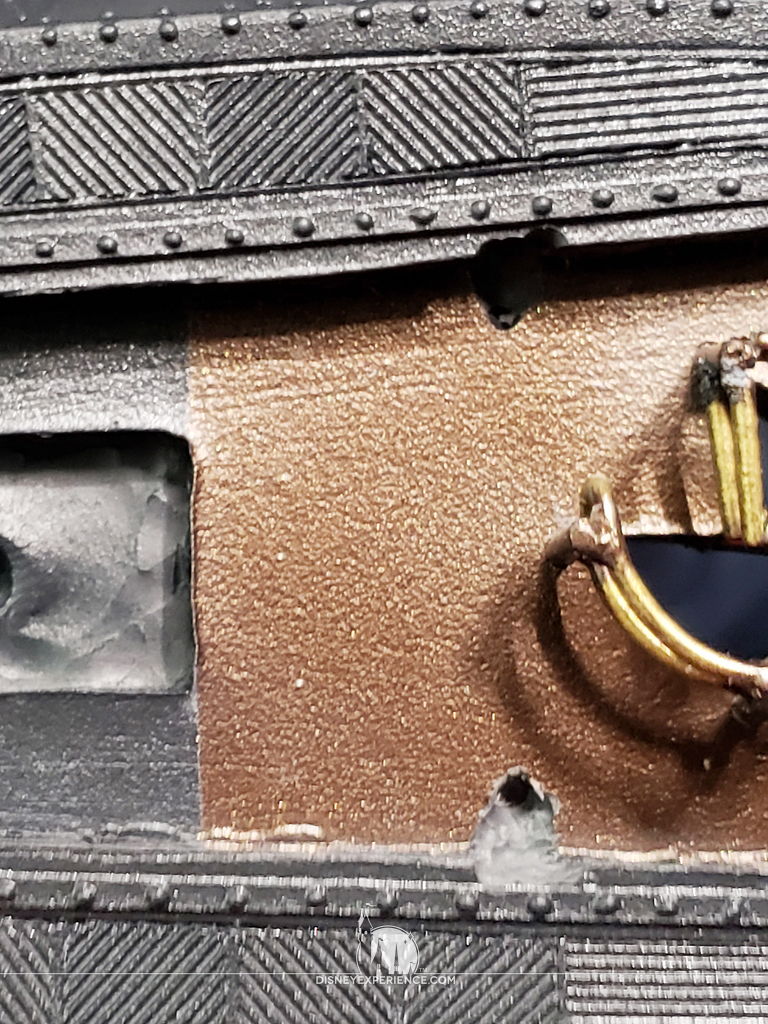
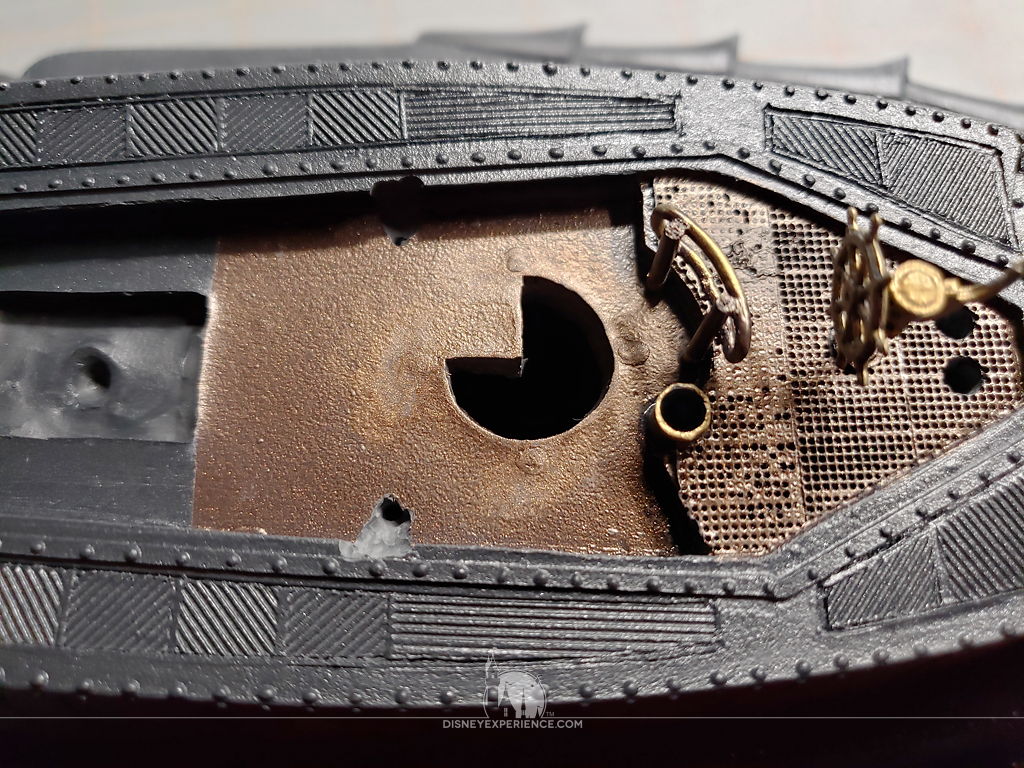
The wheelhouse walls need some brass touches, and the dials need white paint. A final black wash makes the details pop.

The same treatment is given to the rest of the interior wheelhouse parts, adding brass-colored components.
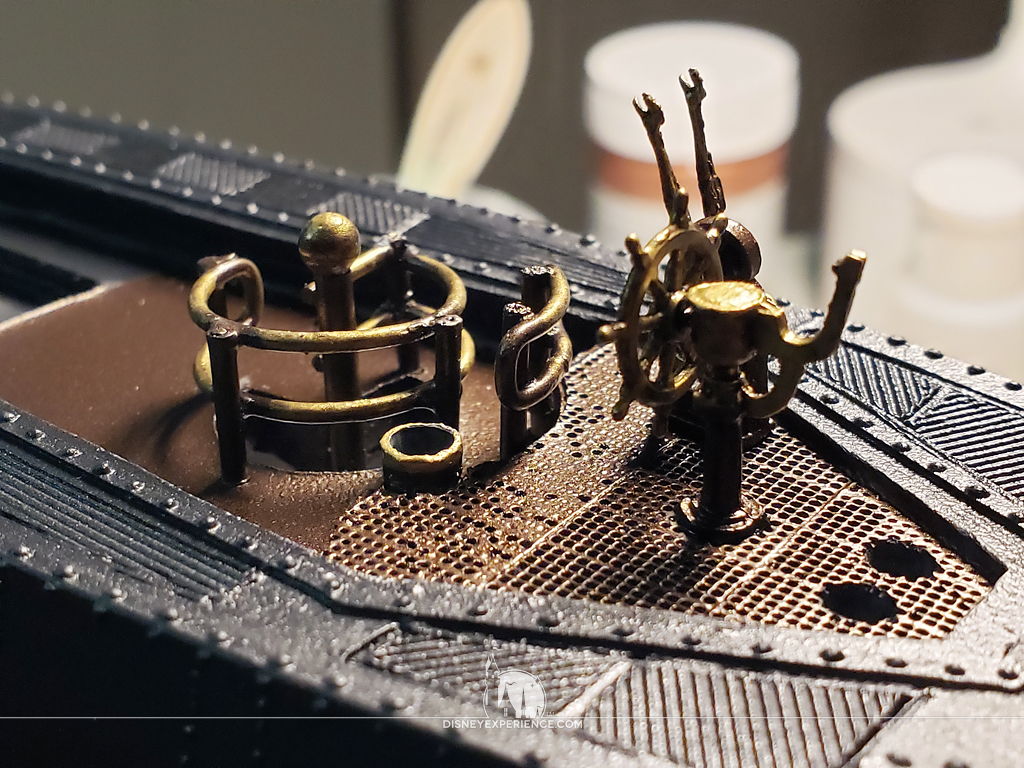
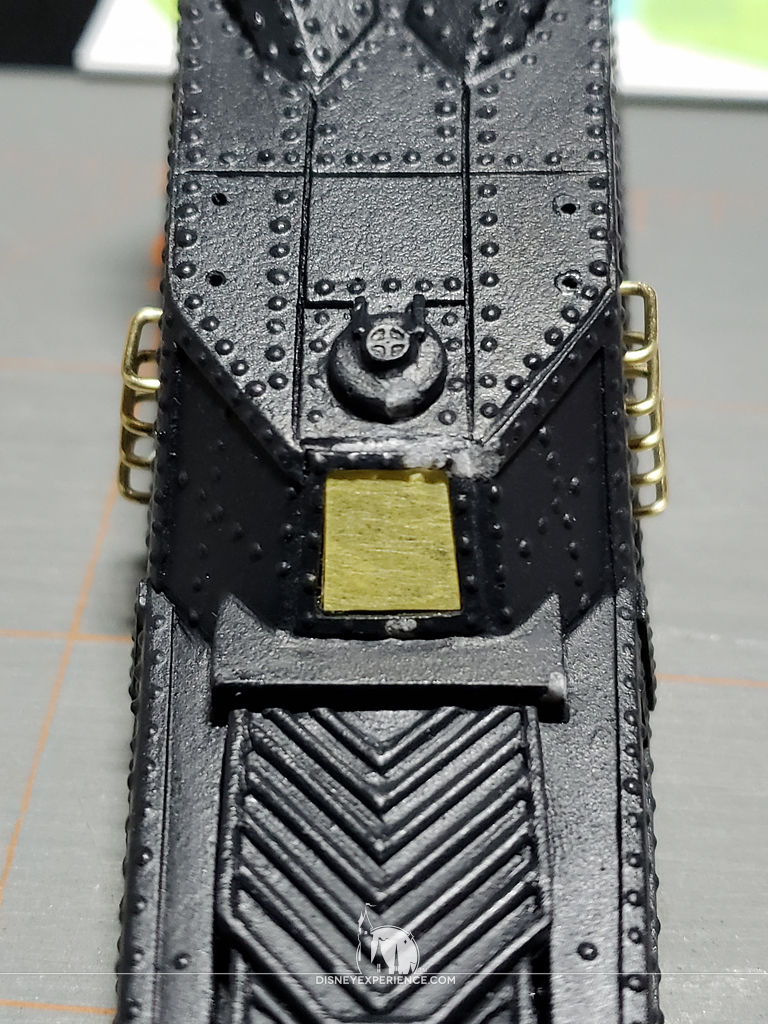
The parts are all glued to their locations on the wheelhouse floor, with the ballast lever glued to the ceiling. Overall, the details look nice!
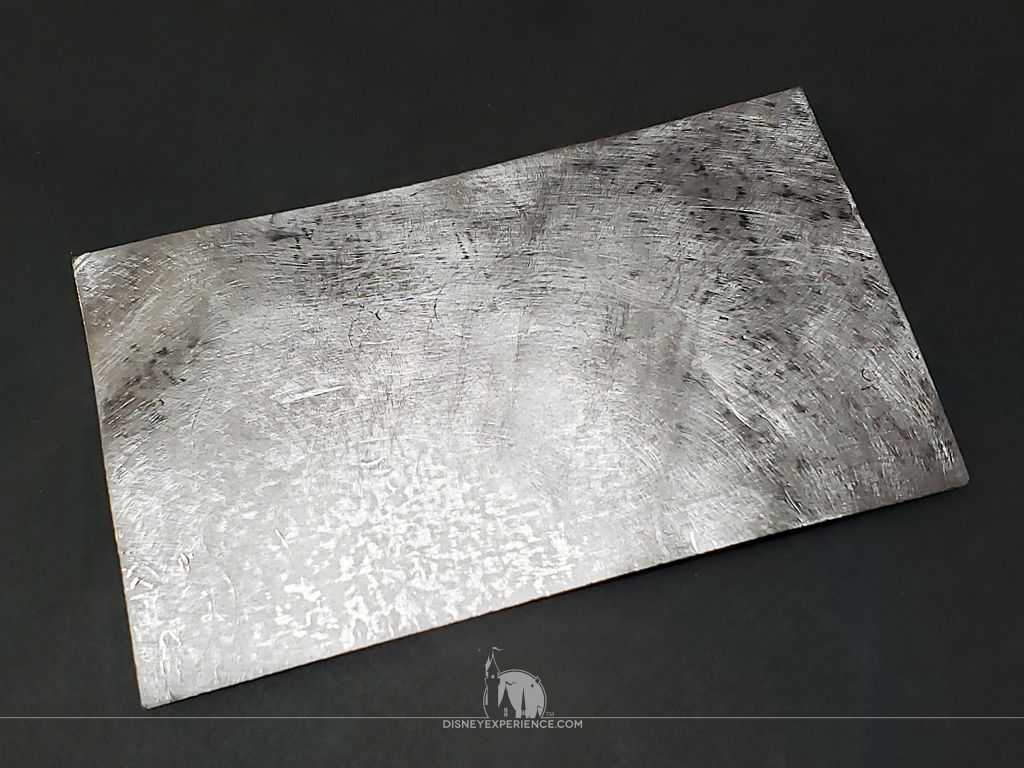
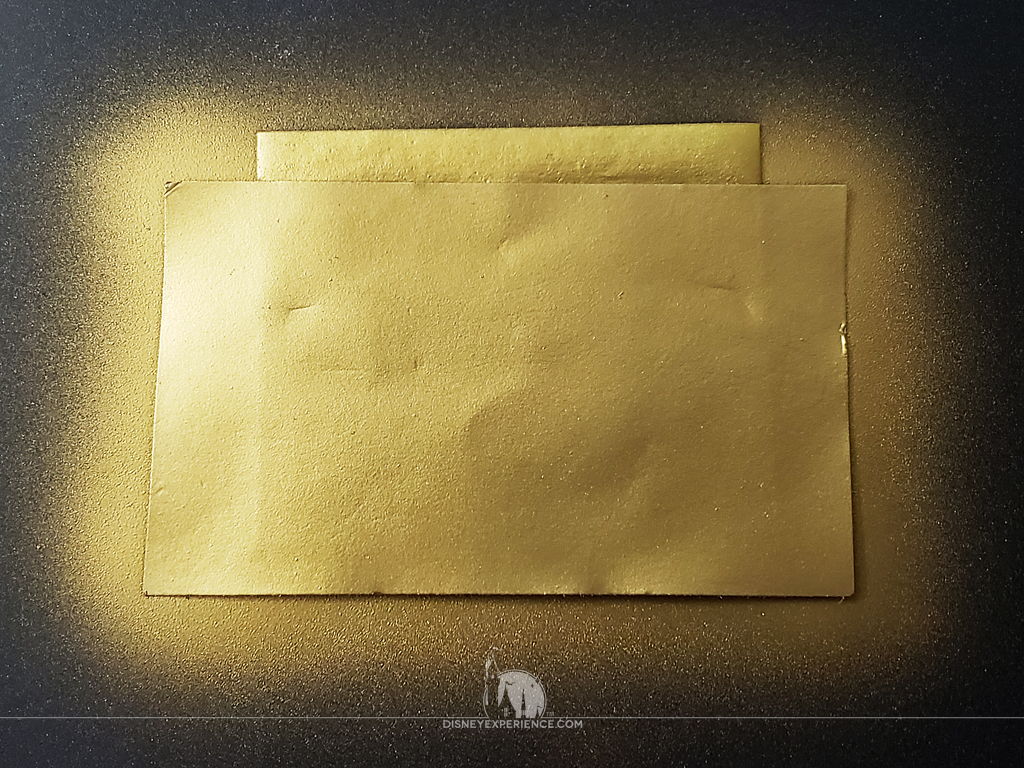
In the film, the wheelhouse float tube is reinforced with brass. To recreate the brass, I sand a piece of self-adhesive foil tape and paint it with antique gold.
It takes many layers of paint to color the foil tape; the color is very transparent. If I brushed this on by hand instead of airbrushing it, it would take forever to get full color saturation.
I glue the float tube to its location on one of the wheelhouse walls. When everything is dry, I cut out 1 mm strips of the foil tape that I can stick to the tube.
I was originally going to extend the tiny green LED that is on the magnetic switch, having it shine through one of the gauges in the wheelhouse. I even drilled a hole and carved out some space for routing electrical wires.
Sadly, that was not to be. The continued problems with my soldering iron (I’ve since purchased a new soldering iron) damaged the magnetic switch, causing it to fail. So, I will NOT be using the switch.
The silver lining is that activating the Nautilus will no longer be a 2-stage process—turning on the master power, then triggering the magnetic switch. Now, I only have to deal with a single button press.
Using a Dremel tool with a carving bit, I carve out channels in the the wheelhouse ceiling and walls for routing electrical wires coming from the alligator eyes and a hidden LED housed in the ceiling.
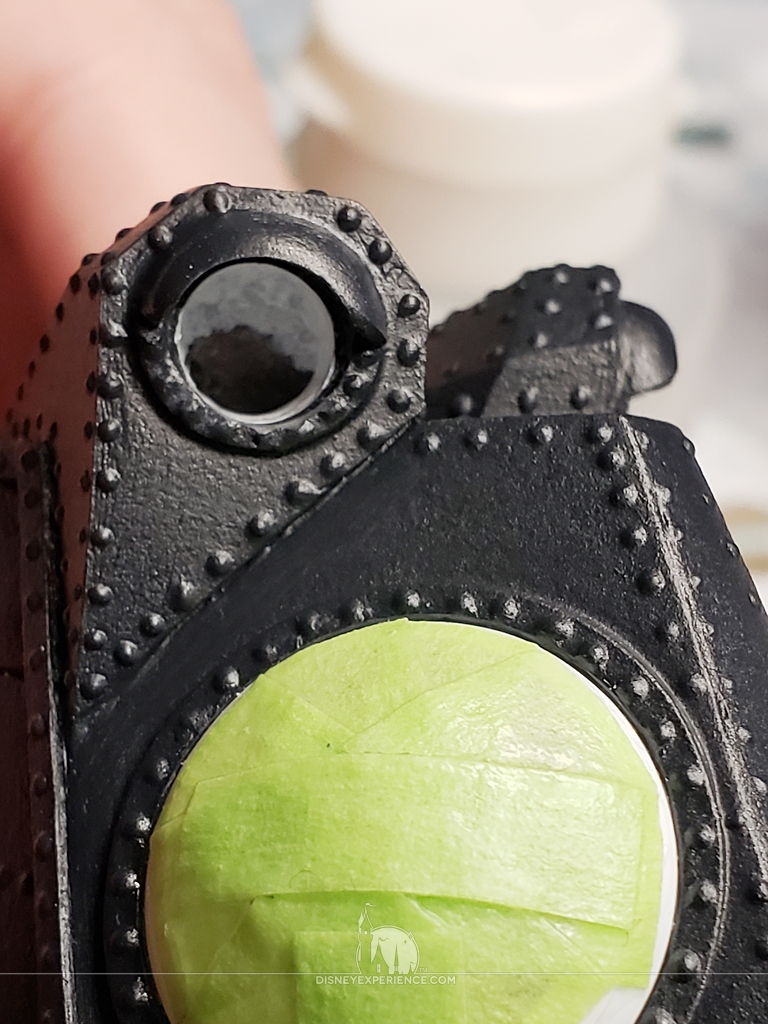
On the inside of the alligator eyes, I apply white paint to reflect and disperse light from the LEDs.
Test fitting the wheelhouse onto the upper hull, I run into a fitting issue. To locate the problem, I remove the masking tape from one of the wheelhouse windows (I re-mask it after I am done).
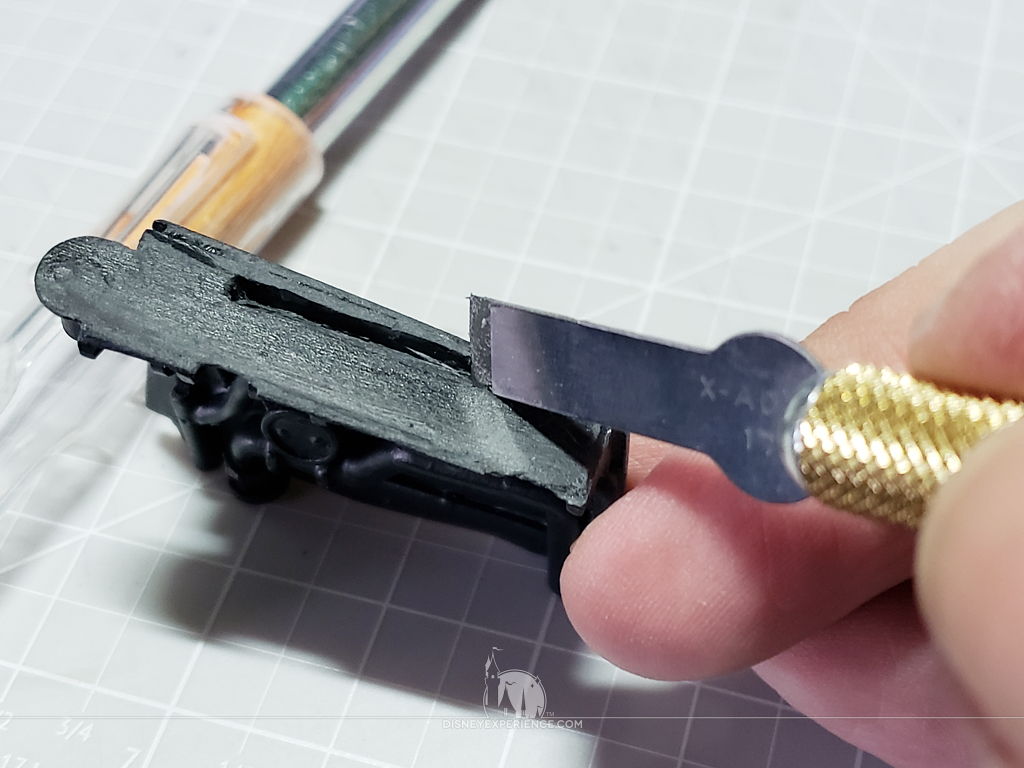
It turns out that the elevator levers are in the way. I move them several times, but they continue to be troublesome. There just doesn’t appear to be any room for the levers—at least, no room where they would look good. So, I make the decision to completely remove them.
I also notice that the wheelhouse interior is extremely cramped with the staircase railing. It butts up against the walls. Maybe the size of the brass rods are too big; I should have gone smaller. No matter—I decide to remove the staircase railing as well!
I don’t feel that the removal of both the elevator levers and the staircase railing take anything away from the model. In fact, the details on the wheelhouse walls can now be seen whereas they were obscured before.
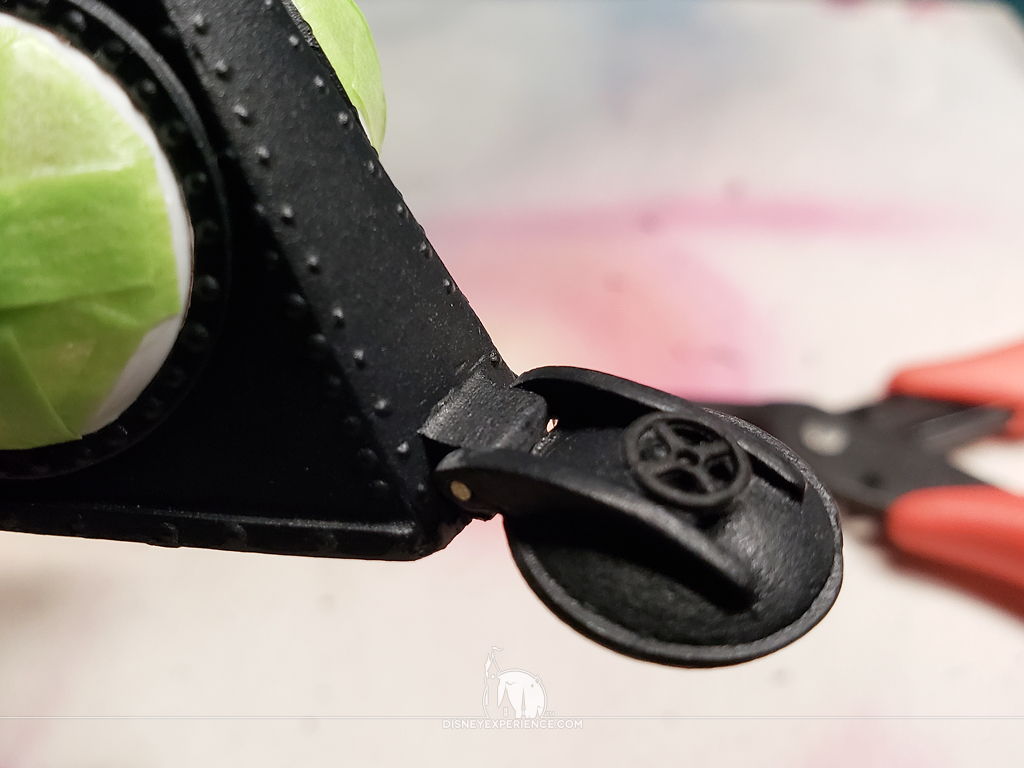
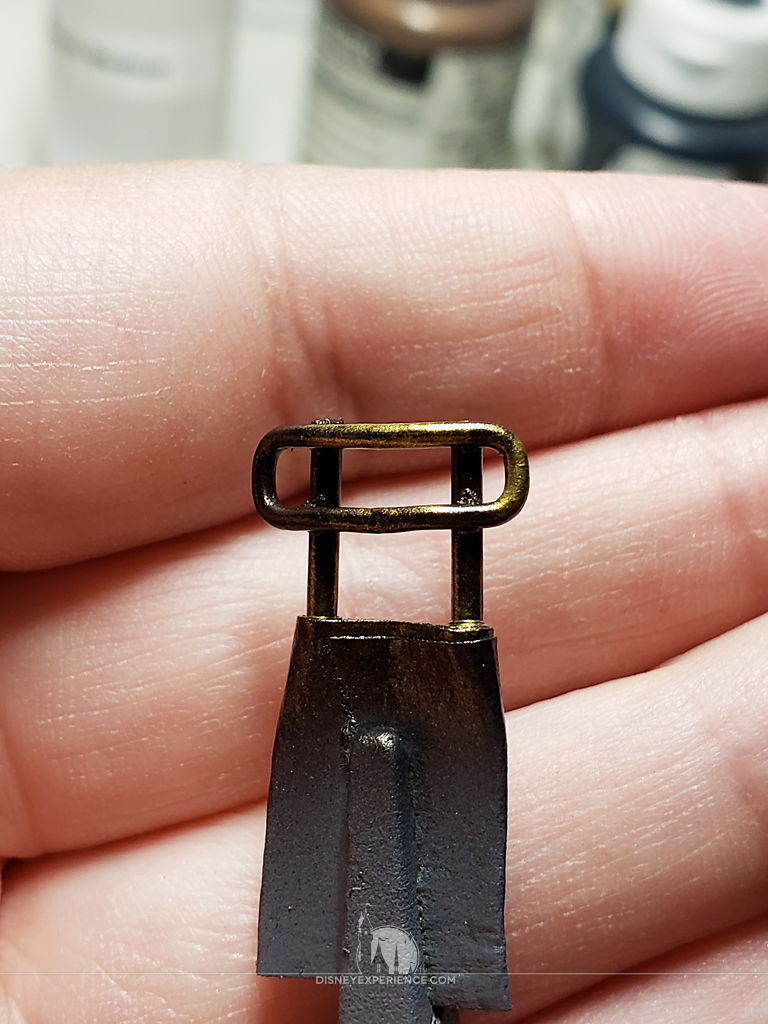
To finish the wheelhouse details, I attach the forward hatch with a small piece of brass rod, and I test the hinge.
Time for a nice rest.
Both the post author and this website have not received any compensation for writing this post. Both the post author and this website have no material connection to the third-party brands, products, or services that have been mentioned. Some of the links in the post above are “affiliate links.” This means that if you purchase the item, we will receive a commission. As an Amazon associate, we earn from qualifying products. This is being disclosed in accordance with the Federal Trade Commission’s 16 CFR, Part 255: “Guides Concerning the Use of Endorsements and Testimonials in Advertising.”
Do you have a thought about this post? Why not leave a comment . . .