Craft Tip: Make Your Own Adjustable Wire Bender
The Disney Experience | July 26, 2021
Bending wires and rods by hand is time consuming, and it can be a pain to get all of the kinks out. In the end, your circle may never be as perfect as you’d like. Make this small, handy wire bender with radius adjuster at home. The downside is that this bender has no wheel/handle, so wires/rods will have to be pushed/pulled through by hand.
Although this tool is for bending narrow hobby wire/rods, you may be able to make one for larger-diameter wires/pipes/rods (see instructions). Here are the tools and materials that were used in this project:
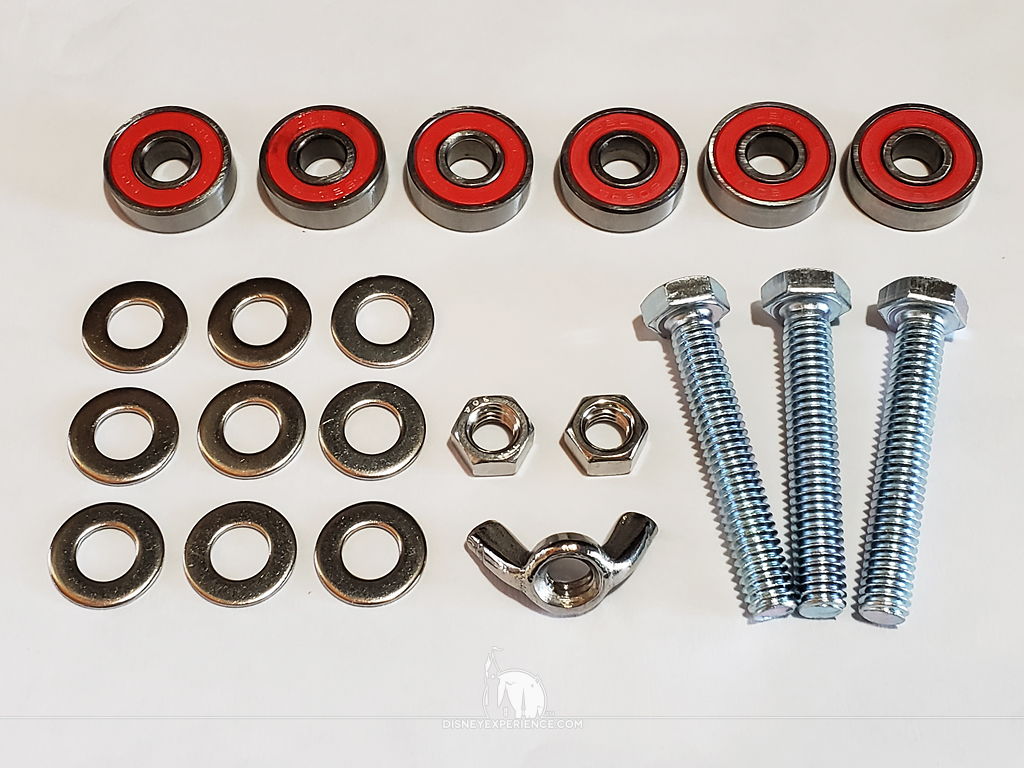
- Qty. 6—22 mm Skateboard Bearings
- Qty. 9—5/16″ Flat Washers
- Qty. 3—5/16″-18, 2 in Long Hex Bolts (adjust length according to wood thickness)
- Qty. 2—5/16″-18 Hex Nuts
- Qty. 1—5/16″-18 Wing Nut
- 5/16″ Drill Bit
- Sandpaper (optional)
- Ruler
- Pencil
- Piece of Scrap Wood
- Wrench
- Gloves (optional)
- Table Vise (optional)
For the scrap wood, look at your local hardware/lumber store’s scrap/off-cuts pile for deep discounts on good quality wood.
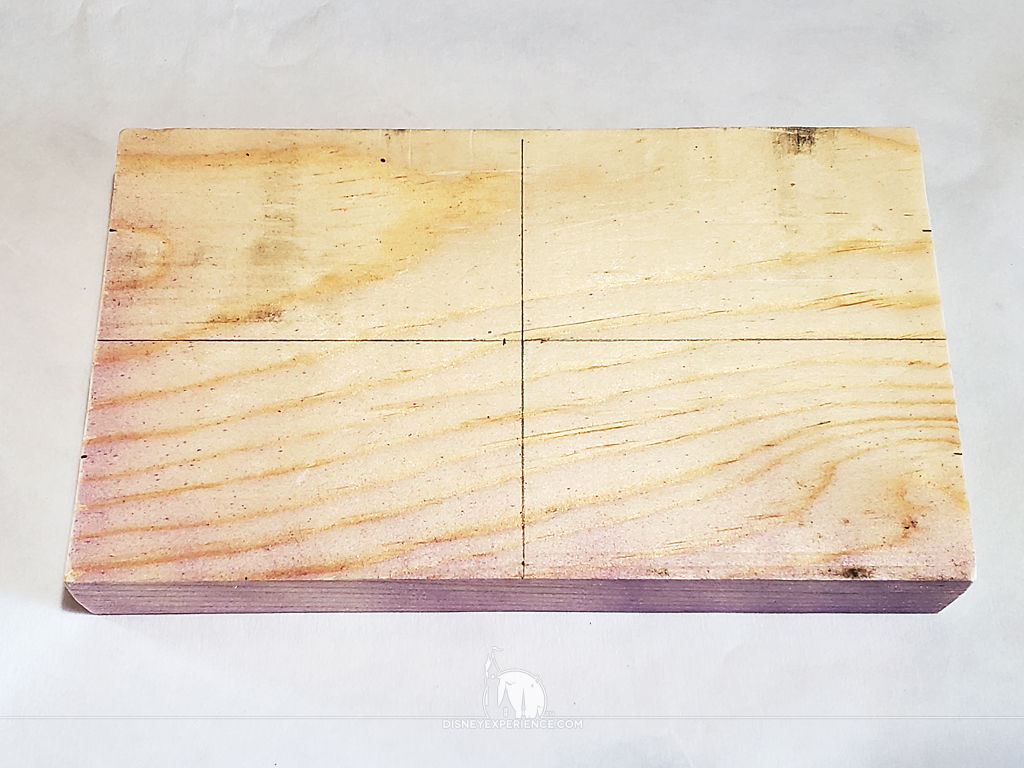
Cut a piece of wood to a workable size. For this project, the size is 5″ x 3 ½″ x ¾″. Sand smooth the rough cuts if desired, and mark the center of the wood with a pencil.

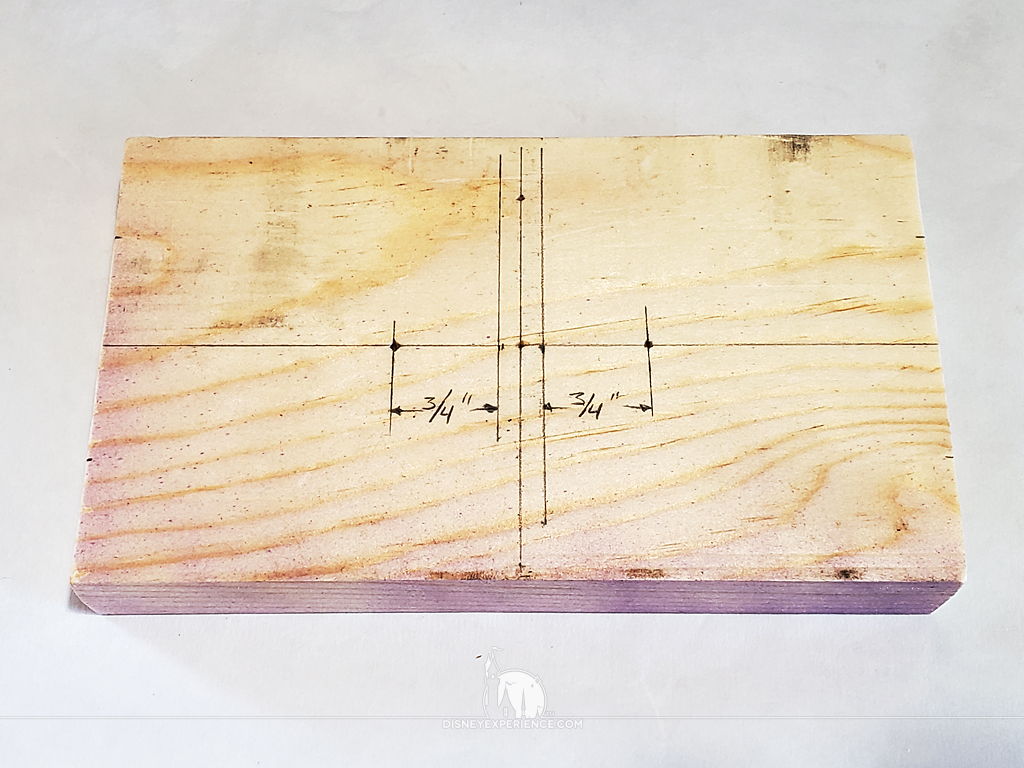
The center point will be where the adjustable bearings will go. From the vertical center line, mark parallel lines on both sides totaling a width of 5/16″. These will be the sides of the channel that the center hex bolt to will slide up and down.
For the project’s bearing size, we measure 3/4″ away from both sides of the channel edges to find the centers of the two stationary hex bolts.
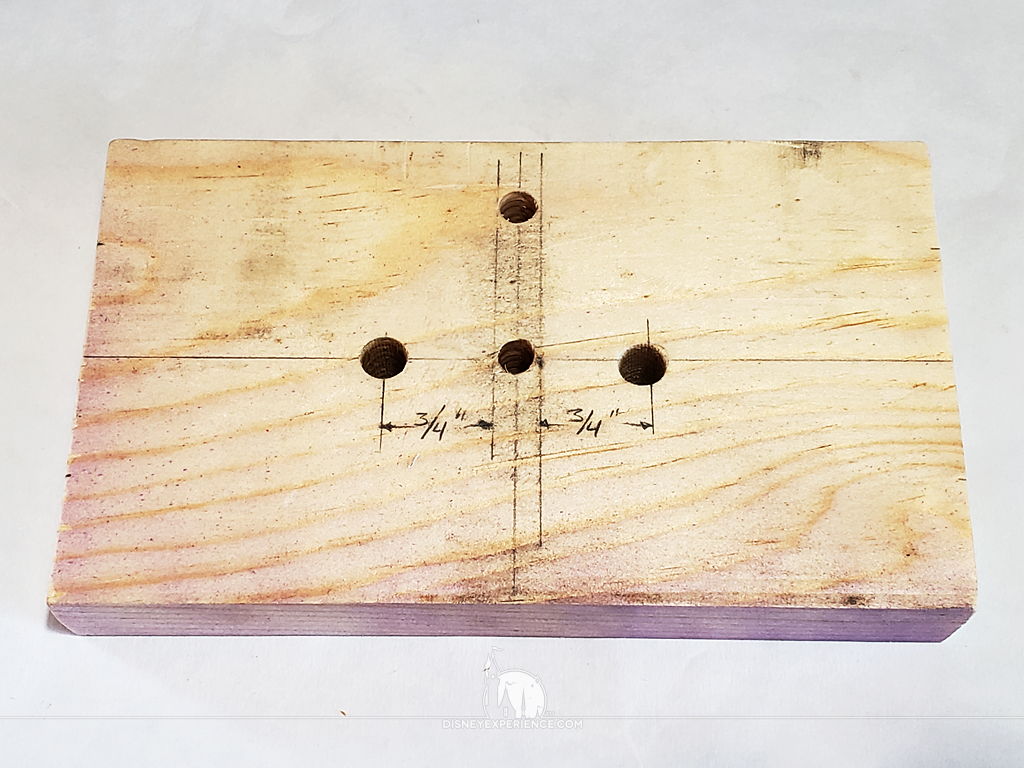
Using a 5/16″ drill bit, drill out a hole on each of the three center points on the horizontal line. Drill a fourth hole on the vertical channel line, approximately 1 ¼″ from the center mark.
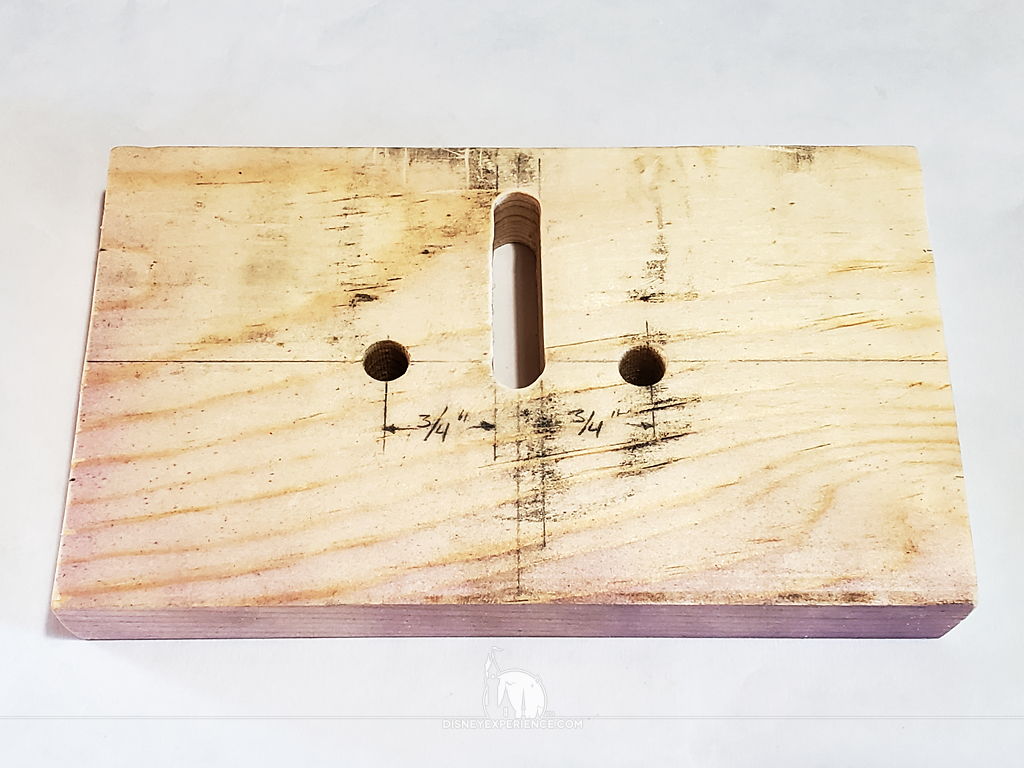
Carve out the channel by connecting the two holes. You can use a chisel, a coping saw, a jig saw, or by drilling a series of holes and filing/sanding/chiseling out the leftover material.
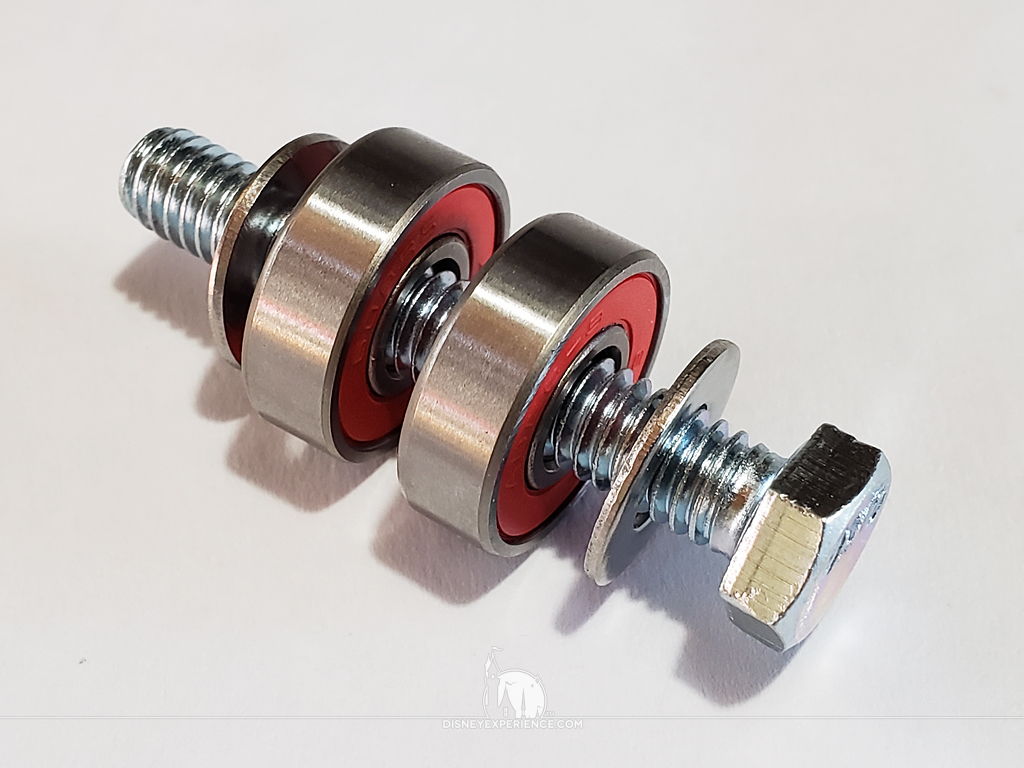
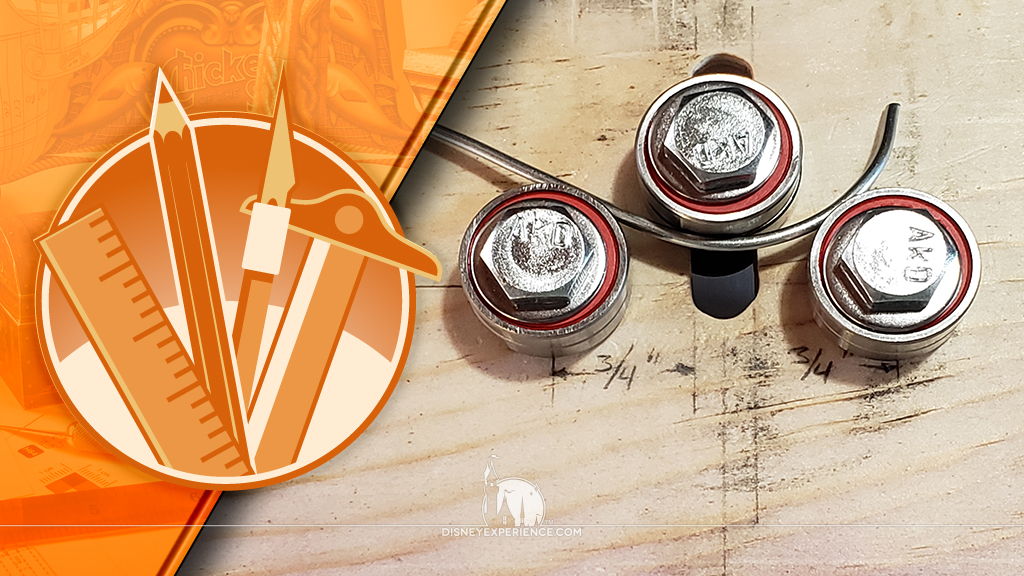
Assemble the three hex bolts, sandwiching 2 skateboard bearings between 2 flat washers. The skateboard bearings used in this project have chamfered edges that create a natural groove that is perfect for small wires/rods. If needed, additional washers can be placed between the skateboard bearings to accommodate wires/pipes/rods with larger diameters.

Insert 2 hex bolts through the single holes and secure them in place with a flat washer and a hex nut on the backside. Tighten with a wrench.
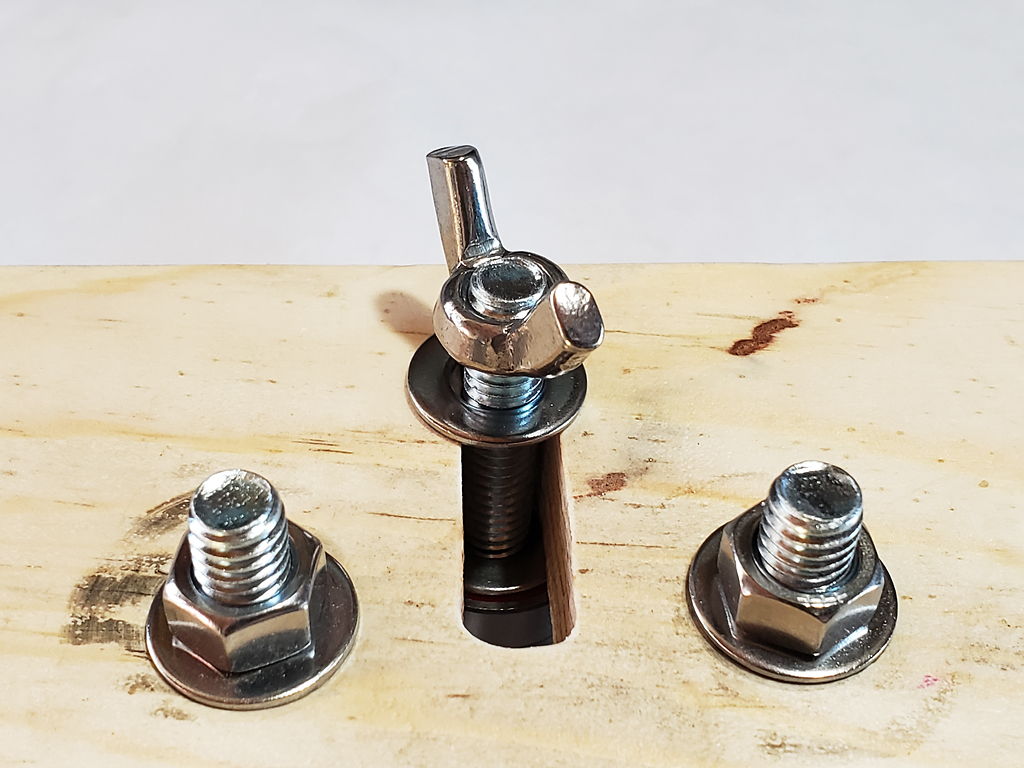
Insert the third hex bolt through the vertical channel and secure it with a flat washer and a wing nut. Tighten/loosen the bolt and adjust its position up/down as desired. The closer the bearings are to each other, the tighter the circumference of the bent wire will be.
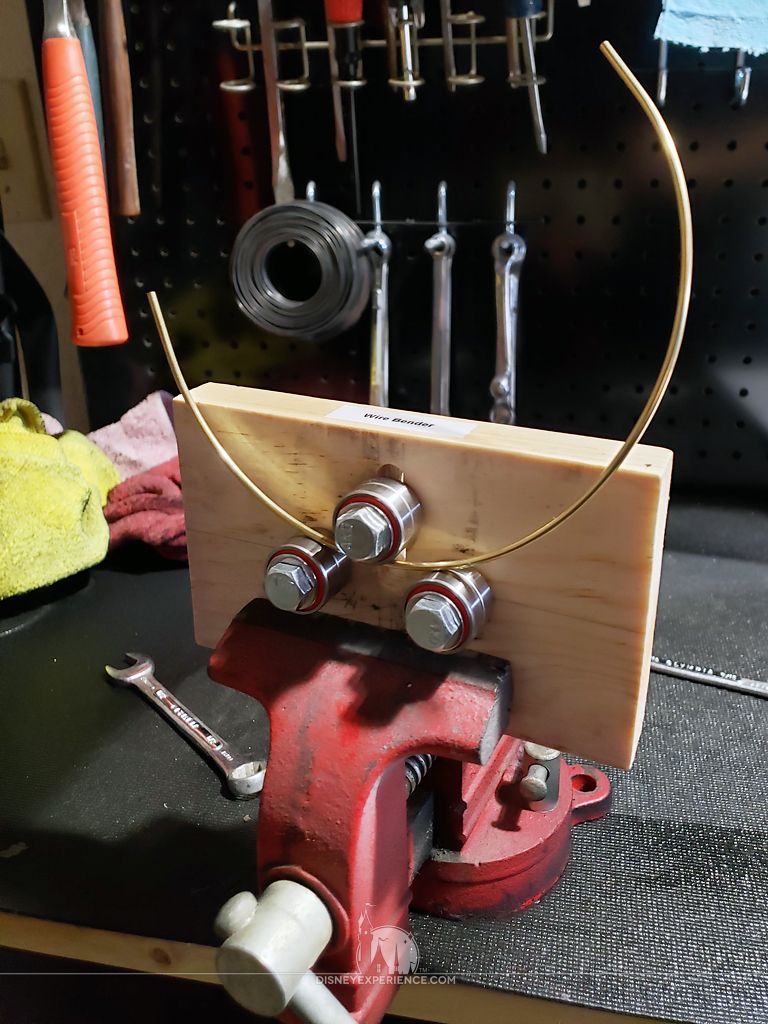
Mount the wire bender into a table vise, and use work gloves that have a good grip. Push a piece of wire/rod through the channels in the bearings. For tight circumferences, it may be best to bend the wire in several passes, adjusting the bender as needed each time.
Both the post author and this website have not received any compensation for writing this post. Both the post author and this website have no material connection to the third-party brands, products, or services that have been mentioned unless otherwise explicitly stated. Some of the links in the post above are “affiliate links.” This means that if you purchase the item, we will receive a commission. As an Amazon associate, we earn from qualifying products. This is being disclosed in accordance with the Federal Trade Commission’s 16 CFR, Part 255: “Guides Concerning the Use of Endorsements and Testimonials in Advertising.”
Do you have a thought about this post? Why not leave a comment . . .